This document will explain how to configure m-Power as well as a 3rd party tool (in our case, Microsoft’s Azure) to utilize OAuth2 for single sign on access to generated m-Power applications.
Configuring m-Power
Oauth2 SSO is configured at the data dictionary level. Therefore, you can control which dictionaries utilize this functionality and which do not.
On your m-Power server, navigate to the mrc-runtime.properties file located in /mrcjava/WEB-INF/classes and add the following lines to the file:
oauth_ms_client_id=ENTER_IN_YOUR_CLIENT_ID_HERE
oauth_ms_client_secret=ENTER_IN_YOUR_SECRET_HERE
oauth_ms_discovery_url=https://login.microsoftonline.com/YOUR_DIRECTORY_TENANT_ID_GOES_HERE/v2.0/.well-known/openid-configuration
oauth_ms_callback_url=ENTER_IN_YOUR_CALL_BACK_URL_HERE
oauth_ms_scope=openid offline_access profile email https://graph.microsoft.com/user.read
oauth_ms_response_type=code id_token
oauth_ms_response_mode=form_post
oauth_ms_grant_type=client_credentials
oauth_ms_name_key=preferred_username
Your client ID is how your OAuth2 provider identifies your organization. The secret is essentially the password that helps to authenticate your request. Finally, the callback_url is the endpoint that the OAuth2 provider interacts with to essentially tell m-Power that the user is question is valid.
How to obtain your Client ID, secret, and callback are discussed in further detail in the document below.
After restarting Tomcat, log into m-Power and enable security
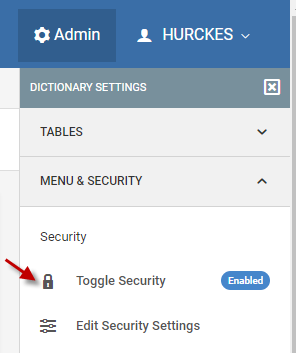
(The default user/password, if prompted, is mrcuser/mrcuser)
Next click the edit security settings option and change the Validation Type dropdown to “Validate by OAuth2”
Change the “Data Source” option to “Other” and provide a value of “ms”
Finally, when a user clicks Signoff of a runtime application, m-Power needs to redirect the user somewhere to tell them that their m-Power session has been terminated. You can specify a specific page by changing the “After Signoff Redirect” value to “/mrcjava/logout.html”
You are welcome to customize this file as you see fit.
Promote to Production
To promote your security settings, please promote the mrcSignon2.xml file to production. To promote your log out file you’ve customized, promote the logout.html file to production.
Configuring Azure
Log into your Azure portal at portal.azure.com. Open Azure Active Directory, then click App Registration
Click “New Registration” Enter a name for your SSO Connection and click “Register”
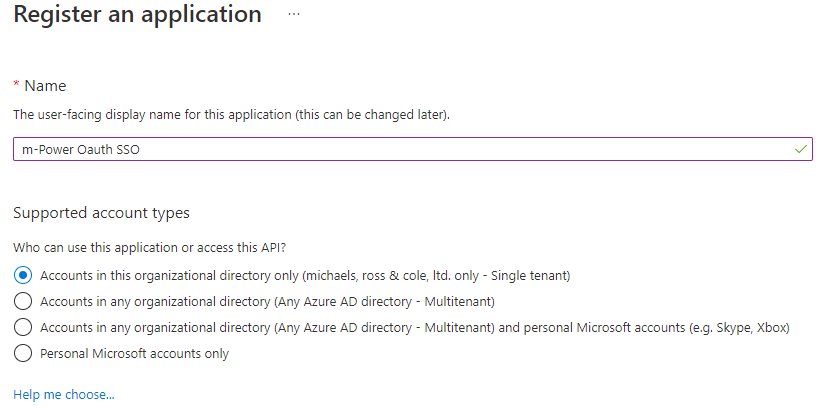
Your screen should now look like this:
Obtain a Secret Key
On the right hand side, click “Add a certificate or secret”
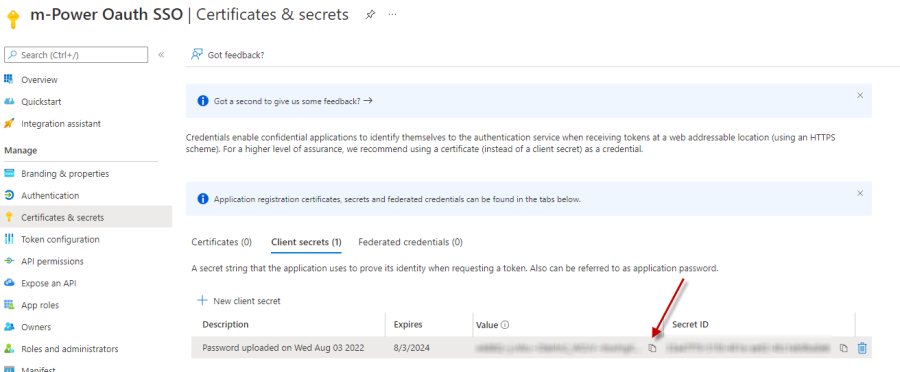
Click “New client secret”
Enter a description for this secret and select an expiration window.
On the next screen, click the copy button next to the Secret Value (not the Secret ID). Save this secret value in a safe place as it will be needed later.
Obtain Tenant ID
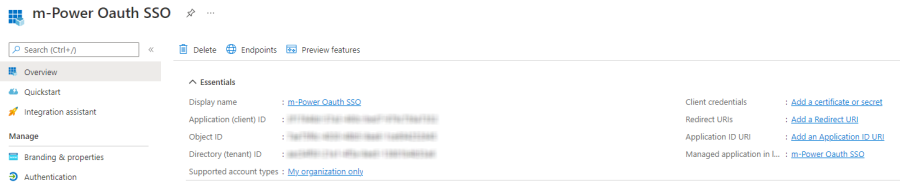
Navigate back to the newly created app registration (Click the Overview button on the left side navigation panel).
Make note of the Application (client) id as well as the Directory (tenant) id as both values will be needed later.
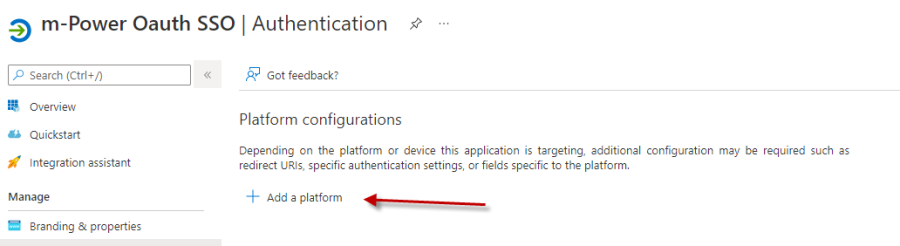
Configuring Redirect URI
The Redirect URI is what tells your SSO provider (Azure in this case) what endpoint to connect to once a user has been validated.
On the overview page, click the “Add a Redirect URI” link. Then click “Add a platform”
Click “Web”
In the Redirect URI text input add the following text:
https://yourserveraddress.com/mrcjava/servlet/oauthcallback
Click both checkboxes at the end of the page (Access tokens and ID tokens). Then click configure