Row Level Security is a highly flexible technique for controlling which records are returned based on the current user. The following few steps demonstrate the technique. Currently there are two methods to accomplish row level security in m-Power.
Option 1: Built in Row Level Security
For most customers, this approach will work great. Available to anyone running an m-Power update later than summer 2023, this approach takes advantage of pre-existing security columns within the m-Power user table, thus minimizing the number of steps required.
Step 1: Create User & Assign Security Value
Assume you are creating users and which to tie them to a specific customer #. First, click Admin -> “Menu & Security” -> “Application Users”. From here, either create or edit an existing user.
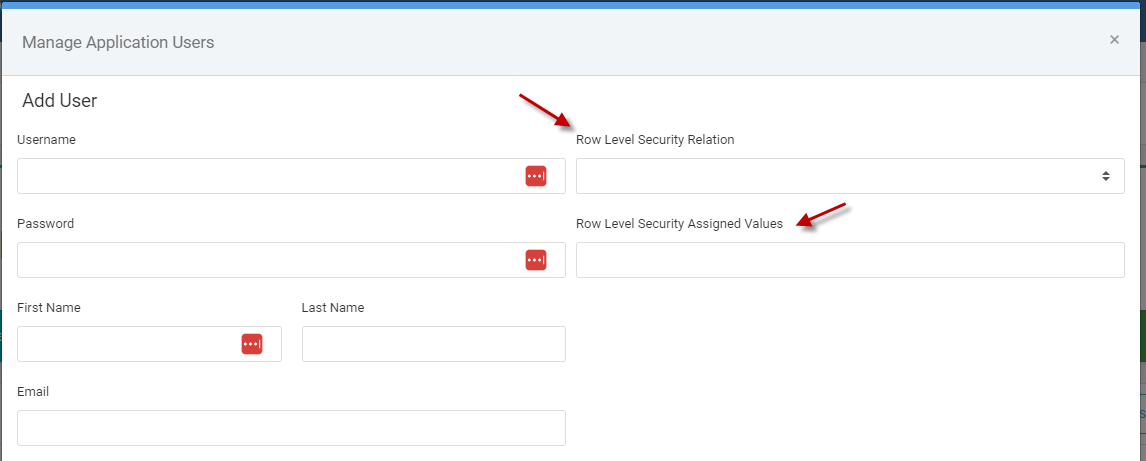
After entering in user information on the left, choose a “Row Level Security Relation” of “Equal To” in the drop down list. Then, in the “Row Level Security Assigned Values” enter in the customer #.
Step 2: Add to Application
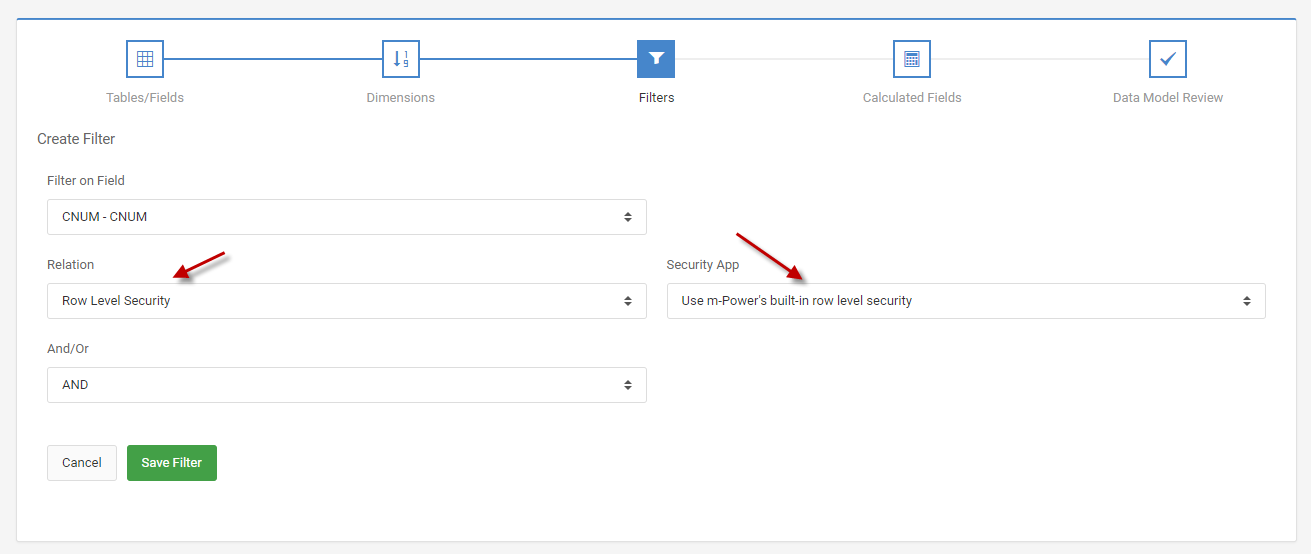
Within an application, navigate to the “Filters” section. Add a new filter. Choose the field you which to secure against in the “Filter on Field” option (For our example its the Customer #). In the relation drop-down, select “Row Level Security.” In the “Security App” dropdown, select “User m-Power’s built-in row level security” option. Press Save Filter
The video below illustrates how to implement Row Level Security.
Option 2: Custom Row Level Security
This approach is useful if you need to add row level security by more than 1 security field (For instance, securing by Company # and Customer #). Or, if you do not wish to store security objects within the built in m-Power user table (MRCSEC1).
Create Table
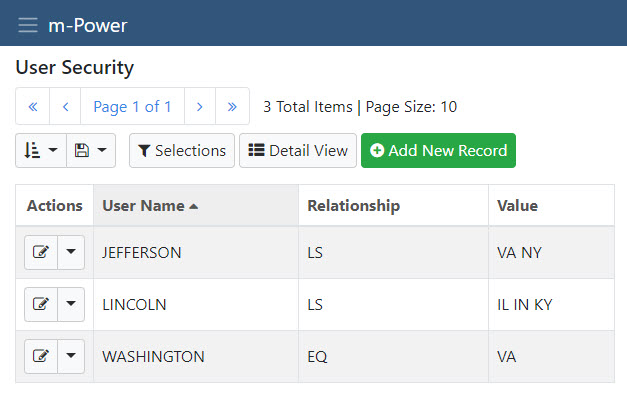
Create a security table and populate it with data. It may contain several records per user.
This example has fields Profile (10A), Relationship (2A), and Values (99A). Valid values for the Relationship field include:
- EQ Equal to
- GE Greater than or equal to
- GT Greater than
- LE Less than or equal to
- LS Is in the list
- LT Less than
- NE Not equal to
- NG Not greater than
- NL Not less than
- RG Is in the range
- SW Starts with
Create Security Retrieval
Create a row level security retrieval over this security table.
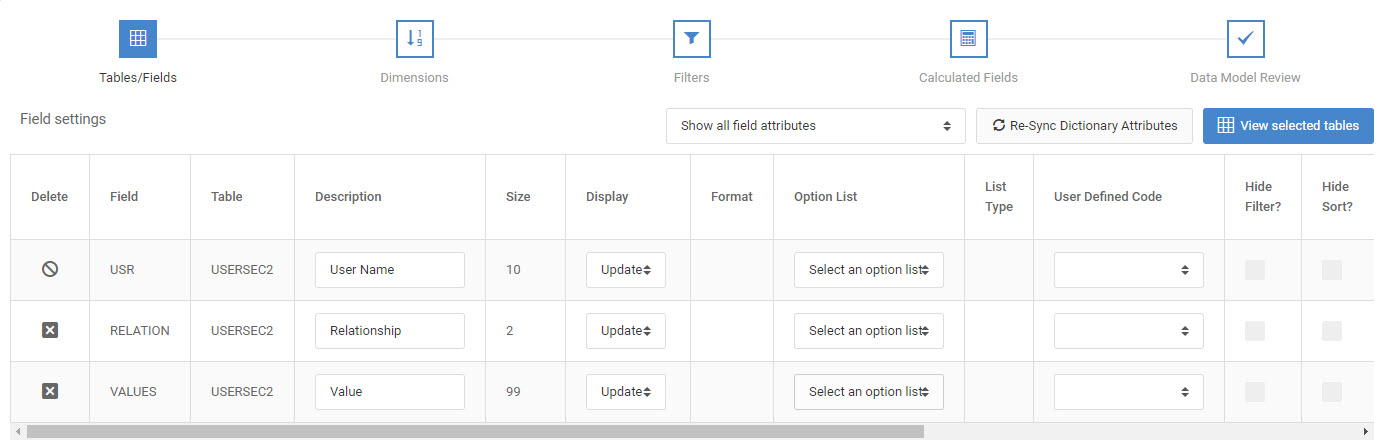
Here is the listing of all the fields used in the retrieval application. Your Dimension field in your application will be the field containing the user profile (USERNAME in this case).
Select the Row Level Security template in the ‘Application Settings’ link from the ‘Edit Application Template’ screen. Click the Save button to save your changes and compile your application. This specific template tells m-Power that this application contains security credential information. Further, by selecting this template, you allow future applications to apply this security via the Filters section of your data model.