Overview
The purpose of this utility is to allow developers the ability to promote their applications to a production environment so applications can be accessed by their users. This utility will allow the developer the ability to access the necessary components directly in the m-Power interface.
Video
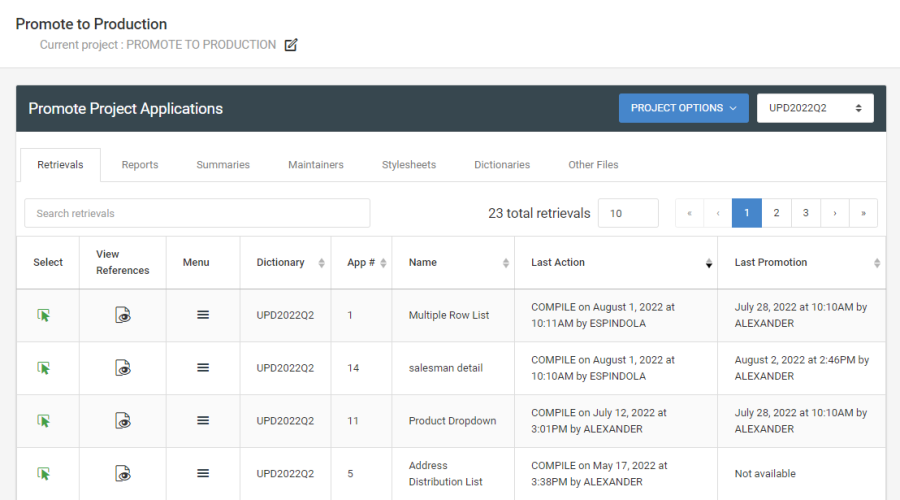
Project Applications
A listing of applications and files assigned to the selected project. Click the green “Select” button to add the app/file to the Promotion Review.
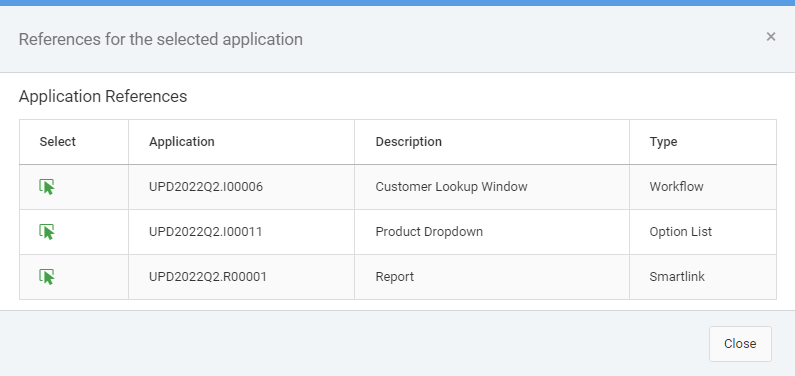
View References
Lists all referenced applications to the selected application. For example, if a maintainer uses different Option List Retrievals, smart linked applications, imported apps, or other applications in the workflow — those applications will need to be promoted to production as well for the maintainer to fully function. This modal will list the referenced applications that need to be promoted as well. Click the “Select” button to quickly add these apps to the Promotion Review.
Refresh Application References
From the Menu (three lines) button of an application, you may select the “Refresh Application References” option. This will automatically add any applications referenced from the selected app that are not in the current project (i.e. Option List Retrievals, Imports, Smartlinks, Workflow apps, etc). This option will also add any newly reference applications to the “View References” list of the selected application.
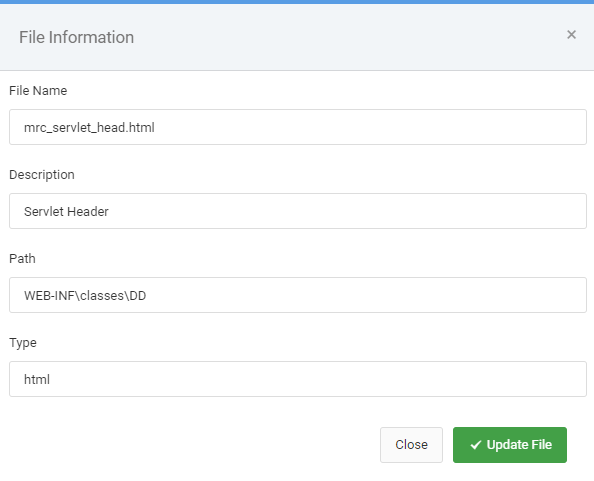
Other Files
Here you will see a list of common files that you can manually promote. If you have other common files that need to be promoted, be sure to add them to the list.

When adding dictionary specific files, use ‘DD’ as a substitution for the selected Dictionary in the “Path” text box.
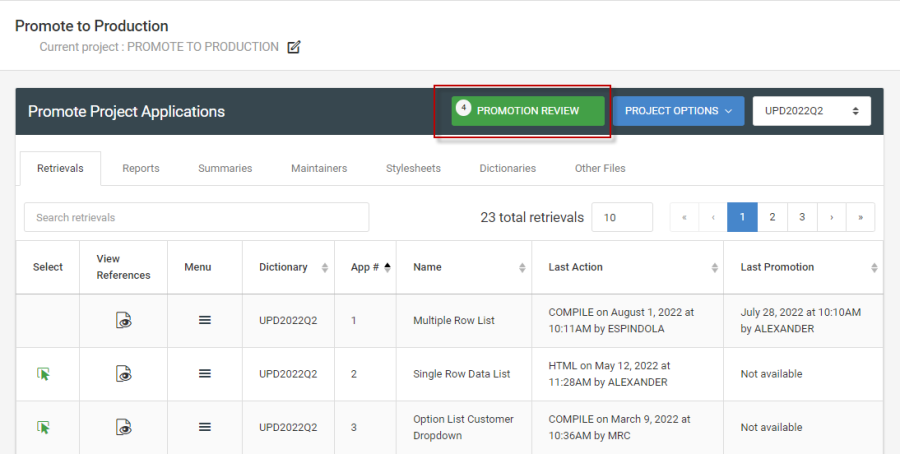
Promotion Review
As soon as an application or file has been selected, it will be added to the Promotion Review screen.
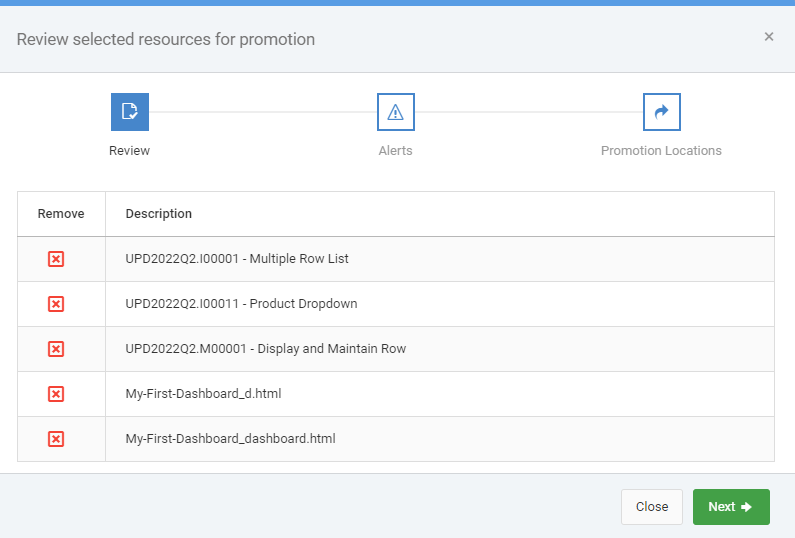
Review
A list of all applications/files that are currently set to be promoted.
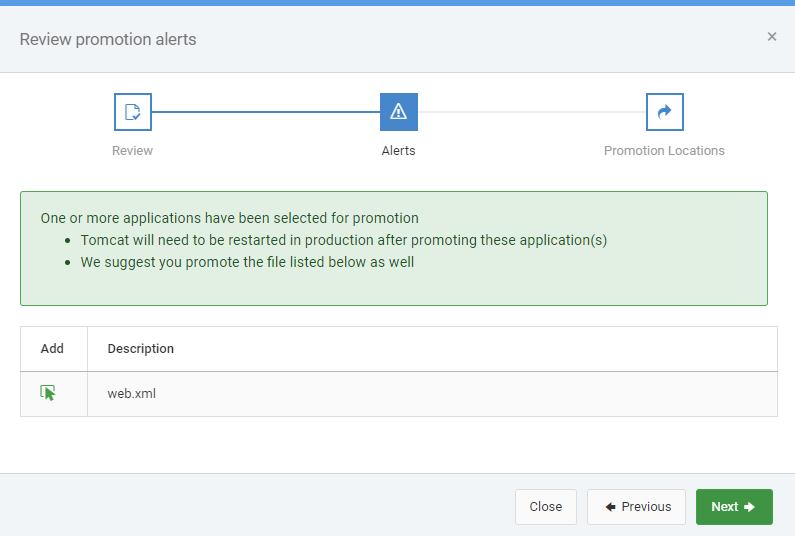
Alerts
Any important suggestions or recommendations will be listed here.
Promotions Locations
Check the box of the location where you would like these files to be promoted.
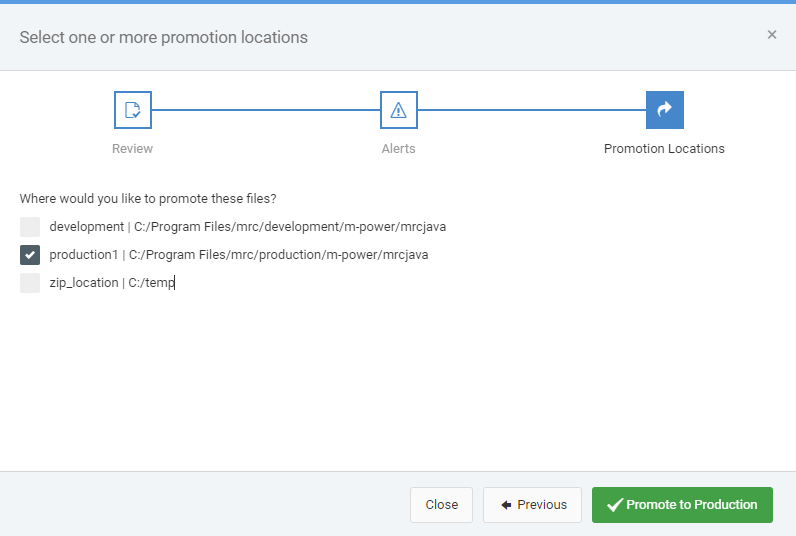
If your production instance is on a different server, you can utilize a mapped network drive, if available. If not, you can choose the .zip option. This option will create a zip-file on your development server that you can manually copy and extract on your production environment.
These locations may be edited from the m-Power server in the /m-power/mrcwebgui/WEB-INF/classes/promote.properties file.
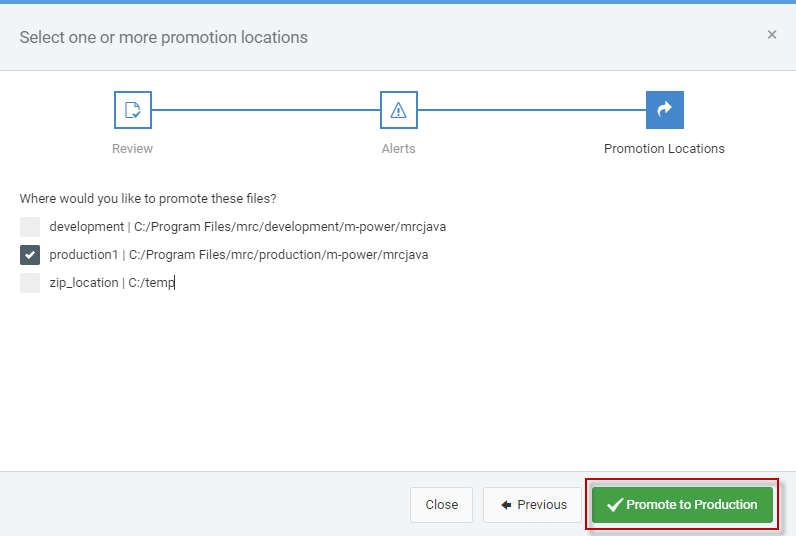
Promote to Production
Clicking the green “Promote to Production” button will copy the selected application files/other files and promote them to the selected location. After the promotion is completed, remember to restart the production Tomcat service if it was suggested in the Alerts section.
Project Options
Add Apps to Project
Find applications that need to be promoted to a production environment. Click the green “Select” button to add one or multiple apps to your project. You may also add applications from other dictionaries to your selected project.
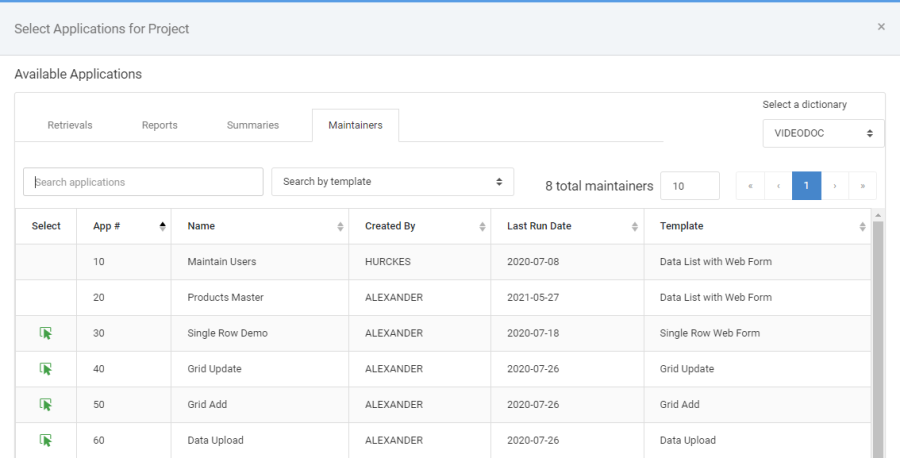
This is a one time selection. Once an application has been added to the project, you will not need to add it again in the future.
Promote All Project Apps
Add all apps in the current project to the Promotion Review screen.
Select a Project
Use this modal to switch to an existing project or to manage your projects. You may create a new project or delete existing projects here.
Create a New Project
Create a new project by assigning a name for the project.
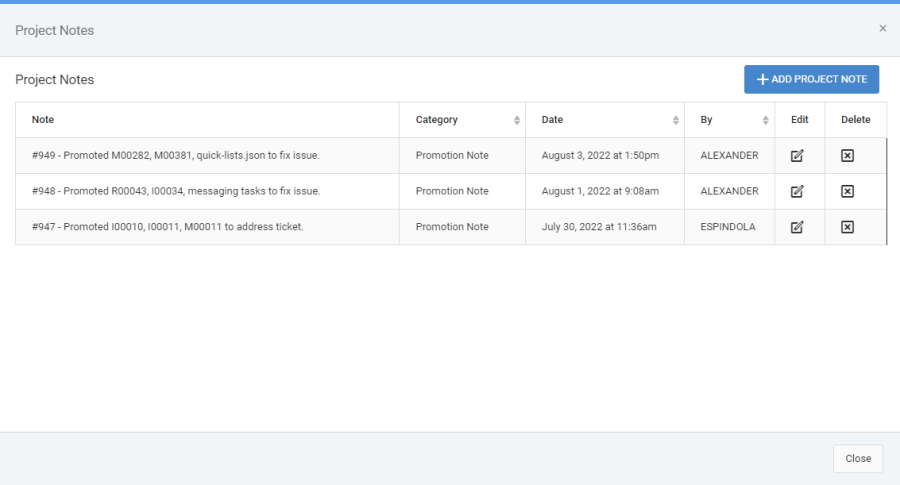
Project Notes
Add or manage notes for a project. You may assign and organize them by Category if desired.
Check All Project References
This option will comb through all applications in the current project to find any additional apps referenced in those project apps (i.e. Option List Retrievals, Imports, Smartlinks, Workflow apps, etc). Selecting this option will automatically add any found applications referenced to the current project.