Overview
The Web Services module is a useful tool for developers to incorporate 3rd party API web services as the datasource for their m-Power applications. This differs from the standard m-Power method of pulling data directly from a database. This module supports consuming any outside web service that returns data in the standard JSON format. For more on the JSON format, see this link. At runtime, the applications built over your configured web service will make a request to your web service and display the results within an m-Power application.
Base URL
The Base URL is the part of the web service URL that is common to one or more endpoints. This is typically a server address (i.e. https://someserver.com).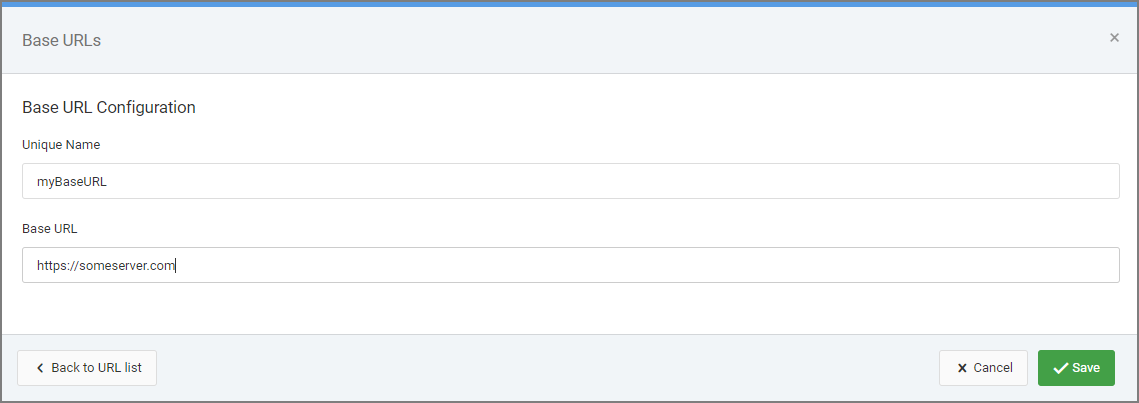
Authentication Methods
When calling web services, authentication is often required. m-Power supports the following methods of authenticating web services:
Basic Authentication
Bearer Token
Custom Header
Append Tokens to URL
Custom Authentication
Additionally, if the authentication fails you can determine how to handle the authentication failure with Error Handling tab.
Basic Authentication
With this method, a username and password into the request header. The username and password are encoded with Base64, which is an encoding technique that converts the username and password into a set of 64 characters to ensure safe transmission.
Bearer Token
This is an HTTP authentication method that involves security tokens called bearer tokens. The bearer token will be sent with request in the header as “Authorization: Bearer ||”. Hard code the token from this screen.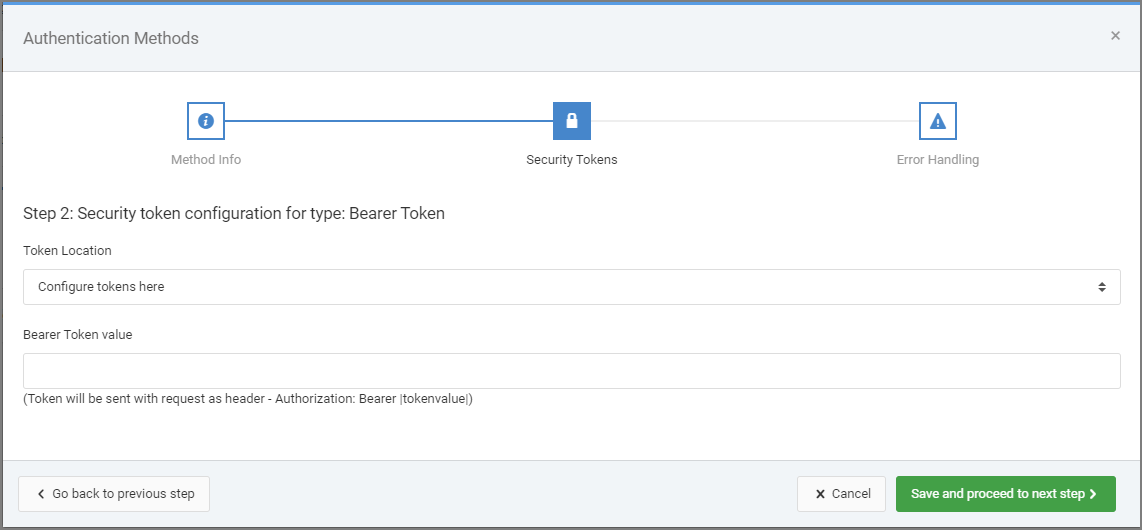
Custom Header
If your web service requires custom keys in the request header, you may configure as many “header:value” pairs as needed here.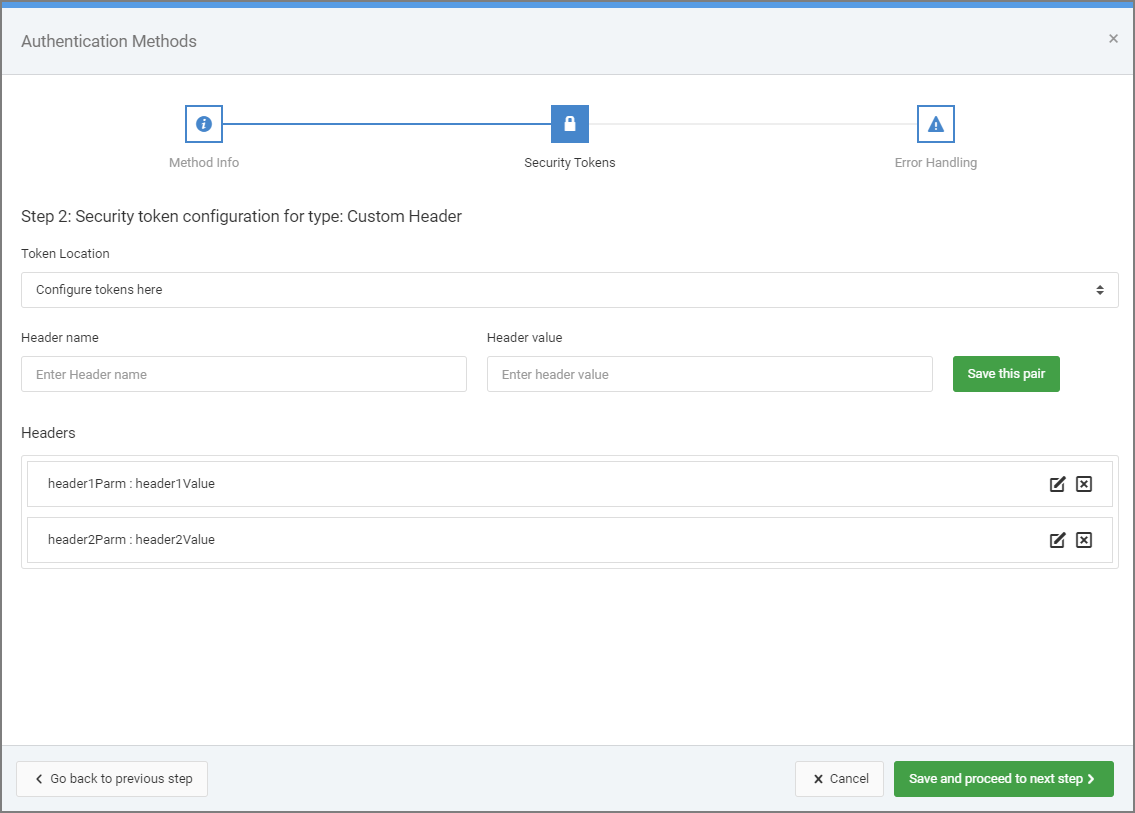
Append Tokens to URL
Certain web services require you to append the authentication token(s) to the URL call. You may hard code the token “name:value” pairs here.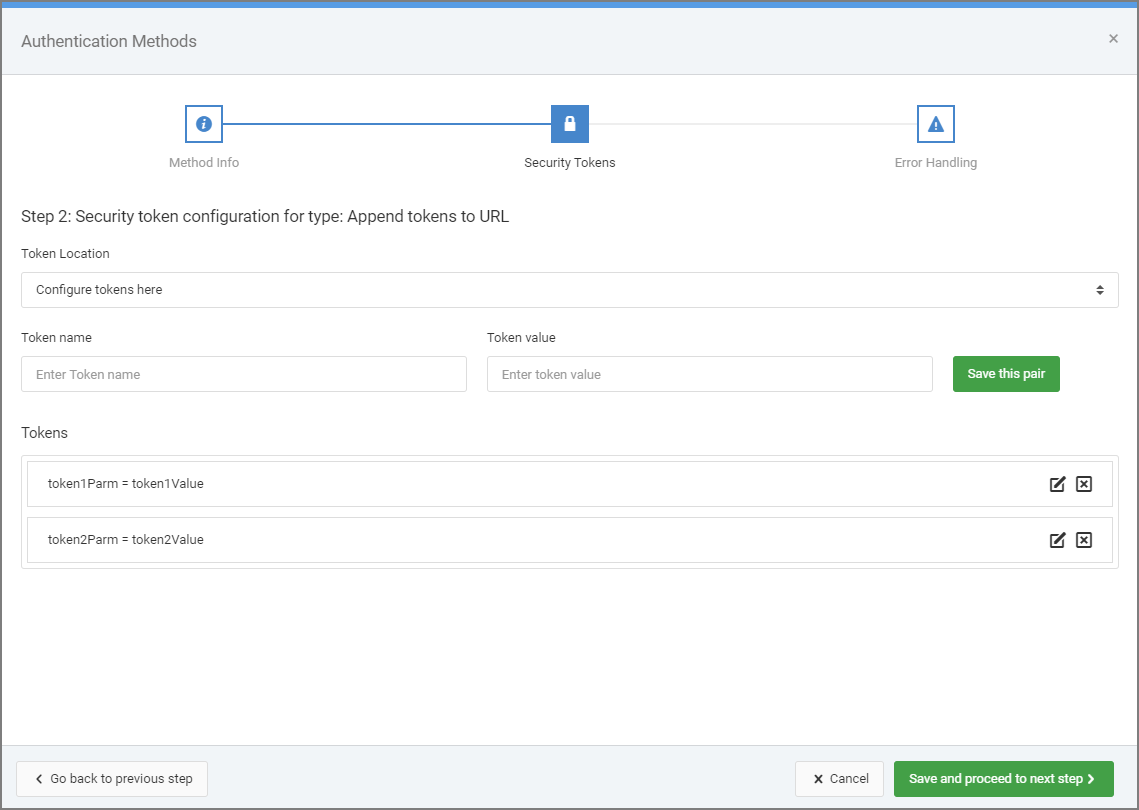
Custom Authentication
If your web service requires an authentication method that is not directly supported, m-Power does have the hooks necessary to allow for custom Java code to be written to handle such cases. Please contact mrc if you would like documentation on how to hook in your own java programs or if you would like to hire mrc to write the custom integration.
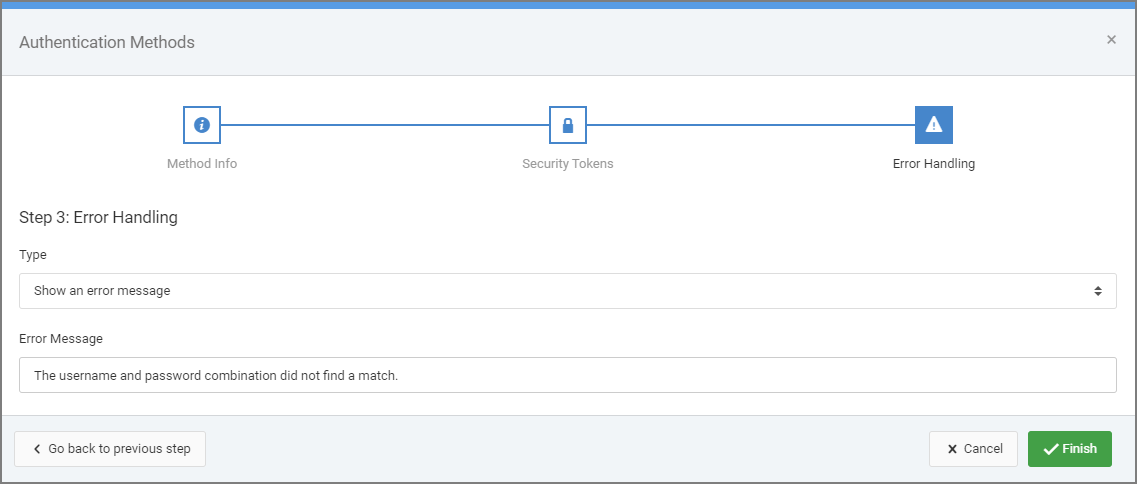
Error Handling
In the event the web service fails to authenticate, developers can control what happens. Either set a URL to redirect the user (such as the dictionary login page: [DICTIONARY].Login) or set an error message to be displayed on the page.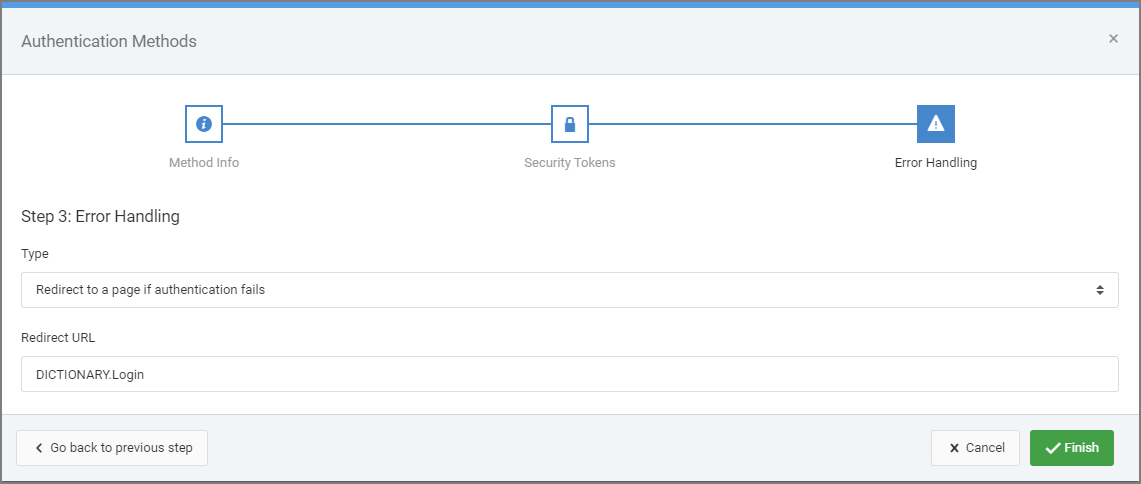
Web Service Endpoints
Service Info
Provide a short unique name to identify the endpoint and provide an optional description. Select a base URL if desired. Choose the HTTP Method for the endpoint and enter the endpoint URL. If using a Base URL, omit that portion of the URL from this entry. If the web service data is largely static, check the box to Cache the service response. This will reduce the number of URL calls to the web service. Finally, if needed you may set a previously configured Authentication Method.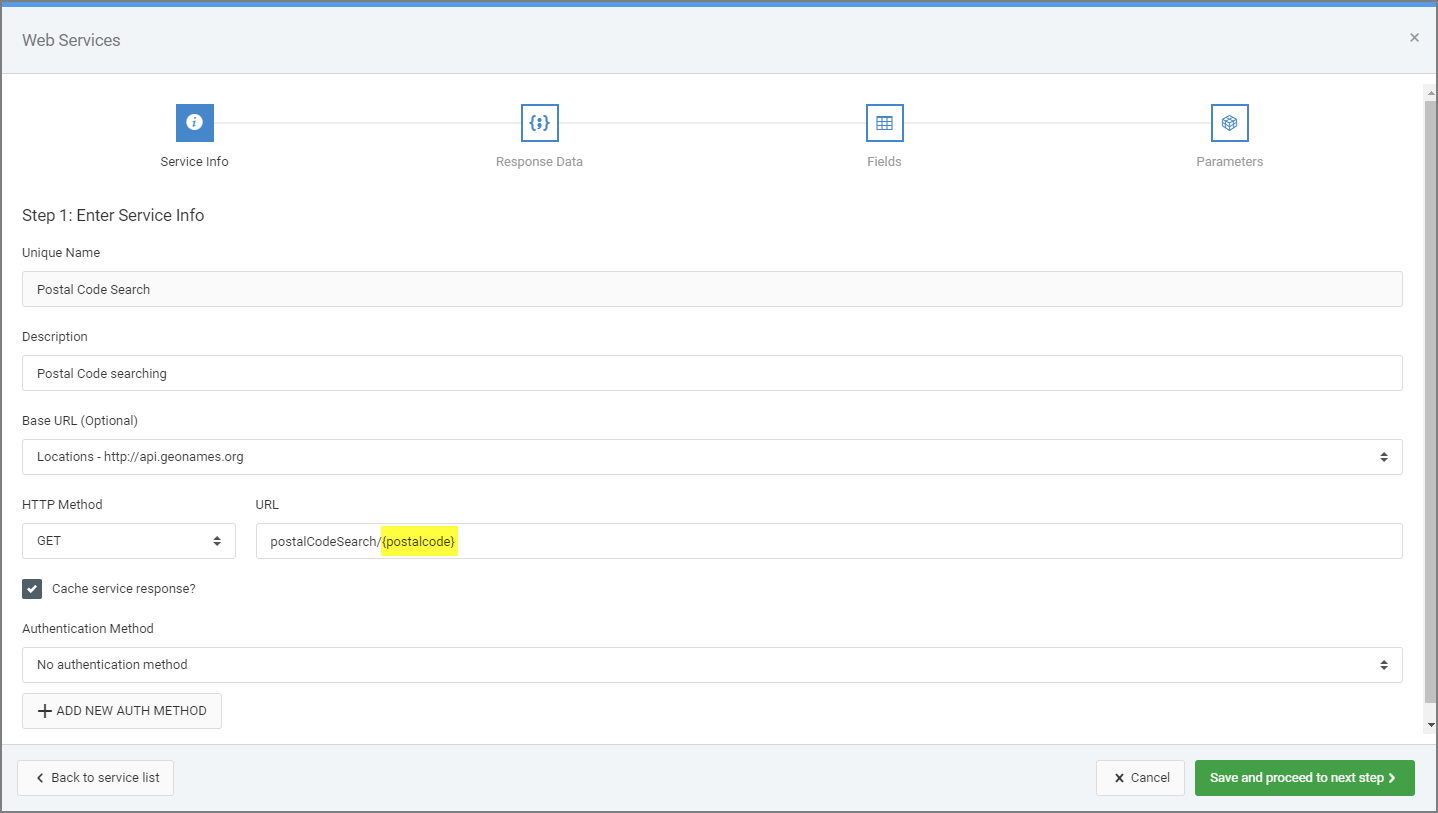
URL Path Parameters
Notice the area marked in yellow in the image below. Some web service endpoints contain “path parameters”. These are dynamic values substituted into the URL that often filter the data or resource returned. If you know that your application will have a filter or smartlink that you want to pass into the service endpoint, use {fieldname} notation like in the image below.
For example. If I call an m-power application with a url parameter like: DICTIONARY.I00010s?postalcode=12345
If I00010s calls a web service endpoint, I can substitute {postalcode} into the url and have the runtime value 12345 passed to it like so:
api.geonames.org/postalCodeSearch/12345
Response Data
m-Power needs to know what the JSON response looks like from the endpoint. This teaches m-Power how to parse the endpoint response, allows the registration of all “fields” to m-power and to understand their data types. Also, if there is an error message field in the response, you can configure m-Power to look for said error field(s).
If the JSON structure is nested, use the dot notation in the Results Field input to identify which field in the response contains the “data” that we want to read into the application. If the root of the response is the data array or data object, leave this blank.
If the response contains an error field with a possible error message, use dot notation to enter the name of the key that contains the error message.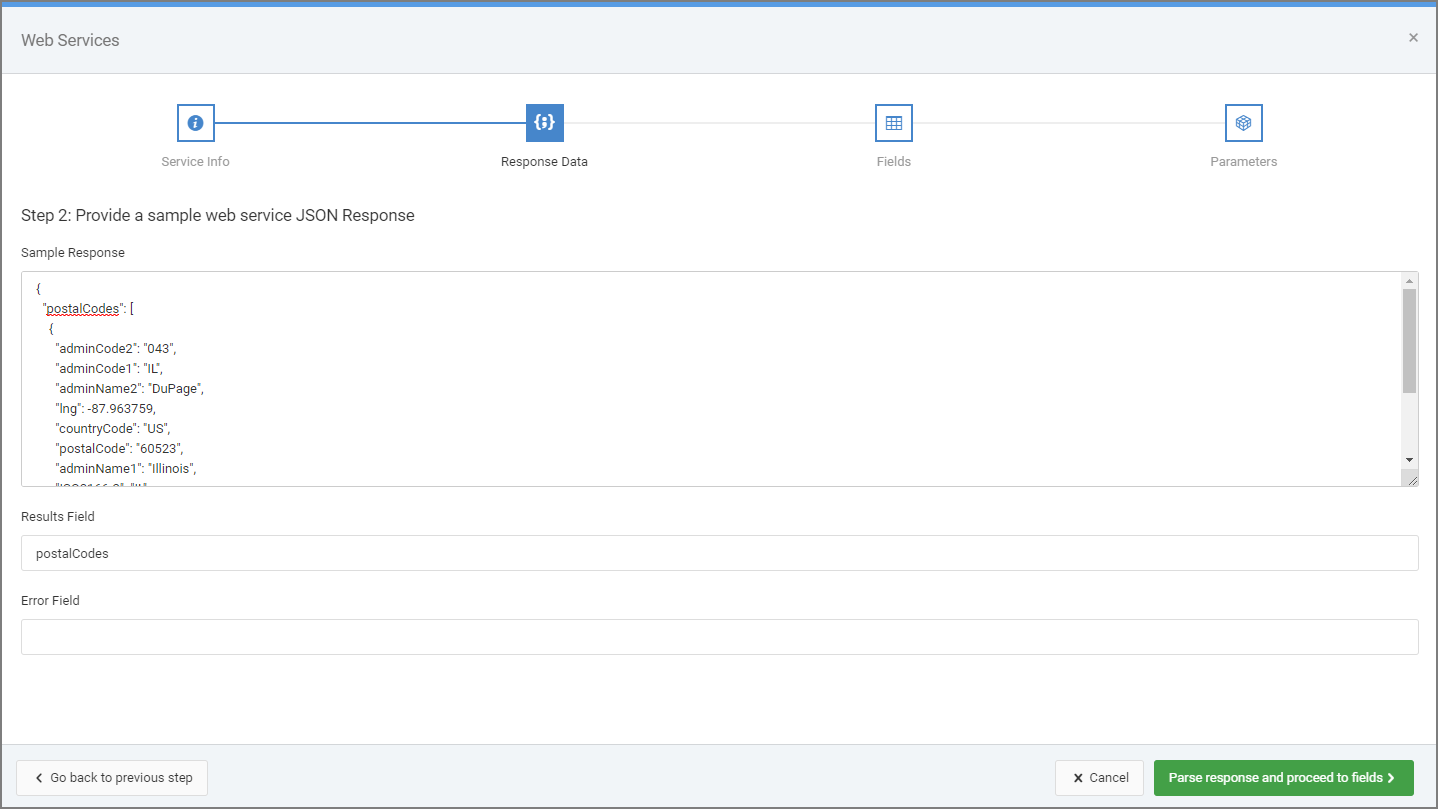
Fields
After successfully parsing the sample response, m-Power extracts the field information. Here you can reconfigure and verify the field descriptions.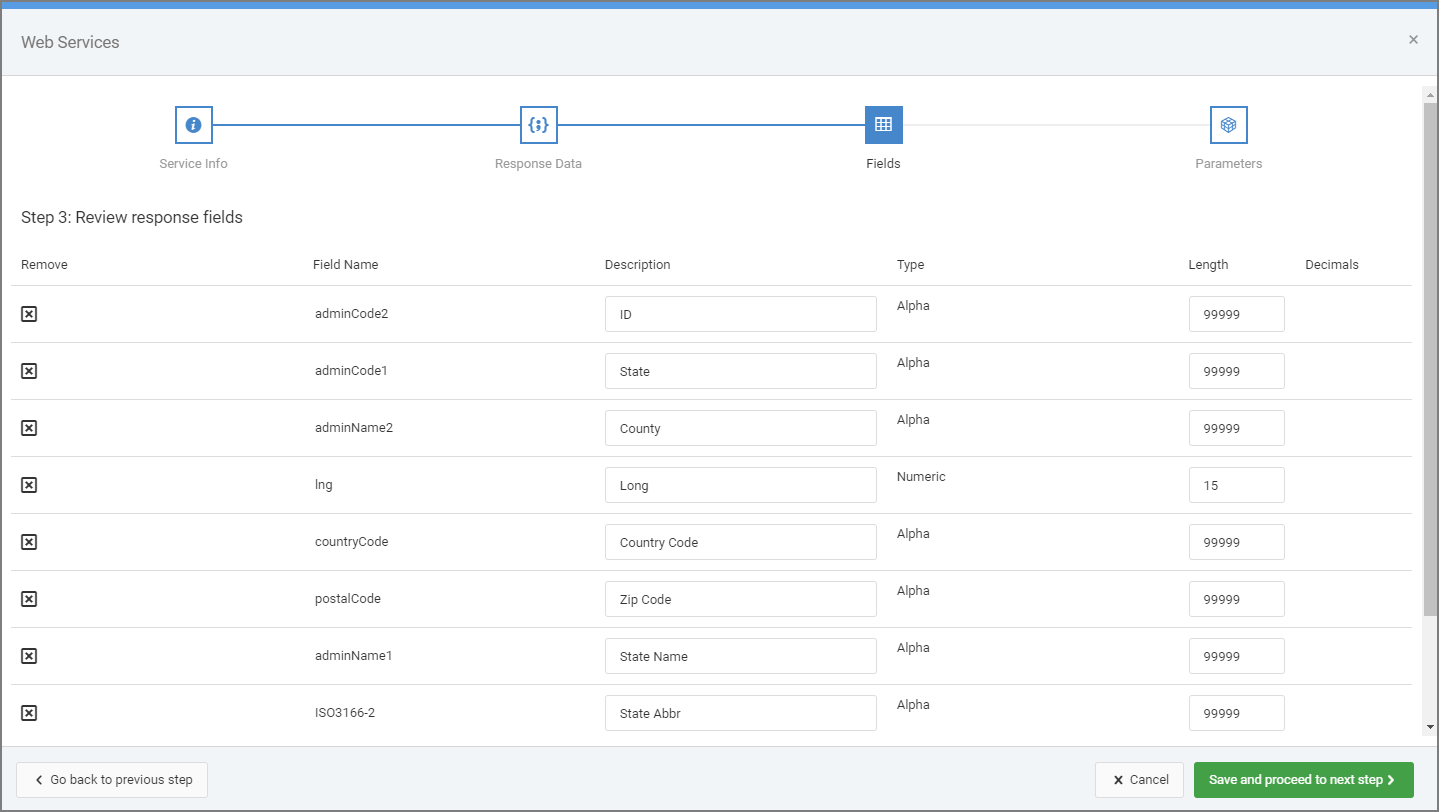
Parameters
URL Parameters
Similar to the Path Parameters described earlier, you can also configure the endpoint to accept runtime values from your m-Power application and substitute them into the endpoint URL at runtime. This “name:value” pair UI allows you to configure URL parameters to append to the URL. Use {fieldname} notation for the value in any case where you want to substitute an application value at runtime. Available values are any parameters in the application URL or form POSTs (such as from Selection Dialog filters using {val_FIELD}).
Note: if an API Key or other known token needs to be added to the URL with each request, you can set it here.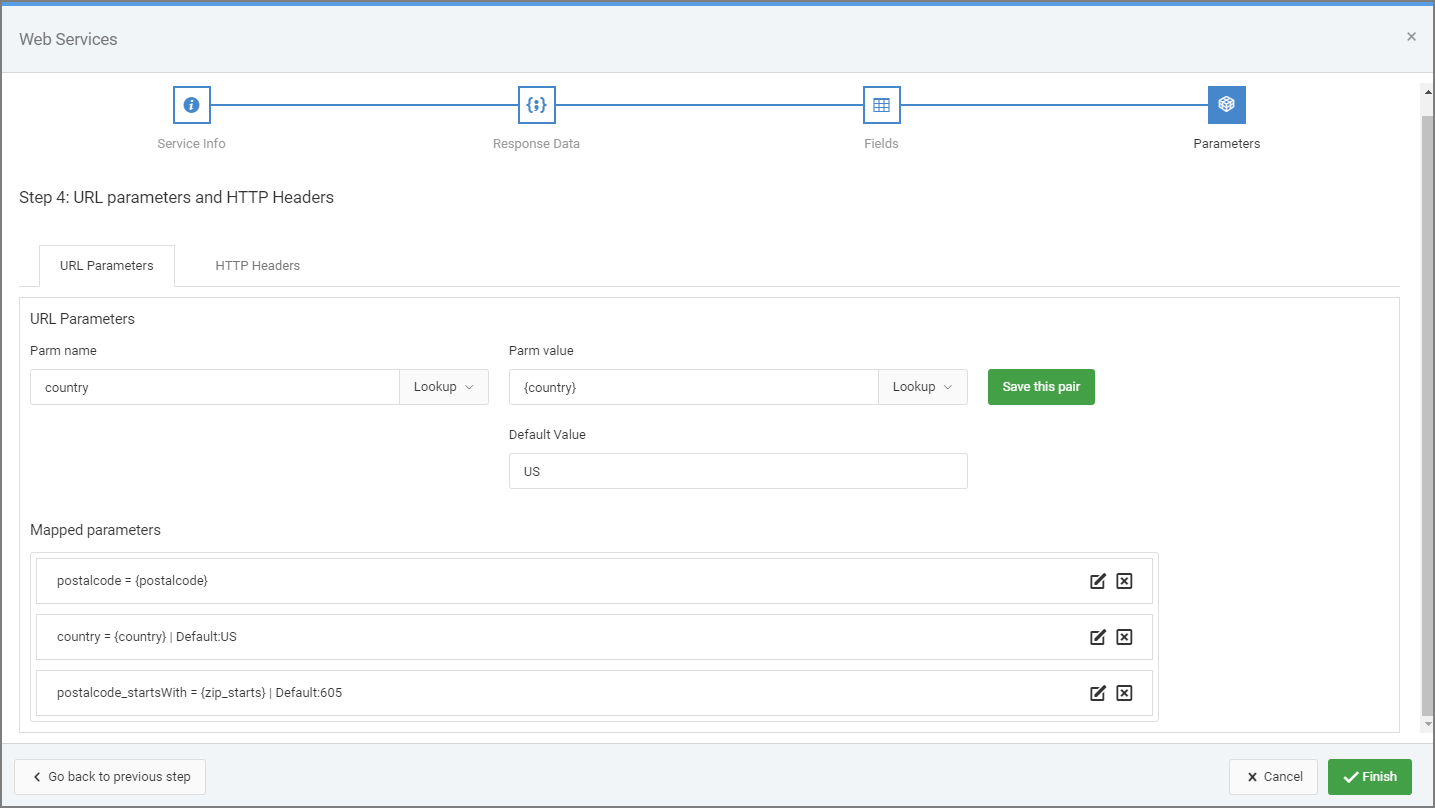
HTTP Headers
If additional HTTP headers with known values need to be set with each request to the endpoint, commonly for authentication, you can set them using this tab.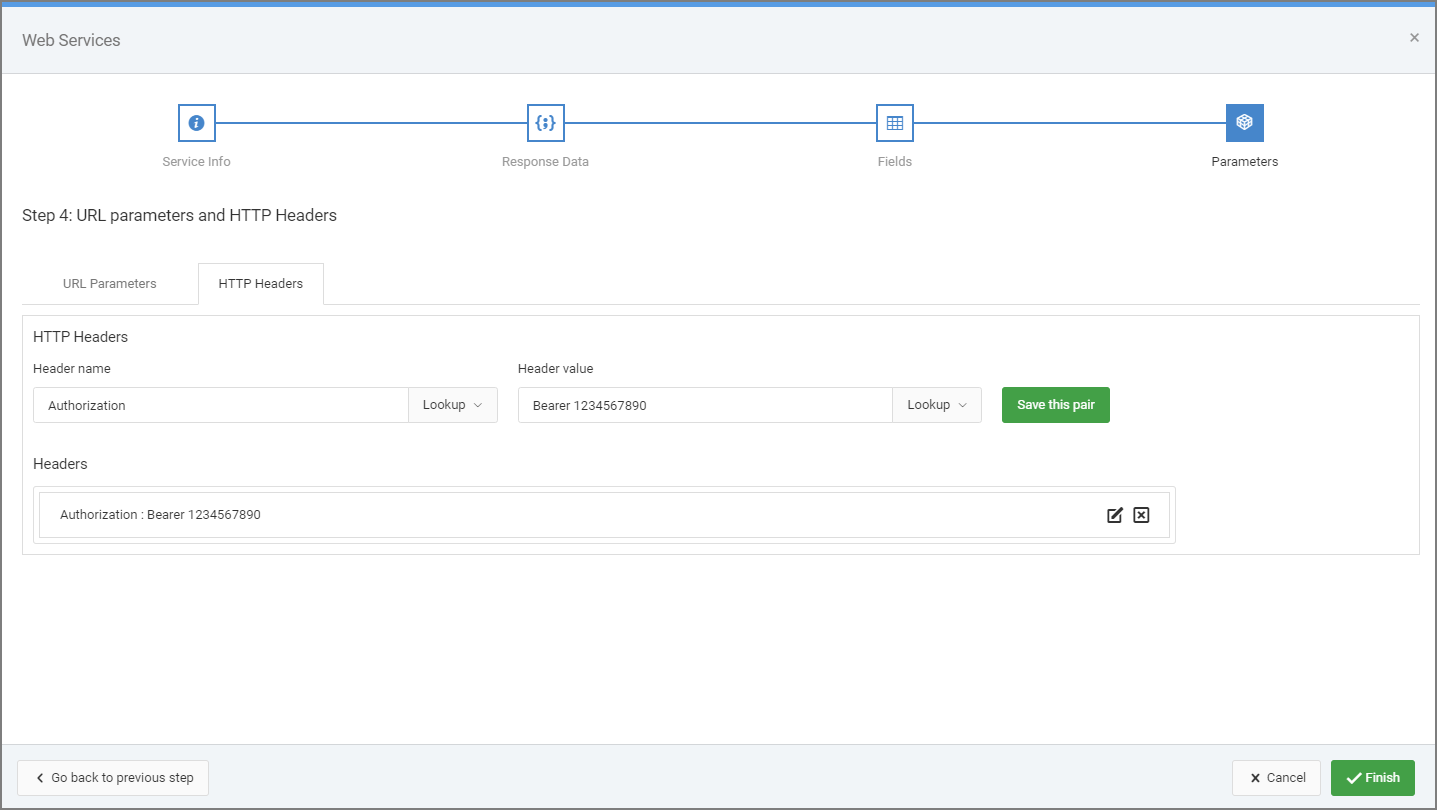
Testing the Endpoint
After your endpoint has been configured, you may preview the API call and response from the Web Services list window. Use the pull down menu to select “Test Endpoint”. The next screen will make the configured URL call with any mapped parameters and the selected authentication method. The full URL with parameters is displayed as well as the raw json response. Below the raw service response, there is also a parsed response. This can be a great tool for debugging your web service API call.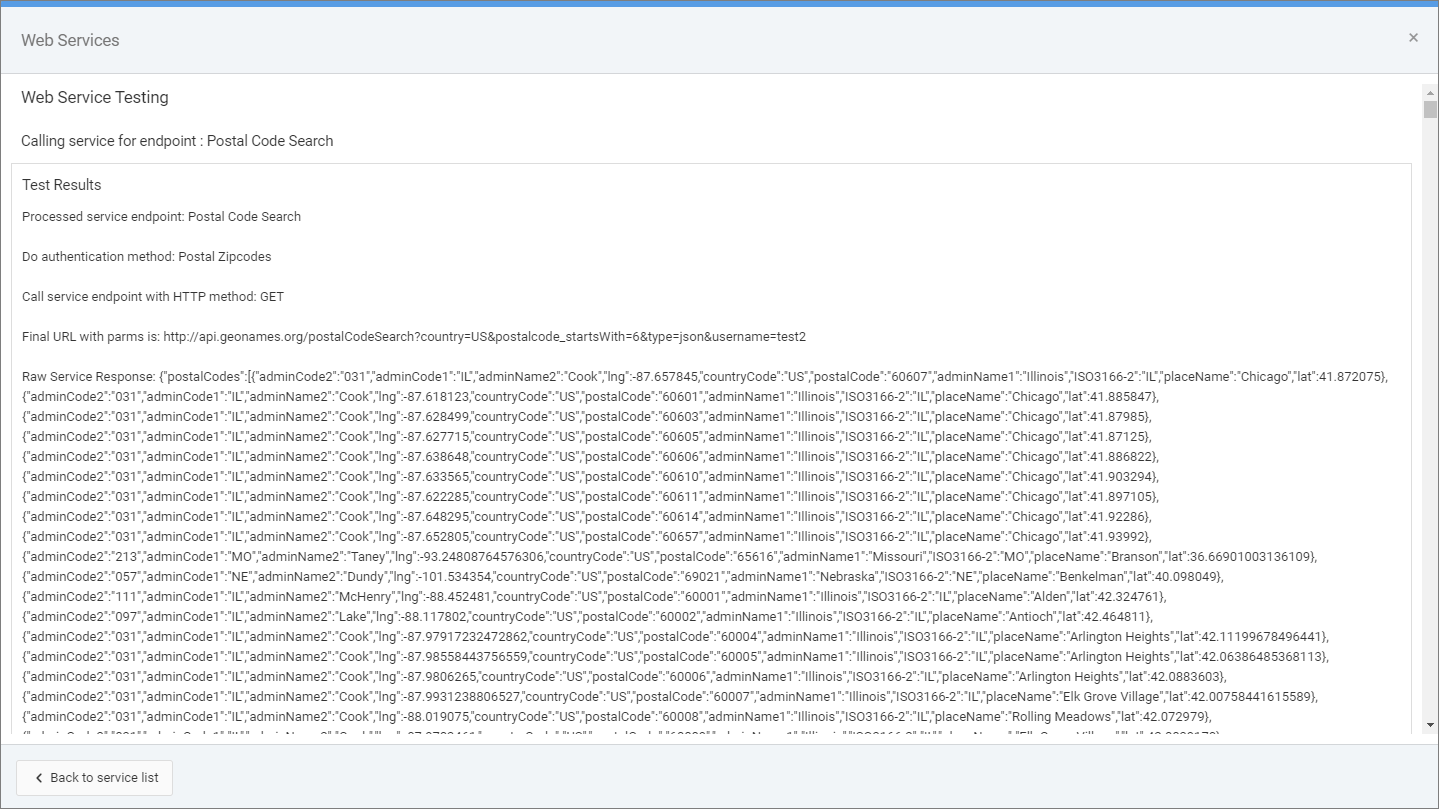
Using Web Services in an m-Power Application
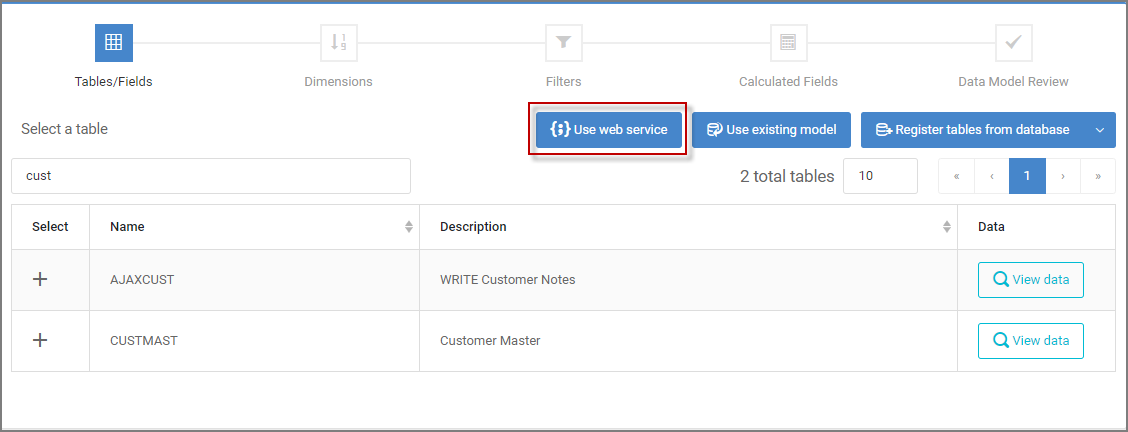
Creating an application with web services is similar to creating an app with tables. On the table selection screen select the “Use Web Service” button to show a list of available web services. The remainder of the build process is the similar to building any other m-Power application. Note: Because the Web Service API result set is not a database table, you cannot use database related actions such as joins or database calculations.
Notes
Debugging
To troubleshoot your web service calls, you can enable debugging in the logs. On the m-Power server, open /m-power/mrcjava/WEB-INF/classes/log4j.properties. Find the line for “log4j.logger.com.mrc=info”. Change this to “log4j.logger.com.mrc=DEBUG”. Save and restart Tomcat. Now when you run your web service application, the full web service URL call request and response are displayed in the stdout logs. Note: mrc recommends disabling this debugging when not troubleshooting your web service call.
Promoting to Production
When promoting to a production environment, you will need to promote the application using the web service and the /m-power/mrcjava/WEB-INF/classes/[DICTIONARY]/mrc-webservices.json file. Be sure to include the web.xml if promoting the application for the first time. Restart production Tomcat after promoting.