
In this article, I’m going to explain how to make important data in your web reports stand out using conditional formatting. With just a little jQuery, you can make your current web reports easier to read and understand.
Implementation
Before I begin, here’s some quick background information for those that aren’t familiar with jQuery: It is a cross-browser JavaScript library designed to simplify the client-side scripting of HTML. It’s one of the most popular javascript libraries, and widely used across the web. In other words, it’s a simpler way to include javascript in your web apps.
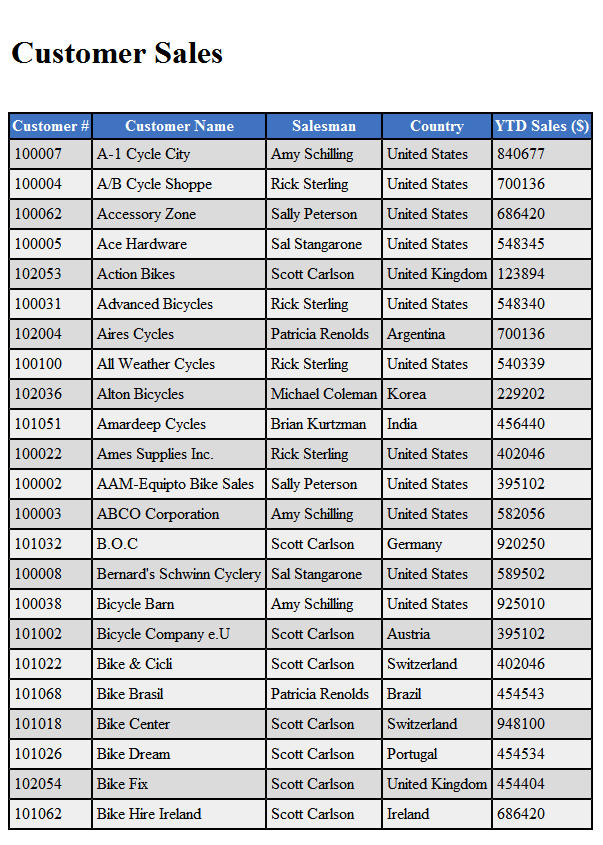
So, what is conditional formatting, and how does jQuery tie into this whole thing? Here’s my own simple definition: Conditional formatting adds formatting to your data based on certain criteria, or conditions. For example, look at this data table and quickly tell me which customers had sales below $300,000.
That’s not easy, is it? Figuring out anything of importance is much too difficult because all the data looks the same. Now, take a look at this table and answer the same question. (Red is bad, green is good).
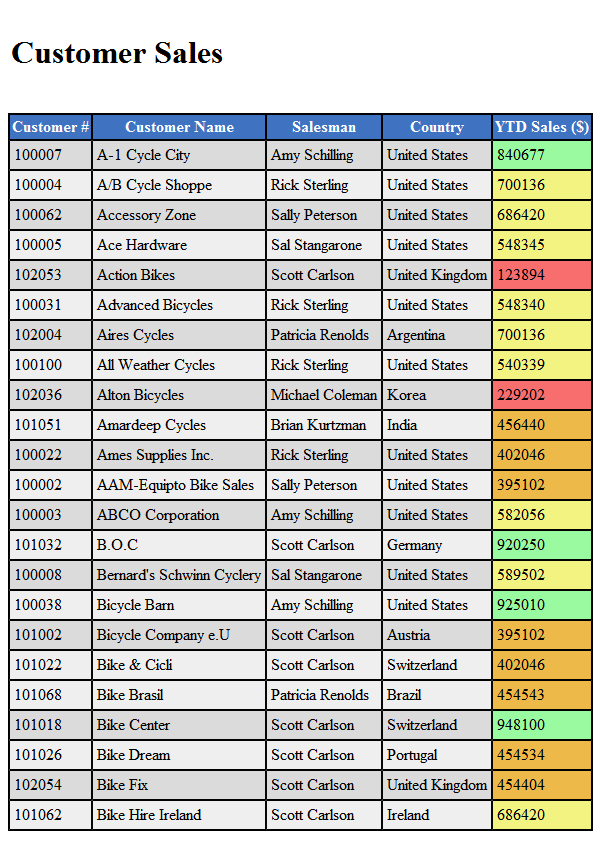
See how much easier that is to read and understand? Within seconds, I know the best and worst accounts, all thanks to conditional formatting.
Demo
Okay, let’s get started. First, let’s take a look at what we’re building. Here’s a link to a conditional formatting demo that I created. Click the links on the page to turn formatting on or off. Make sense so far? Okay, let’s get into it:
If you take a look at the source code in that demo, you’ll notice there are essentially three elements to the application: A little jQuery, a few styles, and a table of data. I’m going to walk you through the code from the bottom up. I’ll quickly explain the table data and the styles, and then get into the jQuery.
First, let’s take a look at the table. Here are two rows from the table. I’m only showing two because they are all essentially the same thing:
<tr class="one">
	<td>100007</td>
 	<td>A-1 Cycle City</td>
 	<td>Amy Schilling</td>
 	<td>United States</td>
 	<td>840677</td>
</tr>
<tr class="two">
	<td>100004
 	<td>A/B Cycle Shoppe</td>
 	<td>Rick Sterling</td>
 	<td>United States</td>
 	<td>700136</td>
 </tr>
This is a very basic table, but I want to point out two things. First, we will be applying conditional formatting to the 5th cell (<td>) in each row. You’ll understand why that’s important in a second. Secondly, you don’t need to worry about the classes on each row (<tr>).
Those are only there to make alternating rows a slightly different color, which improves readability. If you want to see the styles for those rows, look at the code below:
tr.one {background-color: #dbdbdb;}
tr.two {background-color: #efefef;}
That’s pretty much all you need to understand about the table and styles in this demo.
Breaking down the code
Now, let’s get into the jQuery. I’ve pasted all of the code below. This is all the jQuery necessary to add conditional formatting to this page.
First, look over the code, and then I will walk you through each part.
<
script>

    $(document).ready(function() {
        $("a.on").click(function() {
            $('table td:nth-child(5)').each(function() {
                var Sales = $(this).text();
                if ((Sales > 0) && (Sales < 250000)) {
                    $(this).css('backgroundColor', '#f76e6e');
                } else if ((Sales > 250000) && (Sales < 500000)) {
                    $(this).css('backgroundColor', '#edb949');
                } else if ((Sales > 500000) && (Sales < 750000)) {
                    $(this).css('backgroundColor', '#f2f381');
                } else {
                    $(this).css('backgroundColor', '#99faa0');
                }
            });
            return false;
        });
        $("a.off").click(function() {
            $('table td:nth-child(5)').each(function() {
                $(this).css('backgroundColor', 'transparent');
            });
        });
    });
</script>
The necessary script that references your external JavaScript file will be automatically inserted into the JS page of your application from m-Painter via a line similar to this:
<script id="app-js" type="text/javascript" src="/mrcjava/mrcclasses/MRCWORKLIB/R00010/js/R00010.js"></script>The function begins with this bit of code:
$(document).ready(function() {This tells the page to start running this function when the page is loaded.
On the next line, you’ll notice that I’ve added a click function:
$("a.on").click(function(){This line tells the document to run the conditional formatting function only when the hyperlink named with a class of “on” is clicked. I added this so you could turn conditional formatting on or off, but you don’t really need it if you want formatting to always be on.
The next two lines are quite important, and I grouped them together because they directly relate to each other:
$('table td:nth-child(5)').each(function() {
var Sales = $(this).text();
With the first line, I’m telling the document to find table cells (td) within the table, but to only find the 5th cell in each row (the cell that contains sales data). This is important for one simple reason: Most jQuery methods require that you assign a class to the cells you want to alter. This method doesn’t force you to alter any of your existing data. In other words, you can use this code without adding anything to your current web apps.
Getting back to the code, let’s take a look at the second line above. With the second line, I’ve assigned the fifth cell in every row with the name “Sales”. This makes it easier to reference going forward.
In the next line, we get into the actual formatting. Here’s the first condition:
if ((Sales > 0) && (Sales < 250000)) {
	$(this).css('backgroundColor', '#f76e6e');
}
In plain English, here’s what this is saying:
If the variable “Sales” (5th cell in each row) is greater than 0 and less than 250,000, change the background color to “#f76e6e” (a shade of red).
Now, any sales numbers under 250,000 will be red.
else if((Sales > 250000) && (Sales < 500000)) {
	$(this).css('backgroundColor', '#edb949');
}
Again, here’s the code in plain English:
If the first condition isn’t true, then check to see if the variable “Sales” is greater than 250,000 but less than 500,000. If so, change the background color to “#edb949” (a shade of orange).
The next condition is the same as the previous two, but changes the background color to a shade of yellow if “Sales” falls within the 500,000 – 750,000 range:
else if((Sales > 500000) && (Sales < 750000)) {
	$(this).css('backgroundColor', '#f2f381');
}
Finally, the last condition only applies if none of the other conditions are true:
else {
$(this).css('backgroundColor', '#99faa0');
}
Basically, this says: If none of the above are true, change the background color to “#99faa0” (a shade of green). If none of the above conditions are true, than “Sales” must be over 750,000, which is good.
The rest of the code isn’t important to your web apps if you want conditional formatting to always be turned on, but I’ll quickly explain it:
event.preventDefault();This ensures that the conditional formatting will remain after I’ve clicked the link. If I didn’t put it there, the formatting would quickly flash on the table and then disappear, and I don’t want that.
The next bit of code turns conditional formatting off.
$("a.off").click(function() {
    $('table td:nth-child(5)').each(function() {
        $(this).css('backgroundColor', 'transparent');
    });
});
In short, this indicates that when the link with the “off” class is clicked, the fifth cell in each row should have a transparent background.
Now, before I wrap this up, I’d like to explain one more thing that might help you. What if you want the entire row to change colors instead of that one cell? With jQuery, this is simple. You just need to tell each condition to apply the background color to the cell’s parent (the row). Here’s how this would look:
if ((Sales > 0) && (Sales < 250000)) {
	$(this).parent().css('backgroundColor', '#f76e6e');
}
See what I did there? I just added “parent().” in between “(this)” and “css”. This simple change will apply the conditional formatting to the entire row.
Conclusion
That’s it! With minimal work, you can add conditional formatting to your web apps using the jQuery code outlined above. With this method, you will make your web apps easier to read and understand.
I would like to thnkx for the efforts you have put in writing this blog. I am hoping the same high-grade blog post from you in the upcoming as well. In fact your creative writing abilities has inspired me to get my own blog now. Really the blogging is spreading its wings quickly. Your write up is a good example of it.
Great article, thank you very much. I will be using this approach and really appreciate that you put the time and effort into explaining how to use jquery and css to, essentially, make tabular heat maps of html tables.