
Messaging & Scheduled Tasks
Our customer (Betty), runs a small fitness center where members pay a monthly fee to utilize the facilities. Every time a member submits a payment, Betty enters the date in a maintainer to keep track of when the last payment was received from that member. Every Sunday, Betty checks to see which members are behind on their payments, and sends them an email reminder of the late payment. Betty would like to automate the process, and have m-Power send the message for her to make the process more efficient and less time consuming.
Utilizing the m-Power Messaging & Scheduled Tasks utility, we can create this solution for Betty in a few easy steps.
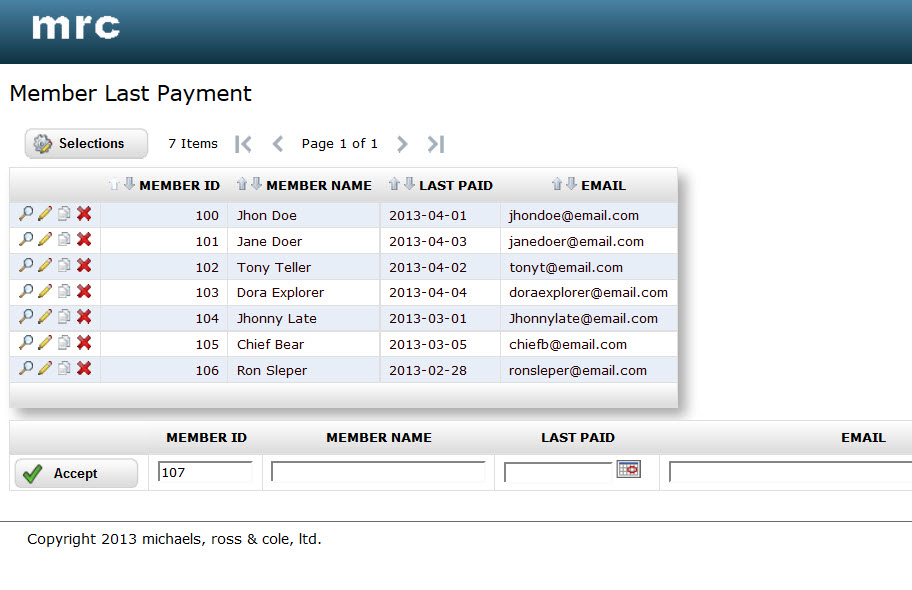
This is the maintainer, it contains the names and email addresses of the members:
The first step is to setup m-Power to send emails. Click Admin, click Utilities, and then click Messaging & Scheduled Tasks. From the Main menu drop down, click Task & Message configuration. Here we will fill in the information for our email services. This is what the page looks like after filling in the values:
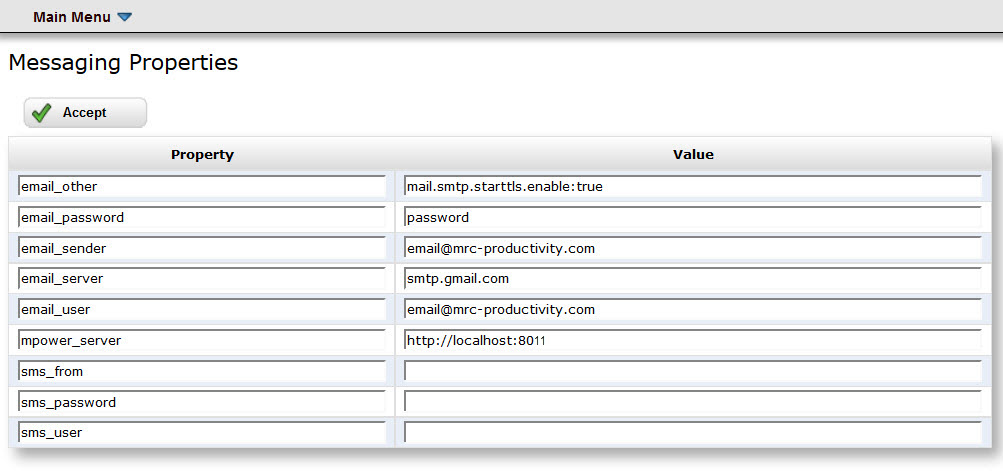
These values will differ depending on the email provider being used. If m-Power is already configured in your system to send emails, you will find these values in Admin –> Edit Data Dictionary Files –> Servlet Properties.
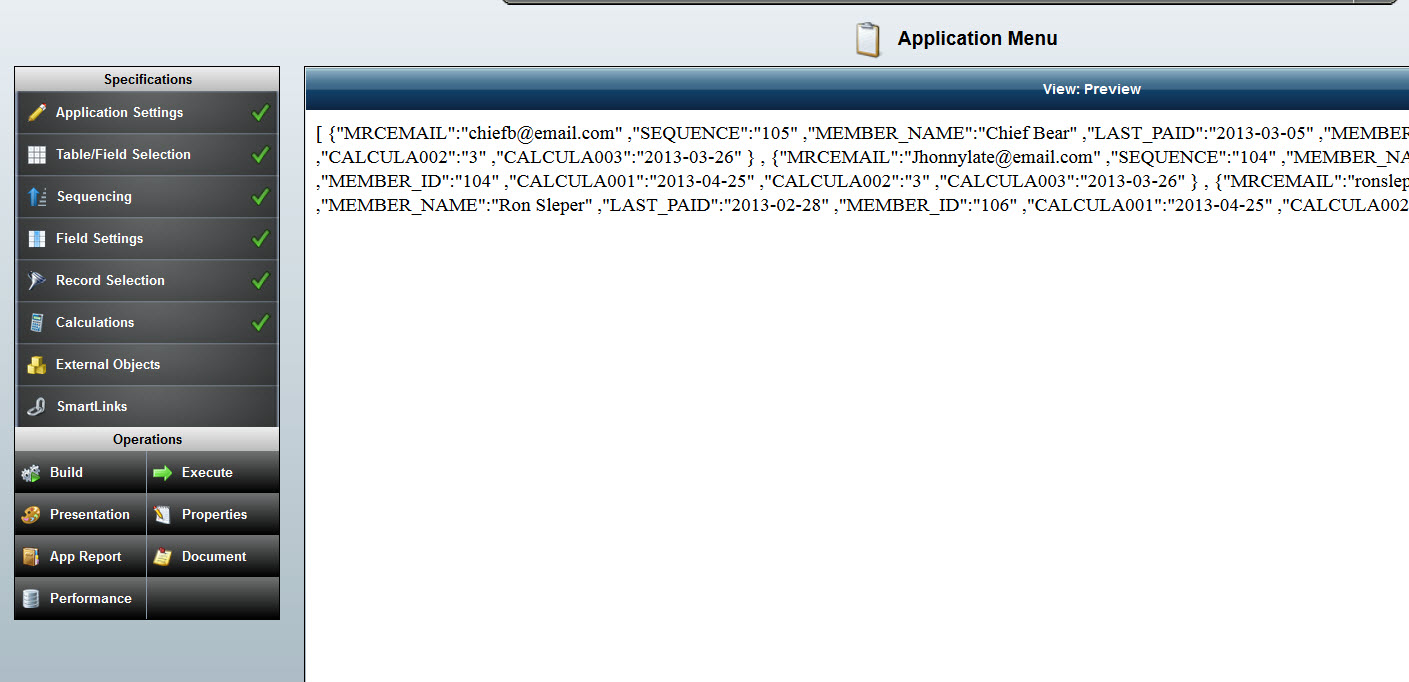
Next, we will create the retrieval that will serve as our email body, and we will create the distribution list that holds the email addresses where we want to send our messages.
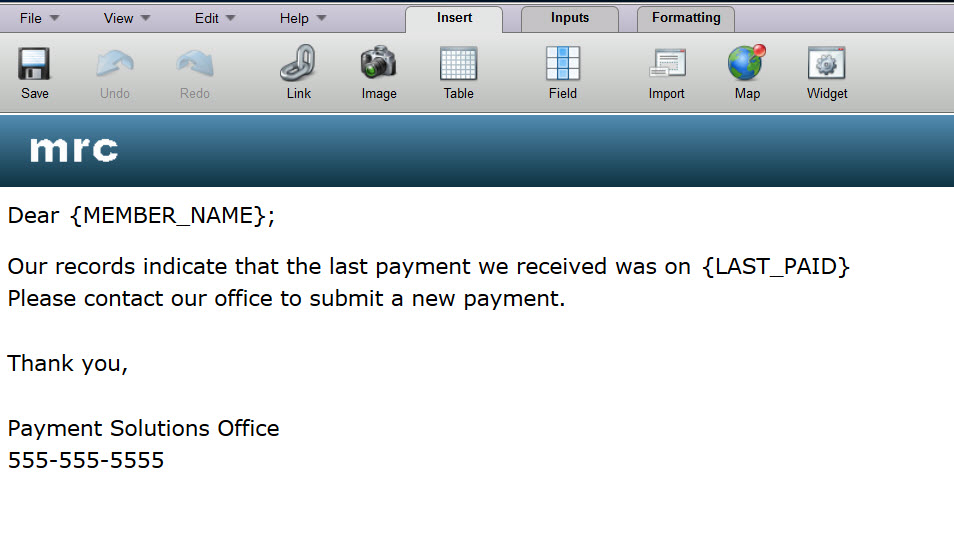
Create a Single Record Inquiry over the same table where the maintainer writes the dates of payment. In m-Painter, we can delete or hide the main table and type in the text for our email body. Then from the retrieval properties, set the hide_header_footer to ‘Yes’ since we do not want the header and footer in the email. Notice in the retrieval we are using the name of the customer and the date of the last payment, from the variable, to create a more personalized message.
Next we will create the distribution list. From the retrieval tab, click Create New, and then select the Address Distribution List as the template.
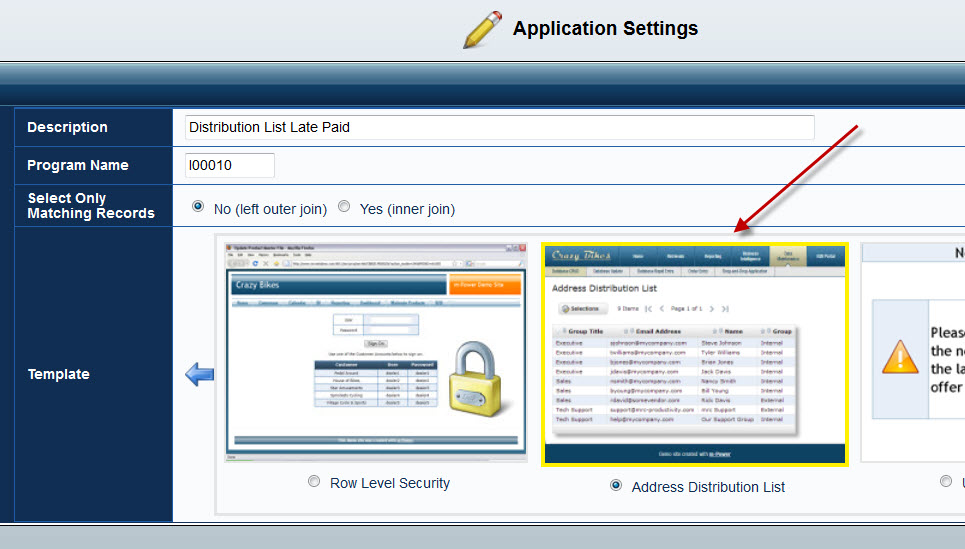
Select the same table from the maintainer. Sequence the application by the email address. As you can see the Address Distribution List does not look like an application, it just holds the list of email addresses where to send the message. I create a record selection combined with a calculation to send the message to only those members whose payment is older than a month.
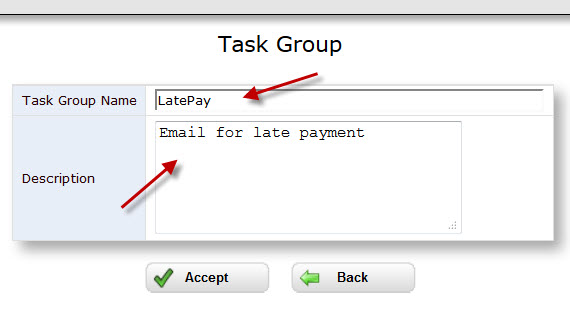
The next step is to add a new Group to the messaging utility. Click Admin, then click Utilities, and then click Messaging & Scheduled Tasks. Click the green plus sign to add a new group, give it a name and a description. Click Accept.
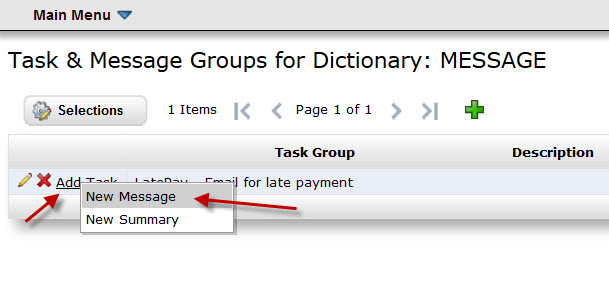
Next click Add Task, when we click Add Task we are offered two options: New Message or New Summary. In our case we need to send a message, so we will select New Message.
In the next window we will find four tabs. Let’s go over each one of them.
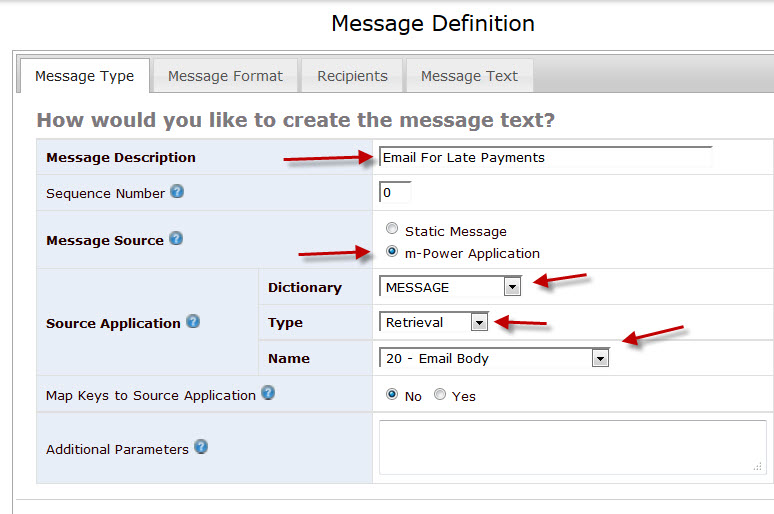
In the Message Type tab type a message description. Under Message Source, we have two options: Static Message or m-Power Application. Static message will allow us to type the text for our message, without the need for an application. This is not a good idea in our case, because we want to send the message only to those customer that have not paid, and we want the message to be customized with their names and last date of payment received. So we will select m-Power Application. Then we are prompted with the location of the application that will be our message. I our case the retrieval 20.
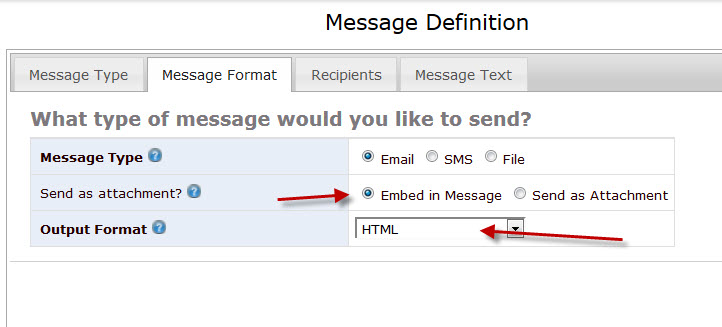
Clicking the Message Format tab will allows us to choose what type of message we want to send, we will select Email. We will embed the message in the email body, and we will select HTML as the output format.
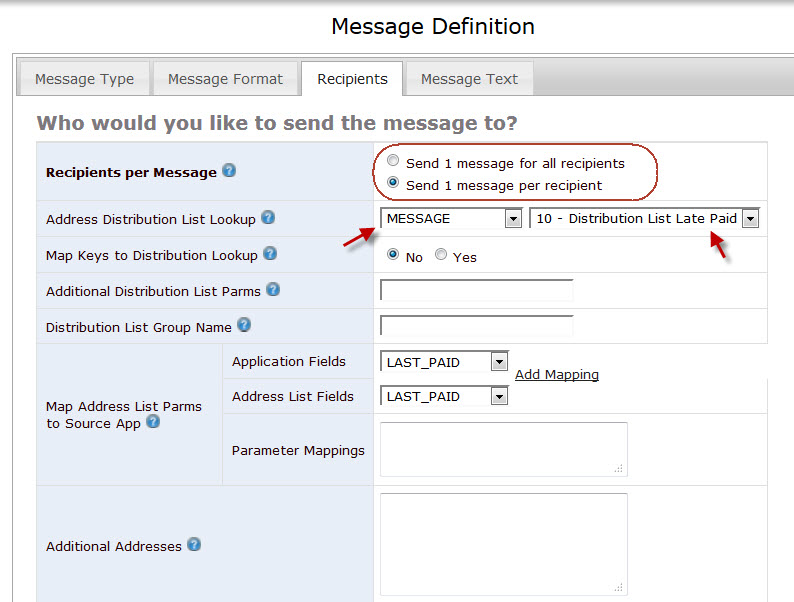
The next tab is the Recipients tab. Here we will select the Send 1 message per recipient choice, since we will personalize the message with the customer name and the last date of payment received. Select the dictionary and the application that is our distribution list. For our example we can leave the rest as default.
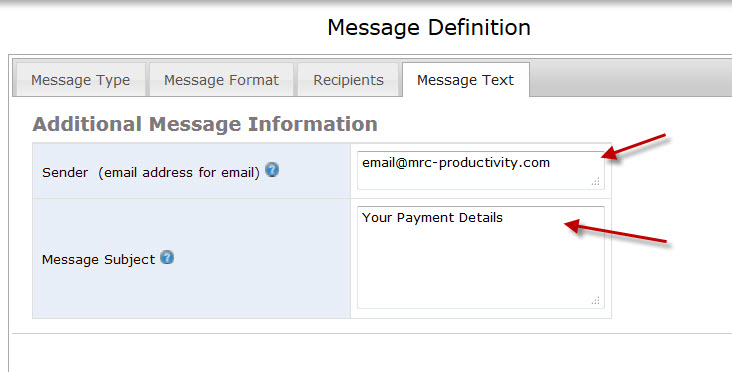
The last tab is the Message Text tab. Here we set the email subject for the email. Optionally, we can specify a different email as the sender email address.
We are now finished setting up the email message. The next step is to send the message to our customers. There are three ways that we can send a message form m-Power. The simplest way is by triggering the message from the URL. This method is best for testing purposes, or if you need to send a message one time only. To run the message simple point you URL to: /mrcjava/servlet/DICTIONARY.Task?group=NAME_OF_GROUP
This will trigger the message to be sent only that one time.
![]()
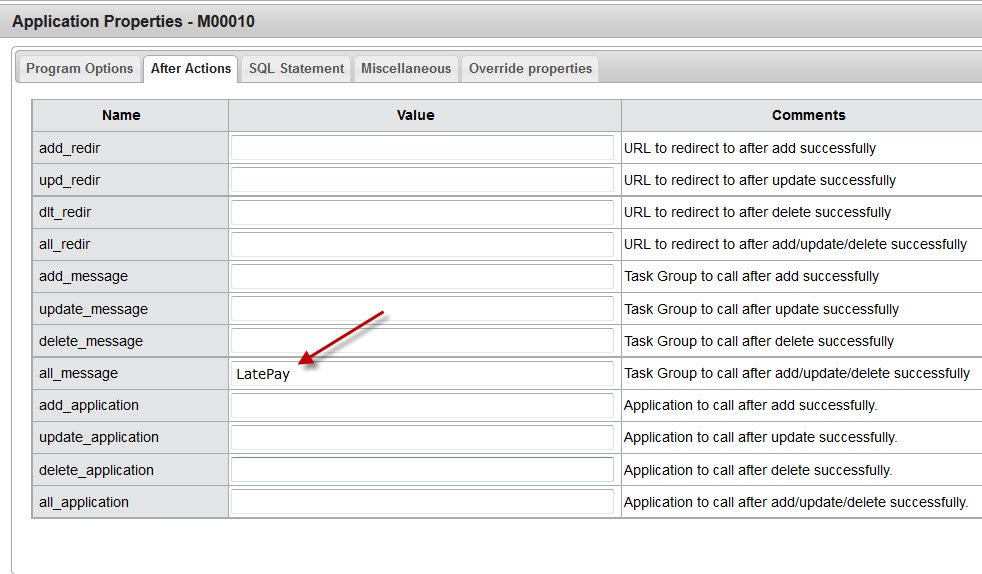
The second way of sending the message is by sending it automatically after a maintainer has completed an action. This could be used to send an email confirmation after a change or update was done to the table via the maintainer. To trigger the message from the maintainer, open the maintainer properties, and click the After Actions tab. Here you will find four properties where you can set the group to be triggered depending on the action performed by the maintainer. For or example I chose the all_message, which will trigger the message after any action (Add, Update, Delete)
The third way of triggering the message is by setting a scheduled task. Using this method we can setup when and how often the message will be sent. To schedule a task: navigate to the Messaging & Scheduled Tasks, hover over the Main Menu and click Scheduled Tasks.
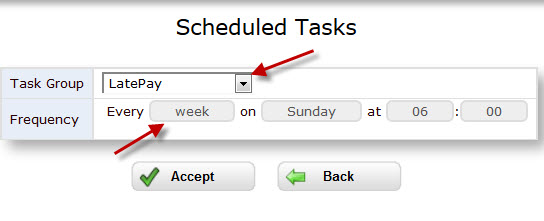
Click the green plus sign to schedule a new task. A drop down will allow you select the Task Group you will like to schedule. Then click the button on the Frequency row. Here we will specify ‘week’ because we want to send one message a week. Then we select a day and time, Sunday at 06:00 will work for us. NOTE: The time is specified in military time, 06:00 will mean 6am, if you wanted to send the message at 6pm it would be: 18:00.
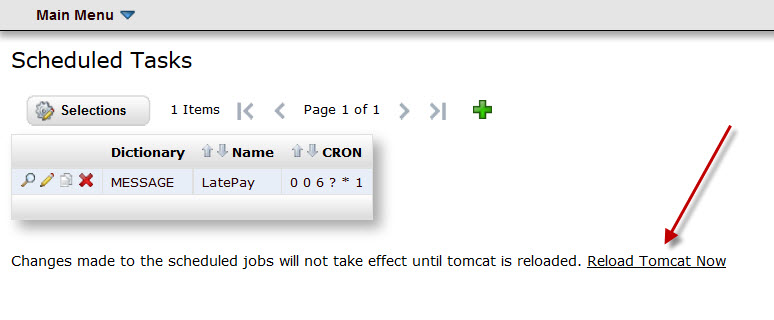
Click Accept. We are back at the Scheduled Tasks page. The task we just scheduled will display here. NOTE: the schedule task will not run until Tomcat has restarted to allow the new setting to be loaded. From this screen you can restart Tomcat by clicking the Reload Tomcat Now link, if you have the permissions to do so. Otherwise you will need to ask your server administrator to restart Tomcat.
Promoting the Task to Production
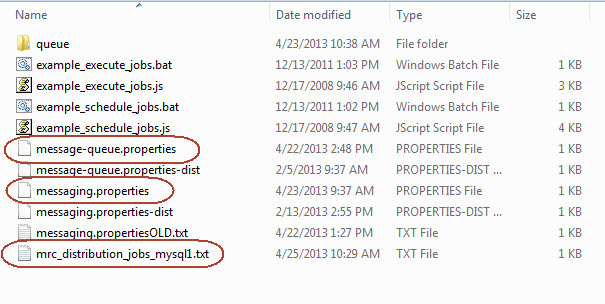
Now that we are finished, we can test the message and confirm that everything is working as expected. It is time to promote the task to production. To promote the task to production we will need to move all the applications involved: the email body (retrieval), the Distribution List (retrieval), and the maintainer if one was used. These applications will be promoted in the regular way. Besides the application files, there are four files that also need to be promoted. These are the files, and their corresponding locations:
- mrc_distribution_jobs_mysql1.txt \m-power\mrcjava\job_streams
- message-queue.properties \m-power\mrcjava\job_streams
- messaging.properties \m-power\mrcjava\job_streams
- mrc_distributions.txt \m-power\mrcjava\WEB-INF\classes\DICTIONARY
The mrc_distribution_jobs_mysql1.txt references your database connection, in my case I am connecting to a MySQL database, as you can see by the reference: _mysql1, if I was using an AS400 connection, it will be: _AS400_remote1
these files will need to be promoted every time a new message task has been created or modified.
The fourth file that needs to be promoted, the messaging.properties, is located: \m-power\mrcjava\job_streams
this file needs to be promoted only once, unless the properties of the email server changes, then it will need to be promoted again.
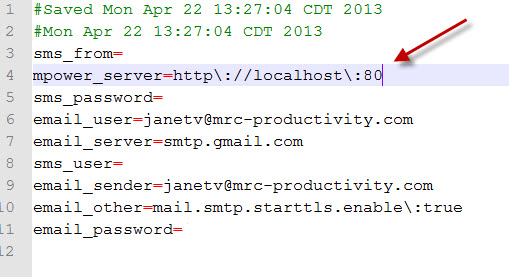
After the messaging.properties file was promoted, it will need to be modified to point to the correct port for the production instance. Open the file in a text editor, and as you can see in the picture, in line four I changed the port number from 8011 to 80, which is the port my production instance works on, make sure you type the port number your production instance works on.
Restart the production instance of Tomcat. Now m-Power will send the message to the customers every Sunday at 6am.
Stopping Scheduled Tasks from Running in Development
After setting up your Scheduled Task and promoting it to production, it will run in both production and development. Should you wish to stop the task from running in development, you can do so by editing the messaging.properties file located in m-power/mrcjava/job_streams. Add the following text to the file:
enable_scheduler=false
Save this file, and restart Tomcat. If you are receiving nightly emails from development, those should stop tonight. Now, you will no longer be able to run a scheduled task through development. However, you will be able to create and set the scheduled task, so that once promoted, it runs as scheduled. Additionally, you can still test the task with the ?task= parameter. Note that if you accidentally promote the edited messaging.properties file to production, scheduled tasks will no longer run in production either.