There are many ways to utilize a WAR file within m-Power.
- Deploying applications offsite (i.e. to external customers). Instead of moving each individual application file to each customer site, you can package the entire mrcjava folder and send one WAR file to each location to deploy.
- Moving your m-Power installation to a new server can be a breeze by packaging your mrcjava folder and contents into a WAR file to transfer.
- Updated release versions of m-Power applications are made easier by simplifying the difference of versioning between your customers. Again, instead of worrying about which file version each customer is on, you can send one WAR file that encompasses the updated files to each customer.
Whatever your need may be – moving m-power to another server, versioning, or sharing your apps with customers – WAR files can be quite helpful. This blog will instruct you how to (1) Create a .WAR file and (2) install/deploy a .WAR file to your Tomcat server.
Here is a scenario: Because m-Power has streamlined your workflow efficiency, your software company is expanding by taking on several new customers. It is becoming too inefficient to pick and choose which individual m-Power application files to give a customer for them to deploy. You decide to create and share your generated application files by using a WAR file.
The WAR file we are going to generate will be a copy of the mrcjava folder. In order to make the most efficient file, we will remove some files that are used in the interface, but are not used in production runtime.
- Open your development m-power folder and make a copy of your mrcjava folder. Open this copied mrcjava folder and delete the following folders inside:
- \m-power\mrcjava_2\WEB-INF\classes\specs
- \m-power\mrcjava_2\WEB-INF\classes\versions
Note: Rename the copied mrcjava folder to “mrcjava_2”.
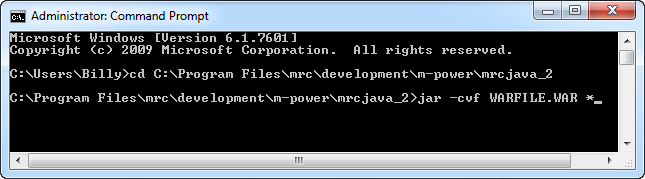
- Open a PC command prompt and navigate to your copied mrcjava folder with the following command:
- cd \m-power\mrcjava_2
Note: You will need to use your exact file path for the location of your m-Power folder and use the exact name of your copied mrcjava folder.
- Once in the desired location that you are wanting, type the below command followed by your desired WAR file name:
jar –cvf WARFILE.WAR *
Replace WARFILE with a name of your choosing. Be sure to include the space between the WAR extension and the *. The * command tells the system to zip all files in the current folder to the WAR file. Press the Enter key.
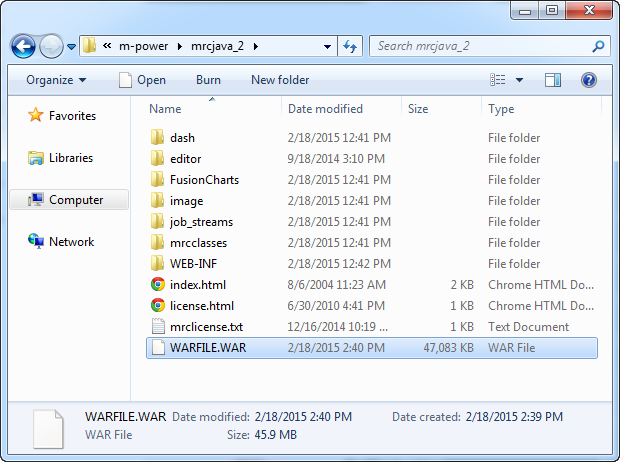
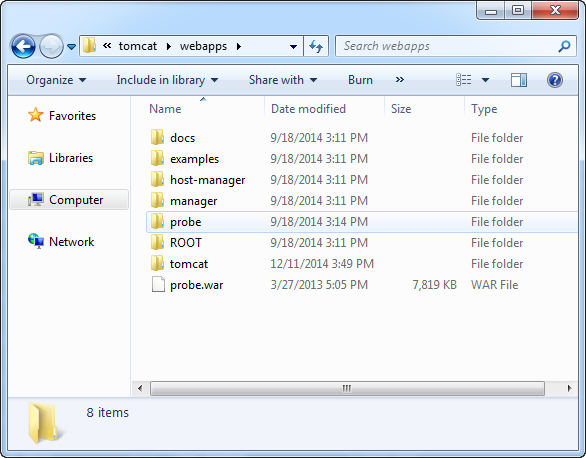
- When completed, use Windows Explorer to navigate to the copied mrcjava folder. Find the WARFILE.WAR and move this to the \m-power\tomcat\webapps folder. This will automatically refresh and will automatically generate the WAR file as a useable folder now.
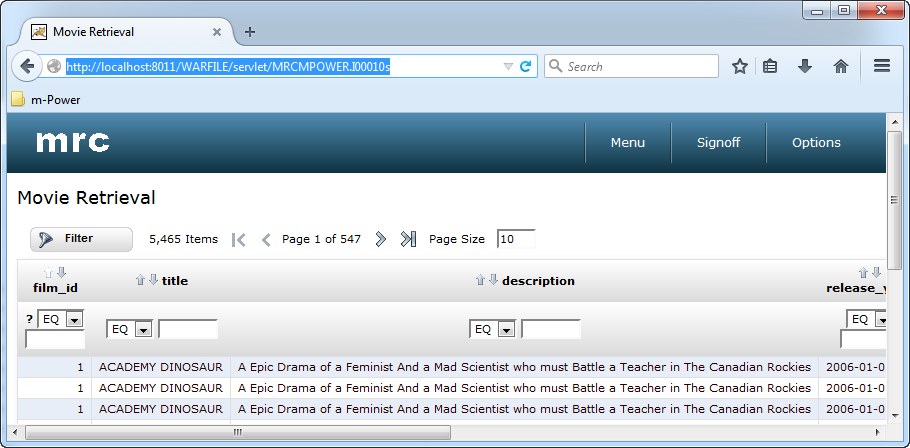
- You can now access any applications that are in this folder from the following URL:
https://IP_ADDRESS:PORT/WARFILE/servlet/DATA_DICTIONARY.PXXXXXs
Where IP_ADDRESS:PORT is the server IP and port, WARFILE is the name of your WAR folder, DATA_DICTIONARY is the name of your dictionary and PXXXXXs is the program name of your application.