
Overview
This post follows up on the previous post entitled, “CSS Tutorial #2: Style Sheet Syntax”. This post will detail two of the more important style sheet elements: Class and ID Selectors.
In the last post, I explained style sheet syntax and how to make universal changes to HTML elements by using style sheets. However, what if you want two different styles for one element? For example, what if you want one paragraph text to be blue, and another paragraph text to be black? That’s where class and ID selectors come into play.
Class Selectors
Class selectors allow you to create different styles for the same element or the same style for different elements. They give you the liberty to assign specific names to certain features of the page. Let’s say that you want the paragraphs on your page to have a blue background with red text, but the first paragraph of every page to have white text on a black background. Simply create a class, and assign styles to it that you would like to see on the first paragraph. To do this, follow the rules of CSS syntax, but add a class name immediately after the selector, and separate the selector and the class name with a “flag character”, like this:
p.first { color: white; background-color: black; }The flag character for the class selector is a period, and it must be placed in between the selector and the class name (“first”) to properly identify that this is a class. Now that you have created a class selector and defined its style, you must specify in the HTML code which paragraph should use this class. In order to do this, you must add a class attribute to the HTML code like this:
<p class="first">Paragraph text</p>
You can assign a class to as many elements on a page as you would like. For example, if you decide to style the last paragraph in every page just like the first, you would simply add the class element to that paragraph.
Let’s take a look at class selectors in action:
<html>
<title>
Selector Demo Page
</Title>
<head>
<style type="text/css">
p {
position: relative;
background-color: blue;
color: red;
left: 20px;
top: 20px;
width: 200px;
font-family: arial;
font-weight: bold;
}
p.first {
position: relative;
background-color: black;
color: white;
top: 20px;
left: 20px;
width: 200px;
font-family: arial;
font-weight: bold;
}
</style>
</head>
<body>
<p class="first">
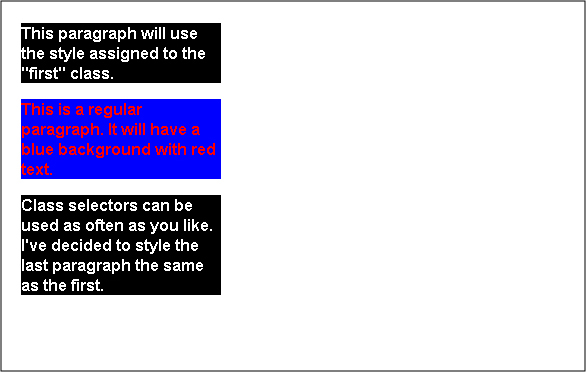
This paragraph will use the style assigned to the "first" class.
</p>
<p>
This is a regular paragraph. It will have a blue background with red text.
</p>
<p class="first">
Class selectors can be used as often as you like. I've decided to style the last paragraph the same as the first.
</p>
</body>
</html>Here’s how the code would look on browser.
Independent Selectors
What if you want to use the same styles for a few different element types throughout the page? You can use class selectors to declare styles for an element without even specifying an html element. It would be written like this:
.footer { background-color: gray; color: black; }
This adds a lot of flexibility because there’s no HTML element defined. This class selector could be used by any type of HTML element throughout the page. For example, you could do this:
<p class="footer"> paragraph text </p>

<h1 class="footer"> Header text </h1>
Both of these elements are now using the same class, and will be styled exactly the same.
Now you may be wondering why anyone would ever need to assign an HTML element to a class selector if you don’t need to. Assigning an HTML element to a class is helpful when you need to go back and alter a page. If you have identified in your style sheet which class corresponds with which element, you can make changes with ease.
Pseudo Classes
Pseudo classes denote a specific quality of an element, and are generally used with the anchor (A) element to distinguish the status of hyperlinks in a document. They are used to override default link colors and are declared with an “A” followed by a colon and link status. Here are the 4 types of pseudo classes for the anchor element:
a:link {color: red} --This means that all links will be red--
a:visited {color: green} --All visited links will be green--
a:hover {color: yellow} --Mouse over a link, and it will turn yellow--
a:active {color: white} --After a link is selected, it turns white--
What if you want different link styles throughout your page? Pseudo classes can work with regular classes to create different link styles, like this:
.footer a:link { color: blue; } –All links within the "footer" class will be blue--ID Selectors
ID selectors are very similar to class selectors. They allow you to create unique styles for certain elements on the page, but unlike class selectors, ID selectors can only be used once. You can create many different ID selectors, but each one can only be assigned to one HTML element.
The only other difference between the two is the syntax. The flag character for an ID selector is the pound sign (#) instead of a period. For example, you would write it out like this:
#first { background-color: black; color: white; }The HTML would look like this:
<p id="first"> My paragraph </p>This would operate exactly as if it were a class, the only difference being you couldn’t use it any more than once.
Why Class and ID Selectors?
You may be wondering why ID selectors even exist if they are basically a more restricted class selector. It’s a good question, and here are a few reasons:
- They allow you to uniquely identify any one object on the page.
- While class selectors can be used multiple times throughout the page, they should only be used once per tag. While you shouldn’t assign two classes to the same element, you can assign both a class and an ID selector to the same element.
- Class selectors are good for very general styles that are used in various places throughout the document. The ID tag is used to identify a very specific style.
Final Example
Using all of the concepts covered in this post, here is an example webpage. Look at the code below, and then click on this link to view the page in a browser.
<html>
<title>Selector Demo Page</title>
<head>
<style type="text/css">

p {
  display: inline;
  float: left;
  padding: 0 5px 0 5px;
  margin: 0 5px 0 5px;
  position: relative;
  background-color: blue;
  color: red;
  left: 20px;
  top: 20px;
  width: 200px;
  height: 300px;
  font-family: arial;
  font-weight: bold;
  border: 1px solid black;
  }

p.first  {
         display: inline;
         float: left;
         padding: 0 5px 0 5px;
         margin: 0 5px 0 5px;
         position: relative;
         color: black;
         background-color: white;
         top: 20px;
         left: 20px;
         width: 200px;
         height: 300px;
         font-family: arial;
         font-weight: bold;
         border: 1px solid black;
         }

.emphasis  {
           font-weight: bold;
           font-family: arial;
           color: red;
           }

#title  {
        position: relative;
        font-size: 18px;
        font-style: italic;
        line-height: 1.5em;
        background-color: lavender;
        width: 644px;
        padding: 0 5px 0 5px;
        left: 25px;
        border: 1px solid black;
        text-indent: 50px;
        }

#footer  {
         background-color: black;
         color: white;
         position: relative;
         clear: both;
         width: 644px;
         padding: 0 5px 0 5px;
         left: 20px;
         top: 40px;
         height: 100px;
         border: 1px solid black;
         }

a:link     { color:red; text-decoration:none; }
a:visited  { color:blue; text-decoration:none; }
a:hover    { color:green; text-decoration:underline; }
a:active   { color:white; text-decoration:underline; }


#footer a:link     { color:yellow; text-decoration:none; }
#footer a:visited  { color<img src="/images/boards/smilies/redface.gif" border="0" align="absmiddle">range; text-decoration:none; }
#footer a:hover    { color:red; text-decoration:underline; }
#footer a:active   { color:blue; text-decoration:underline; }


</style>
</head>
<body>

  <h1 class="emphasis" id="title">
  This is a sample page to demonstrate Class and ID Selectors.
  </h1>

  <p class="first">
  This paragraph will use the style assigned to the "first" class.
  <br>
  <br>
  Here is a <a href="">link</a>.  Notice how it changes
  when you hover over or click it.
  </p>

  <p>
  This is a regular paragraph.  It will have a blue background with red text.
  </p>

  <p class="first">
  Class selectors can be used as often as you like.  I've decided to style the last paragraph the same as the first.
  </p>

  <p id="footer" class="emphasis">
  I'm reusing the "emphasis" class with the "footer" ID.
<br>

<br>
  Here is a <a href="">link</a> in the "footer" id.  Notice how it differs from the other link.
  </p>

</body>
</html>
Conclusion
Class and ID selectors are two very important tools you must know when using CSS. They allow you to assign different styles to the same element or the same styles to different elements. Class selectors can be used multiple times, but ID selectors can only be used once in a document. Class selectors should be used for more general styles, while ID selectors should be used for very specific styles.
The next tutorial will cover the DIV and Span elements.