Overview
Date conversions are common when working with dates and wanting to perform date arithmetic. For instance, while a real date is stored in ISO format (YYYY-MM-DD), occasionally clients will have date fields in their tables stored as numeric values such as yyyymmdd, cyymmdd, or even ddmmyy.
Good application design and the ability to correctly use date values for things like filtering, data entry (maintainers), and date arithmetic, are contingent on using ISO dates. When our date fields are not true dates, consultants here at mrc often employ the use of a date calendar table to easily do date conversions and get the date in the appropriate ISO format within the m-Power application.
This techblog post will show you how to create a date calendar table and upload the data into a new database table. Once uploaded, the calendar table can be joined to in any m-Power application to assist with date arithmetic, conversion, and runtime filtering.
Step 1 – Generate the Calendar Data
The first step is to create the tabular calendar data that will be fed into a new database table. Here, I will use Microsoft Excel to create a spreadsheet that mimics the following structure, where each row is a unique date.
TRUE_DATE | NUM_DATE | CHAR_DATE | WEEK_NUM | YEAR | MONTH | DAY | DAY_NAME | DAY_OF_WEEK |
2025-06-01 | 20250601 | 06012025 | 22 | 2025 | 6 | 1 | Sunday | 7 |
| 2025-06-02 | 20250602 | 06022025 | 23 | 2025 | 6 | 2 | Monday | 1 |
| 2025-06-03 | 20250603 | 06032025 | 23 | 2025 | 6 | 3 | Tuesday | 2 |
While this sample table only shows three days that have already passed, it’s important to create a record for each date into the foreseeable future. My spreadsheet I am creating will have every day from January 1st, 2000 to December 31st, 2079.
An example of this spreadsheet can be found and downloaded here. A few important notes:
- Feel free to add or remove columns as needed. For instance, if your application has dates stored as MMDDYY (e.g. 060325) then you will need to add a new column for this type of format.
- This spreadsheet assumes a standard fiscal year start and end date. That means columns like the week number, day of week, etc. are based on the year starting and ending on January 1st and December 31st, respectively. If you have custom fiscal periods that you want to define, then you must update the spreadsheet to reflect the appropriate period information accordingly.
Step 2 – Upload Calendar Data spreadsheet
Create a new database table. You may use m-Power’s built in options for database table creation in “Admin” -> “Tables” -> click the “Manage” button and click “Create new table”.

Based on the columns in the spreadsheet, define the column names and data types appropriately:

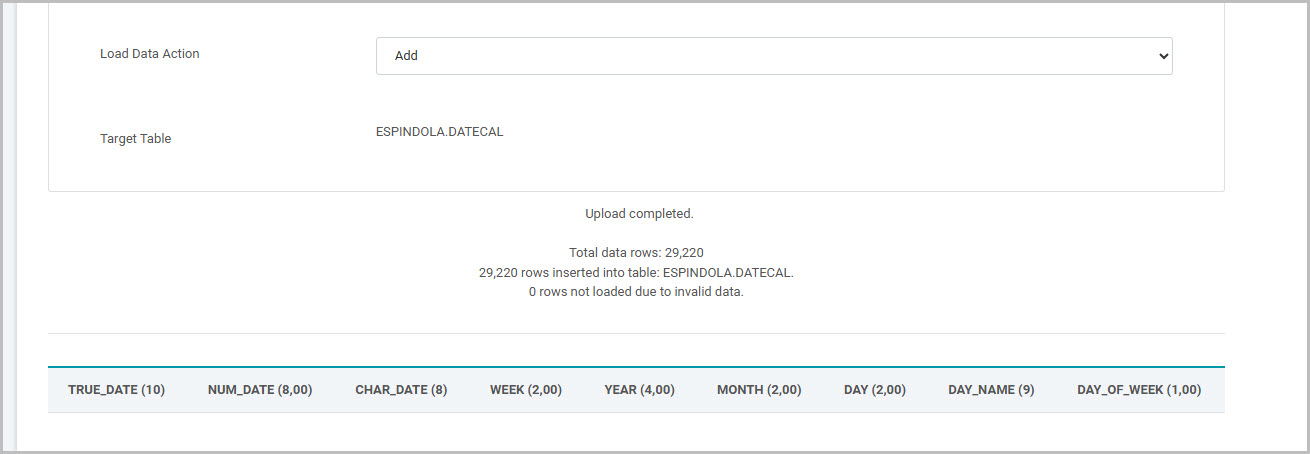
Once created, use a Data Upload maintainer template to then upload the spreadsheet data.
Step 3 – Utilize the Date Calendar table
The way you will utilize the Date Calendar table is up to you. There are numerous ways to employ this information at this point, where I will simply demonstrate one example situation.
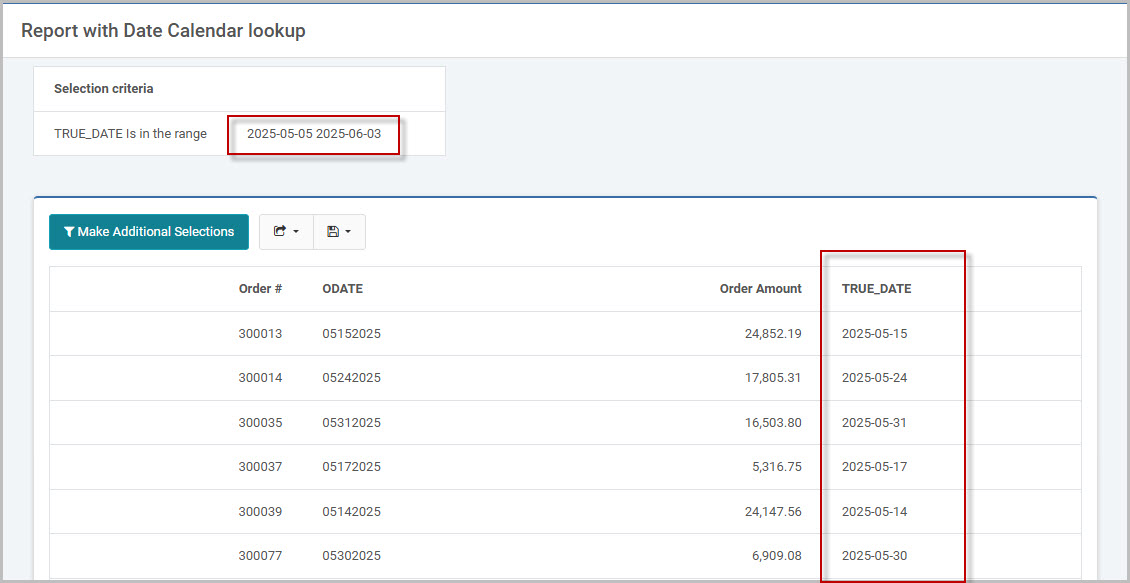
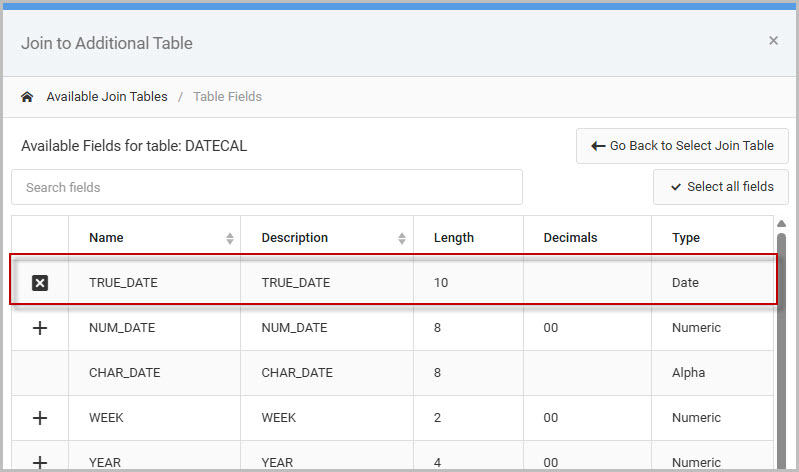
A common situation is when your report’s has a numeric or character date field, which makes filtering on ranges and sorting on these values often unpredictable. Using the Date Calendar table, I can join to it and extract the iso date column TRUE_DATE, which will then be used in any date filtering for my report application.
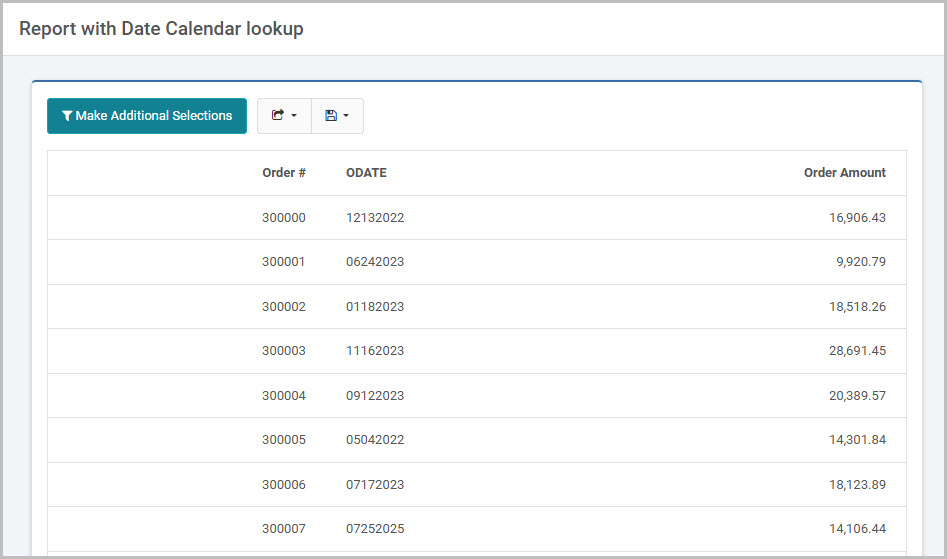
My report application contains a varchar column (ODATE) that stores my order dates as in the format of mmddyyyy:
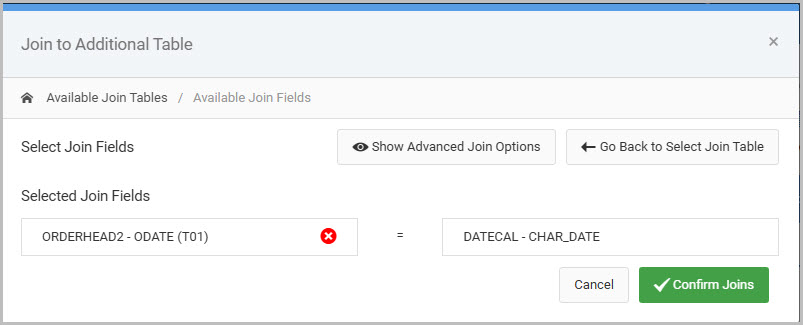
To appropriately filter and search on orders for a given date range, I will join out to the DATECAL table I defined. The key here is I must create an m-Power synonym between
- ODATE – the ‘mmddyyyy‘ varchar(8) field in the report
- CHAR_DATE – the ‘mmddyyyy‘ field in my Date Calendar table.
Using this as my join allow me to then select my TRUE_DATE field, that will represent each order date but as a true ISO date (yyyy-mm-dd).
Once selected into the data model, now I will create a runtime value prompt filter with an “Is in the range” relationship over TRUE_DATE.

After rebuilding, this filter is used to search my orders in the report, which ensures my range search is always correct: