Overview
m-Painter’s What-You-See-Is-What-You-Get (WYSIWYG) graphing interface allows you to easily and quickly customize your graphs. Occasionally, you may want to customize your graph beyond the scope of the built-in options. m-Painter’s built in graph customization option makes this a smooth and straightforward process. m-Power utilizes Fusion Charts as its graphing logic. For more information on Fusion Charts, click here.
There are many reasons you may want to customize a graph beyond the options offered by m-Power. Some reasons include:
- Adding a trendline
- Adding animations to graphs
- Customizing styles
- Creating standardized graph templates
- Obtaining functionality beyond the built-in options
To open the graph customization option, right-click on your graph, and select Graph Properties. Then navigate to the Options tab. The last option listed on this tab it the custom template option. To begin customizing your graph, click on the ‘Customize Graph Template’ button.

After clicking this button, you will be brought to the template customization screen. By default, a template will have already been selected for you. The default template is selected based on your selected graph-type’s logic. There are five default templates:
- Angular Gauge
- Angular Gauge Dial
- Cylinder
- Multi-Series
- One-Series
Note that the screen is dark, and that you cannot edit any of the text.

Existing templates cannot be directly edited. If you want to customize an existing template, you must first select the template from the dropdown, and then click the ‘Customize this template’ button. This will create a duplicate template of the selected custom template. This ensures that a template being used by an existing graph is not affected by any of the changes you make. After clicking ‘Customize this template’, the duplicate template is created, selected, and is editable.
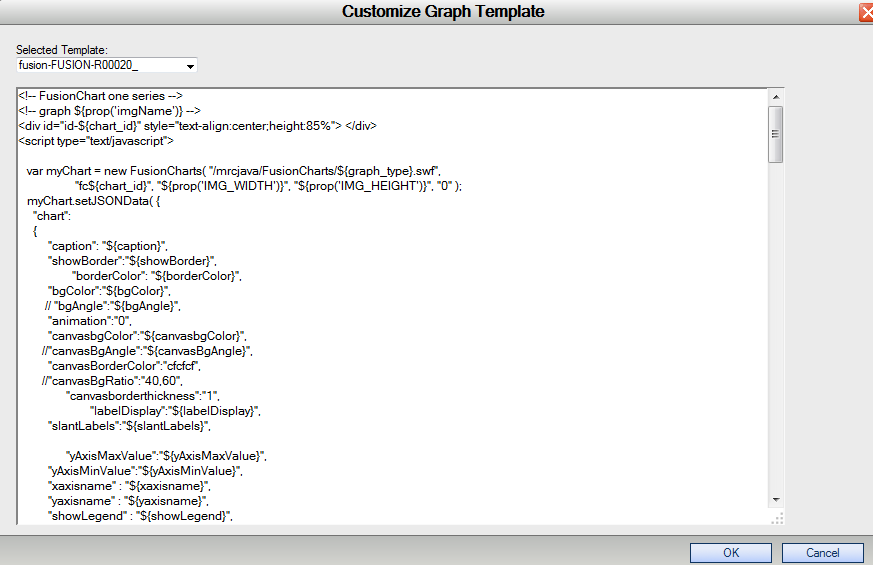
m-Power’s Fusion Charts use JSON logic. The individual attributes use the following format:
"attributeName":"value",The attribute name must begin with a lowercase letter. Subsequent words within the attribute name are connected without a space, and the first letter of the next word must be in uppercase. The attribute name must be surrounded by double quotes. After the attribute name, a colon must be entered. The value for the attribute depends on the attribute itself. This value must also be surrounded by double quotes. The entire line must be finished with a comma.
Special Notes
Once a template has been created, it will then be available for selection when customizing other graphs. For instance, if you customize a 3D Bar Column graph, the next time you go in to customize another similar-type graph, you will be able to select that same template. However, you will be working with a new copy of that template. This allows you to customize your current template, without affecting the existing graph.
Promoting to Production
Customized graph templates will need to be promoted to production for graphs that will be utilized on a production instance of m-Power. These templates can be found within the /m-power/mrcjava/mrcclasses/mrc-graph-templates/custom folder. The templates can be promoted individually.
Alternatively, you can an entry within the Promote to Production utility to easily automate this. To do so, navigate to the Promote to Production.
In the “Other Files” tab, select the “Add New File” option. Add a new file that sets
- File Name equal to “mrc-graph-templates”
- Description to “Custom Graph Templates”
- Path to “mrcclasses”
- Type to “folder”.
Press “Add File” Moving forward, this folder will be available within the promote to production utility.