This document explains how to configure m-Power and a third-party identity provider (in this case, Microsoft Entra ID) to use SAML-based Single Sign-On (SSO) for secure access to m-Power-generated applications.
If you would like to learn how to utilize OAuth2 instead, please click here.
Overview
This guide will walk through step by step how to configure SAML 2.0 Single Sign-On (SSO) between Microsoft Entra ID (formerly Azure Active Directory) and an m-Power application. Microsoft Entra ID is Microsoft’s cloud-based identity and access management (IAM) service, used to enable secure authentication for users and applications.
SAML General Concepts
Within SAML, there are a few key concepts that must be understood:
IdP — This is the identity provider. There are multiple identity providers, but some of the more common ones include Microsoft Entra and Okta. It is the job of the IdP to prove that someone is who they say they are.
SP — This is the service provider. In our case, m-Power is the service provider. In reality, you would have several SPs. Each SP would interface with the IdP to ensure that a user is valid.
Assertion — Assertions are the message that is transmitted between the IdP and the SP during communication.
Metadata — Before an IdP and and SP will communicate with each other, each (usually) needs to know information about the other. This information may contain certificates as well as other entity IDs. All this information is usually stored in the IdP/SP metadata.
Configure m-Power for SAML
Prior to configuring SAML for m-Power, there are a few housekeeping items required.
- Be sure you are on at least the Aug 2022 release of m-Power.
- Add the following entry to your /mrcjava/WEB-INF/web.xml file:
<servlet>
<servlet-name>SAMLMetadata</servlet-name>
<servlet-class>com.mrc.http.security.saml.SAMLMetadata</servlet-class>
</servlet>
<servlet-mapping>
<servlet-name>SAMLMetadata</servlet-name>
<url-pattern>/saml/metadata</url-pattern>
</servlet-mapping>
Next, you will need to download the SAML configuration file. You can download this file and place it into your /mrcjava/WEB-INF/classes folder.
This file ships generic and it now requires some specific information about itself (the SP). Specifically:
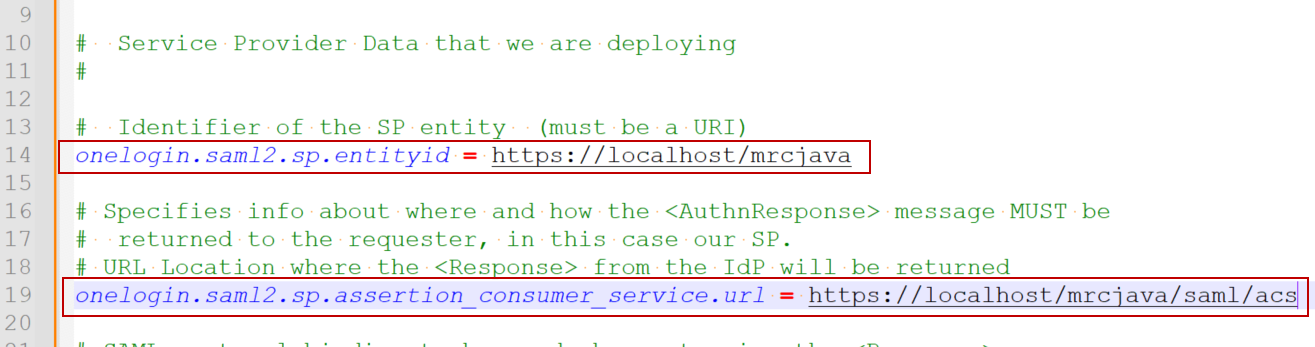
Change lines #14 and #19 to reference your m-Power server address:
- Line 14 — the SP’s entity id (typically going to be: https://your_server_name/mrcjava)
- Line 19 — the ACS URL (typically going to be: https://your_server_name/mrcjava/saml/acs)
Line #38 may need to be changed depending on what information your IdP is sending back to m-Power about the user. If not sure, leave this value alone for the time being.

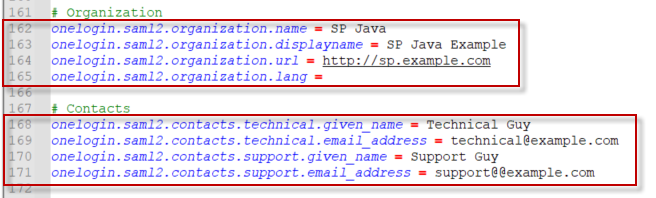
Lines 162 through 171 (Organization and Techincal/Support contact info) should also be populated as this information will be sent along with the SP metadata.
Load IdP Information
Now that you have added in the necessary information about the SP, it’s time to turn your attention to adding information about your IdP.
Line #53 — IdP’s entity id
Line #57 — IdP’s SAML URL endpoint

This IdP information essentially instructs m-Power (the SP) where/how to connect to your IdP.
Lastly, please load the x509 cert from the IdP on line #79. This needs to be unformatted with no line breaks. Tools such as https://www.samltool.com/format_x509cert.php can help assist converting an x509 into a string format, if necessary.

Save this new onelogin.saml.properties file. Restart Tomcat.
If your IdP needs our metadata, you can access it at the following url: http://your_server_address_goes_here.com/mrcjava/saml/metadata
Finishing Touches
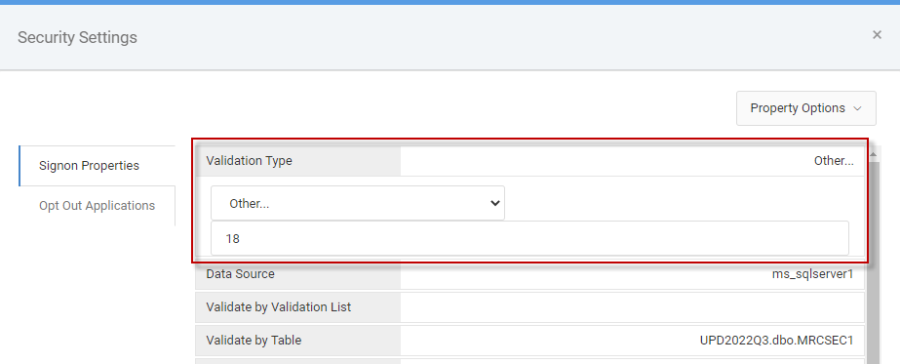
Now that SAML has been configured, we just need to tell m-Power to utilize this method. At the dictionary level, change your m-Power data dictionary’s validation type to 18.
From the Admin menu -> Menu & Security -> Edit Security Settings -> Signon Properties -> Validation Type. Change the dropdown to ‘Other…’ and type 18.
Add the following code to your /mrcjava/WEB-INF/web.xml file:
<filter>
<filter-name>SAMLFilter</filter-name>
<filter-class>com.mrc.http.security.saml.SAMLFilter</filter-class>
<init-param>
<param-name>dictionaries</param-name>
<param-value>MYDESIGNERX</param-value>
</init-param>
<init-param>
<param-name>opt-out-urls</param-name>
<param-value>/some/url,DD.IXXXXXs</param-value>
</init-param>
</filter>
<filter-mapping>
<filter-name>SAMLFilter</filter-name>
<url-pattern>/servlet/*</url-pattern>
</filter-mapping>
<servlet>
<servlet-name>SAMLacs</servlet-name>
<servlet-class>com.mrc.http.security.saml.SAMLCallback</servlet-class>
</servlet>
<servlet-mapping>
<servlet-name>SAMLacs</servlet-name>
<url-pattern>/saml/acs</url-pattern>
</servlet-mapping>
Opt-out-urls
<init-param>
<param-name>opt-out-urls</param-name>
<param-value>/some/url,DD.IXXXXXs</param-value>
</init-param>
Optional: Allows a comma separated list of URL fragments. If they are found in the requested URL, the filter will skip the SAML logic. Use this if you want to opt a specific application out of SAML security.
Dictionaries
<init-param>
<param-name>dictionaries</param-name>
<param-value>MRCWORKLIB</param-value>
</init-param>
Optional: Allows you to specify which dictionaries you want to secure with SAML. If the parm is not set, SAML will be applied to all dictionaries. If you specify this parm with one or more dictionaries (comma separated) then SAML will only apply to those dictionaries. In the above example, a data dictionary named “MRCWORKLIB” is the only data dictionary that that will secure by SAML.
Microsoft Entra SAML Configuration
The above instructions are all that is required on the SP side to configure and utilize SAML. However we realize that there is still an IdP component. While we cannot provide documentation on every possible IdP that exists, we thought it would be helpful how to configure a popular IdP (Microsoft Entra) for SAML connection with m-Power.
Add Microsoft Entra SAML Toolkit
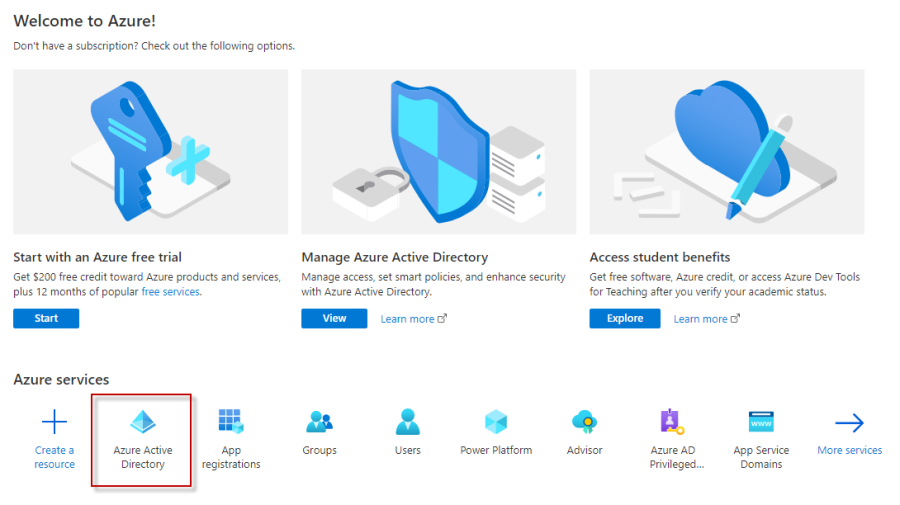
Sign into your Microsoft Azure Portal with an admin account. On the home page, find the Azure services section and select Microsoft Entra ID.
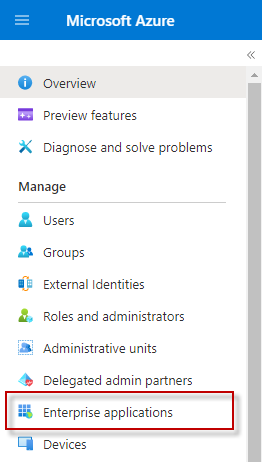
From the left-hand navigation menu, select Enterprise applications.
Select New application.
Search for Microsoft Entra SAML Toolkit and select it from the results and assign a name to the application.
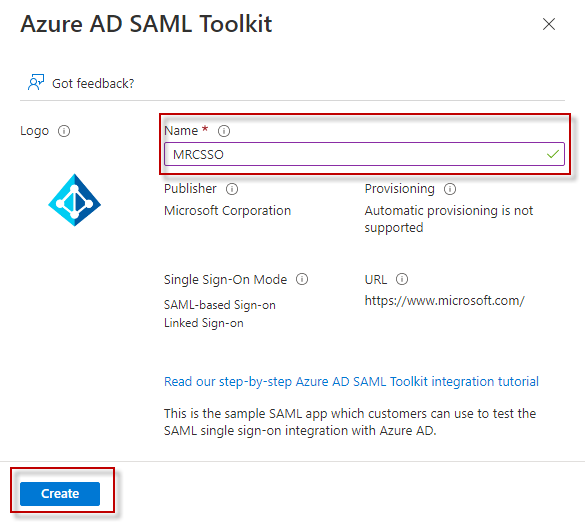
Press ‘Create’ and wait for the application to be created.
Assign Users
From left-hand menu, select Users and groups. Select Add user/group. Select the appropriate groups, users, or roles to use with your m-Power dictionary’s SSO. Finally click Assign.
The purpose of this is to tell Entra what users should be allowed to access m-Power based applications.
Configure SSO for Microsoft Entra ID
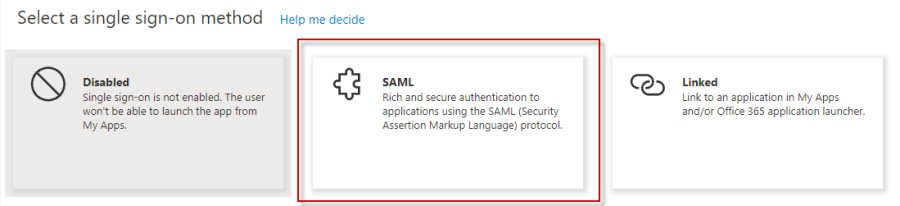
From the left-hand menu, select Single sign-on. Then select the SAML single sign-on method.
On the Set up single sign-on with SAML page, click the pencil icon for Basic SAML Configuration to edit the settings.
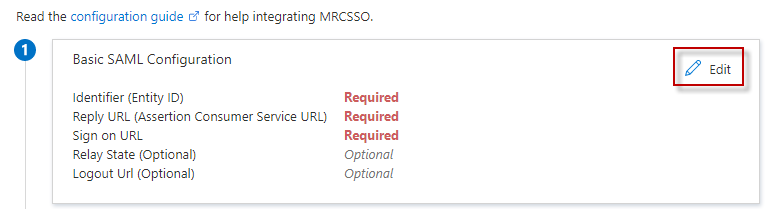
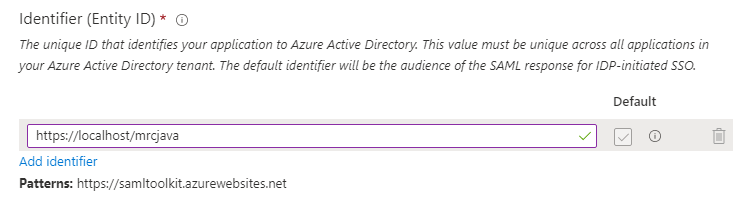
Identifier (Entity ID) – Edit the URL and enter your SP’s entity ID.
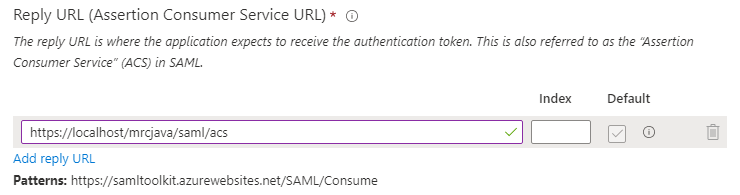
Reply URL (Assertion Consumer Service URL) – Click Add reply URL. Enter your m-Power server’s ACS URL.
Sign On URL – Enter the m-Power dictionary login URL (i.e. https://your_server_name/mrcjava/servlet/DICTIONARY.Login)

Click Save at the top of the page.
Add Azure IdP Info to m-Power
Now that Azure has been properly configured, there is just a bit more housekeeping needed to be done within m-Power, specifically within the/mrcjava/WEB-INF/classes/onelogin.saml.properties file.
On the Azure Portal, in your application’s Single Sign-On set up page, scroll to section 3 SAML Certificates, click the Certificate (Base64) Download link.
Change the .cer extension to .pem. Open the file with a text editor (such as Notepad++).
This certificate string needs to be unformatted with no line breaks when entered into the m-Power configuration file. To help with this, open your browser to https://www.samltool.com/format_x509cert.php.
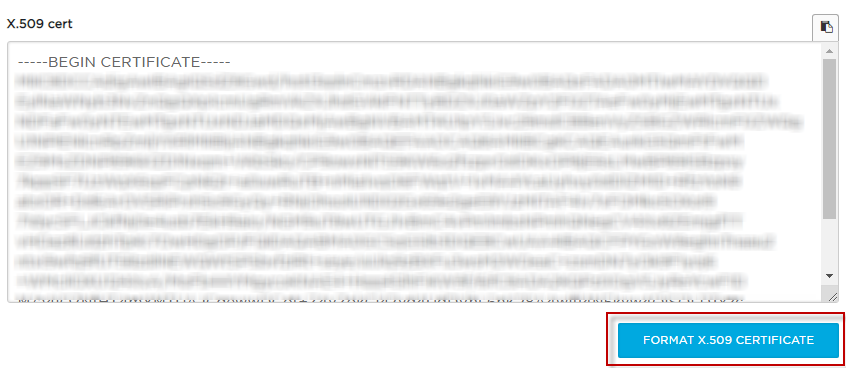
Copy/paste the entire text from the .pem file into the X.509 cert section of the samltool website. Click Format x.509 Certificate.
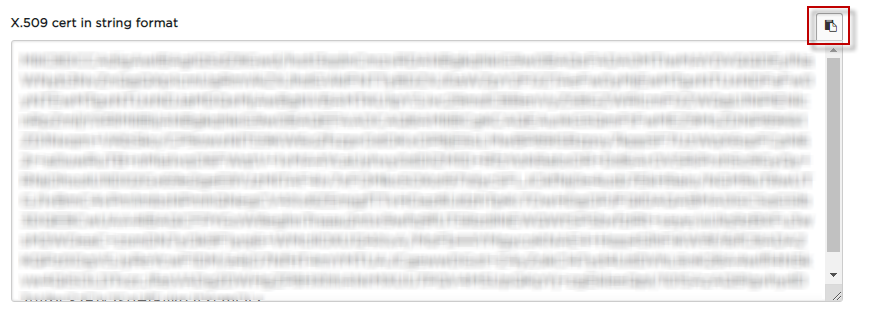
Copy the string from the last input box X.509 cert in string format.
Paste this string into line #79 of the onelogin.saml.properties file onelogin.saml2.idp.x509

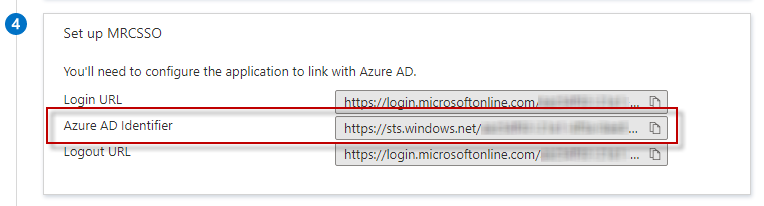
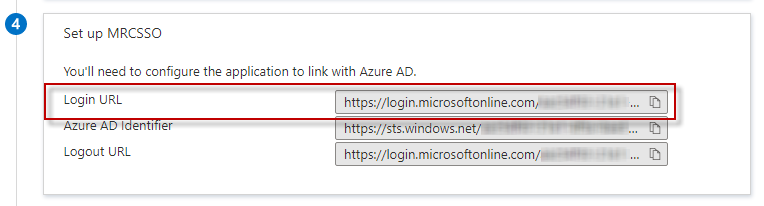
Scroll to section 4 Set up [Application Name] on the Azure portal.
Copy the Microsoft Entra Identifier to line #53 onelogin.saml2.idp.entityid.

Copy the Login URL to line #57 onelogin.saml2.idp.single_sign_on_service.url.

Signed Assertion
Some IdP’s require that the assertion being sent to the IdPbe signed. If that is the case in your situation, please review the following steps:
Generate Certificates
You will need to generate a signed public certificate as well as a signed private key. One may use the openssl program to do so.
Navigator to the directory of your choosing (i.e. cd /temp). Then run the following command:
openssl req -x509 -days 365 -newkey rsa:2048 -nodes -keyout SAML-key.pem -out SAML-cert.pemYou will be prompted to answer verification questions for the signed certificates:
- Country Name (2 letter code)
- State or Province Name (full name)
- Locality Name (eg, city)
- Organization Name (eg, company)
- Organizational Unit Name (eg, section)
- Common Name (eg, your name or your server’s hostname)
- Email Address
After answering the questions, two files will be created in your current directory:
- SAML-cert.pem
- SAML-key.pem
Add Certificate and Key Information to m-Power’s SAML Property File
The string contents of both will need to be added to the onelogin.saml.properties file. However, once again, the strings need to be unformatted.
Open the SAML-cert.pem file in a text editor (such as Notepad++). Copy/paste the entire text from the .pem file into the X.509 cert section of the samltool website. Click Format x.509 Certificate.

Copy the string from the last input box X.509 cert in string format. Paste this string into line #43 of the onelogin.saml.properties file onelogin.saml2.sp.x509

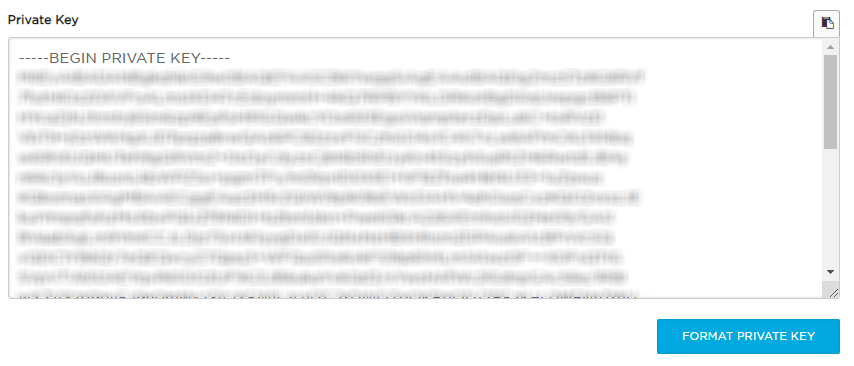
Next, open the SAML-key.pem file in the text editor. Copy/paste the entire text from the .pem file into the Private Key section of the samltool website. Click Format Private Key.
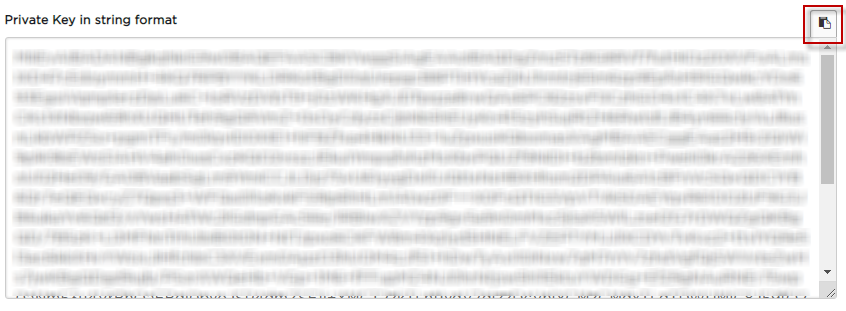
Copy the string from the last input box Private Key in string format. Paste this string into line #47 of the onelogin.saml.properties file onelogin.saml2.sp.privatekey

Finally, we need to instruct our SP to send these assertions to the SP signed. To do this, find line #101 in the onelogin.saml.properties file. Set onelogin.saml2.security.authnrequest_signed value to true.

Save and restart Tomcat.
Configure Azure
Change the extension of the SAML-cert.pem file to .cer.
From the Enterprise Application Single Sign On Set Up screen, find the SAML Certificates section. Click the pencil icon to edit the Verification Certificates.
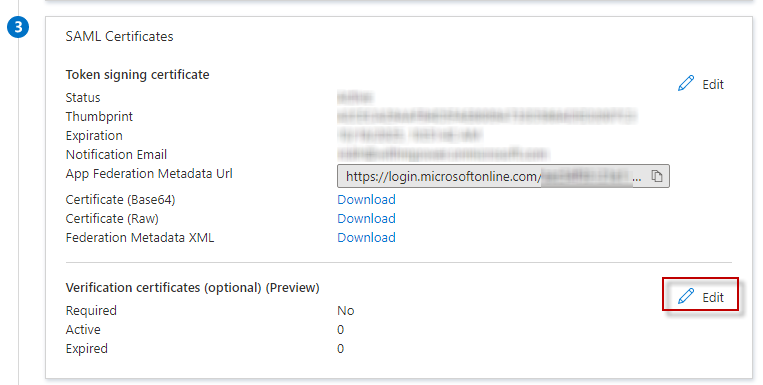
Check to box to Require verification certificates and click the button to Upload certificate. Select the SAML-cert.cer file generated in the previous steps.
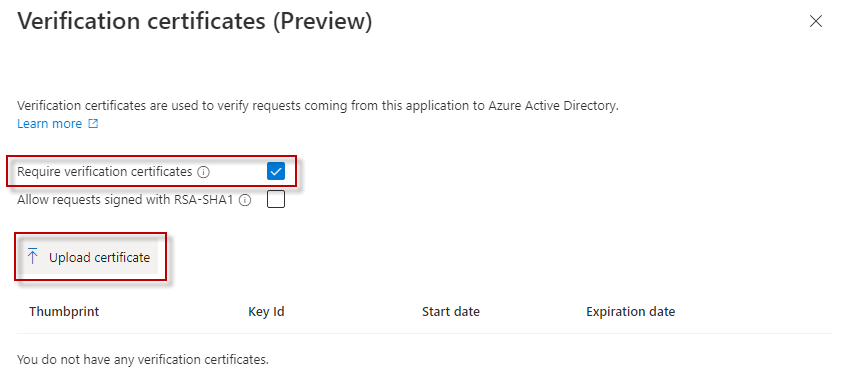
Click Save.
You will now be able to sign into your m-Power applications with your Microsoft Azure credentials via SSO and SAML.