Overview
There may be times when the standard look of a Multiple Row Data List may not work for you. For instance, let’s say the row you want to print is relatively short (perhaps only one field), and there are many rows to display. Rather than having all the data in one column, you could use Freemarker logic to print some of that data into a second column.
As an example, lets take a look at a list of 50 states. Here is a before picture:

As you can see, there is far too much wasted space. Instead, using Freemarker, we can have output that looks like this:
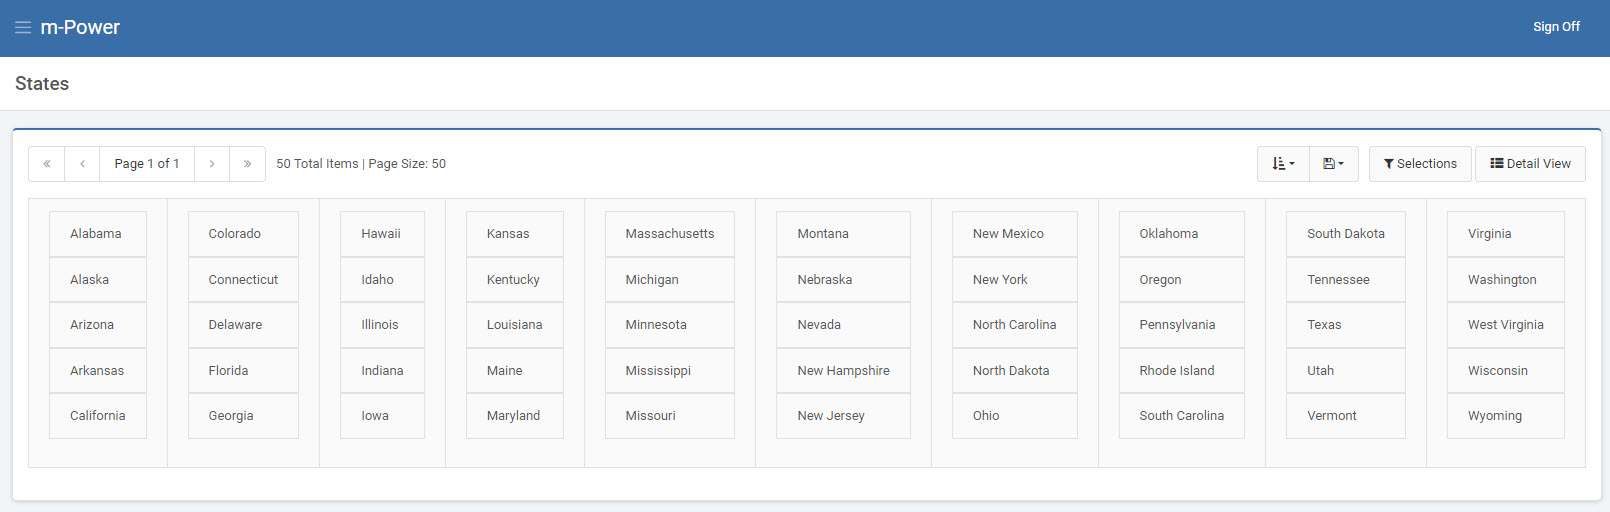
We are now able to utilize the screen much more efficiently.
Configuration
Let’s walk through how this is done:
- After compiling your application, enter m-Painter and Toggle the source view.
- For simplicity, remove the Table Header. Find
<thead>and delete all the way to:</thead>. - To create a screen like the one above, we are going to use Freemarker to create looping logic in the HTML.
- Find this section of text (Beginning with the #list tag and going to the /#list tag):
<!-- <#list table_rows as row> -->
  <tr>
    <td class="text-left" nowrap="nowrap">${row.FIELD?html}</td>
  </tr>
<!-- </#list> -->
And replace it with this:
<tr><td><table class="table">
  <!-- <#assign counter = 0> -->
  <!-- <#list table_rows as row> -->
    <!-- <#if counter == 5> -->
      </table></td><td><table class="table">
      <!-- <#assign counter = 0> -->
    <!-- </#if> -->
    <tr><td class="text-left" nowrap="nowrap">
      ${row.FIELD?html}
    </td></tr>
  <!-- <#assign counter=counter + 1> -->
  <!-- </#list> -->
</table></td></tr>
Here is a review of the above text:
Line 1 — Create a nested row, data cell, and table.
Line 2 — Create a variable called counter and set it equal to 0.
Line 3 — This is the default code that generates which tells the code to begin handling data from the DB
Line 4 — Immediately check to see if the counter variable is equal to 5. This will never be the case until the code loops through 5 times. This number can be changed and will control the number of records printed per column.
Line 5 — If that was the 5th row, end the nested table and data cell. Immediately create a new one. This is what allows the tables to be placed on the same row.
Line 6 — Reassign the counter variable back to 0 to start all over again.
Line 7 — End the if logic.
Line 8 — Start a new Table row and Table data cell.
Line 9 — Print the field. Please replace FIELD with the actual name of your field.
Line 10 — End the Table row and Table data created on Line 8.
Line 11 — Reassign the counter to add 1 to its current value.
Line 12 — End the looping control that began on Line 3. When this is reached, there are no more records to print.
Line 13 — End the nested table, Table Cell, and Table Row that began in Line 1.