Overview
Once data has been selected within the Tables/Fields specification within the application’s Data Model, a developer may use the Field Settings screen, to (among other things) you can delete, reorder, and edit the appearance of fields you have selected for your application.
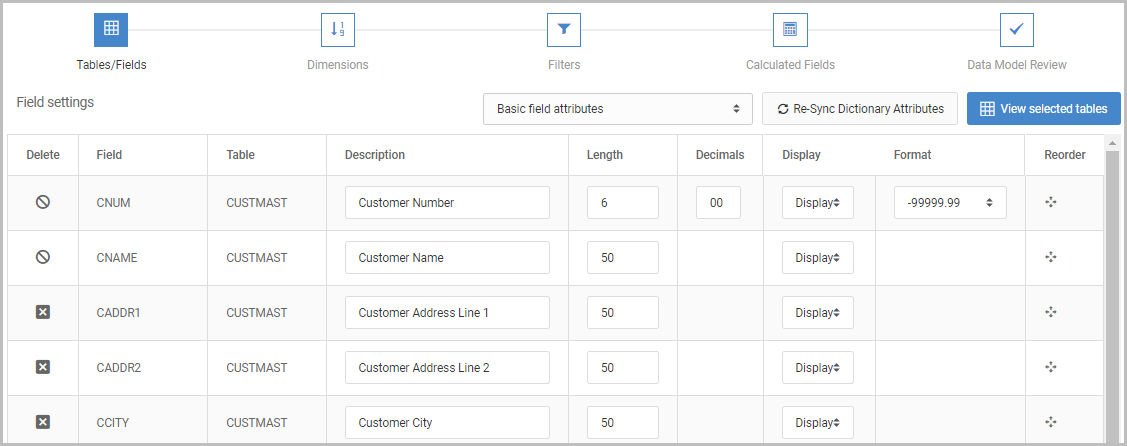
Using Figure 1 for reference, the Field Settings screen will present different field options depending on what the dropdown above the grid is set to, here:
Deleting a Field
To delete a field from your application, click the “X” referring the field you want to delete. Notice that in the screenshot the Customer Number field cannot be deleted. This is because the field is a dimension key. Any field that is linked to a dimension, external object, calculation, SmartLink, or filter cannot be deleted. You must remove these dependencies before the field can be deleted.
Re-Ordering a Field
Initially, fields will be listed in the order they were added. To reorder fields, click on the reorder icon and drag the field to the desired location. Field order is listed from top-to-bottom. The field at the top will appear first in the finished application, and the field at the bottom will appear last.
Basic Field Attributes
While you cannot use Field Settings to change values or fields in the database, you can change their appearances in the application. Therefore, note that editing in field settings is not global, rather only application specific.
Field Description
This appears in the final application, and inherits its value from its global definition at the dictionary level. Set an appropriate description so that the end-users can understand the field.
Display
Set “Display” if you want the field to appear in the application. Setting “Hide” will allow your application to use the field as necessary (such as in calculations), but not display the field to the end-user.
Length
Set the length of the field. The length includes the decimal places, such that 25.325 has a length of 5.
Decimals
For numeric fields, set the desired amount of decimal places. A blank in this column indicated your field is non-numeric (character/date/time, etc.).
Format
Select the format used to display your date or numeric data. For information on creating your own date or time format, click here.
Filter and Sorting Attributes
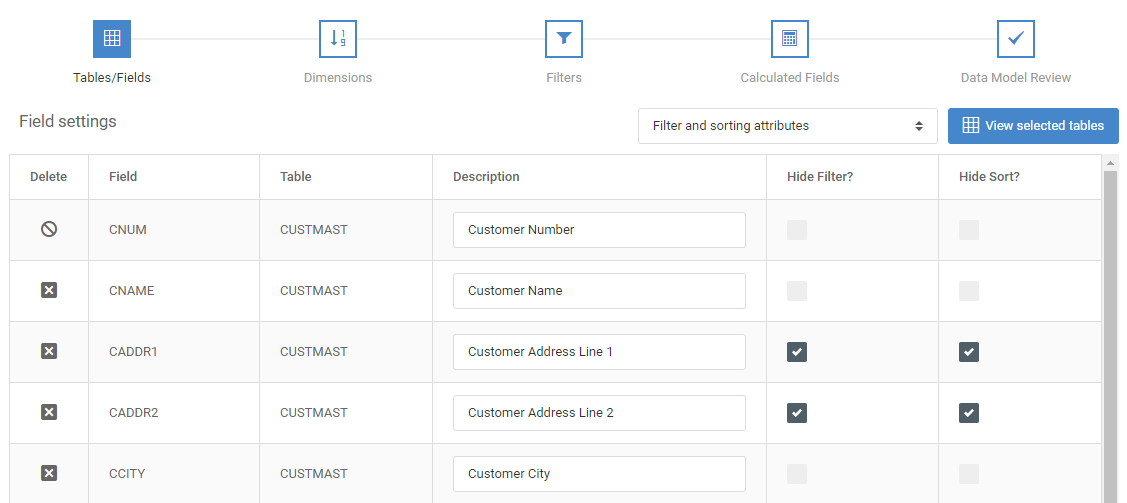
Hide Filter
Check this box to remove the ability to filter over this field during runtime selections.
Hide Sort
Check this box to remove the ability to sort over this field at runtime.
Form Input Attributes
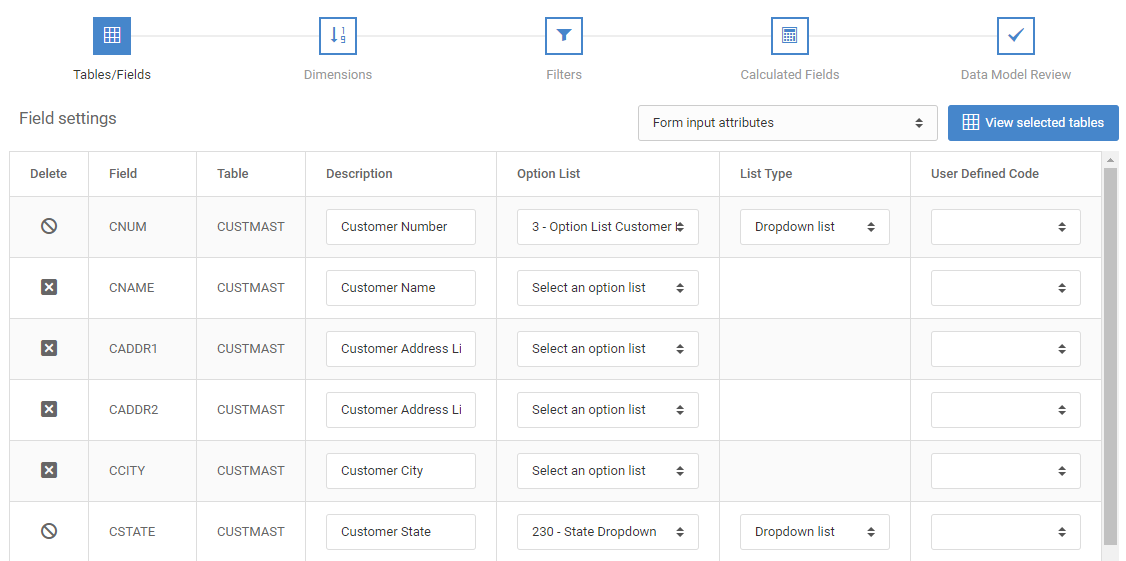
Option List
Choose an external Option List Retrieval to have the dataset automatically added to your selections input for this field.
List Type
Choose Dropdown List or Radio Button to be added to your selections input for this field.
User Def
If you would like a user to be able to upload a file to the server, select the letter ‘U’ from the dropdown. The remaining options have been deprecated.
Form Validation and Auditing
Allow Blank?
Unchecking this option will make the field required before allowing the user to submit the form. This is checked by default.
Validity Relation
This setting, combined with the Validity Value setting will allow you to restrict what information may be entered into your maintenance application. Valid relationships are:
EQ Equal to
GE Greater than or equal to
GT Greater than
LE Less than or equal to
LS Is in the list
NS Not in the list
LT Less than
NE Not equal to
NG Not greater than
NL Not less than
RG Is in the range
RB Radio Button
CB Checkbox
If using Is in the list, a dropdown will be automatically generated during the compile process with the values specified in the Validity Value setting.
If using Radio Buttons, radio buttons will be automatically generated during the compile process with the values specified in the Validity Value setting.
If using the Checkbox option, a checkbox will be automatically generated during the compile process with the value specified in the Validity Value setting.
Validity Value
This is the value that you want to compare the field value entered to in order to restrict the user from proceeding.
Default for Add
Text entered here will be entered into the field initially when a new record is being added. Users may change it to whatever they wish, however this is what they see first.
Audit
This setting allows you to automatically map user metadata (user, date, time, etc.) to a field in the maintainer for auditting purposes.
You can find out more in detail about these options here.
Allow Lowercase?
This option determines whether or not an alpha field can be submitted to the database with lowercase letters. If this is unchecked the field will be converted to uppercase when it is submitted.