Overview
The m-Power Data Explorer allows users to design their own queries based on data sets created for them by m-Power developers. This separation ensures that end-users have access to a wealth of key features, such as:
- Overall layout (such as data listing, Pivot Table, graphing, etc…)
- Column choice and ordering
- Run-time filtering
- Calculations
- Dashboard customization
- And much more
At the same time, end-users do not have to be bothered with how to join tables or worry about other database concerns. Instead, they will have access to a data set that an m-Power developer creates for them. Developers can apply global filtering, row level security, or useful calculations that will automatically be included with the data set. Developers can be confident that end-users won’t accidentally create a bad query, because the developer has the ultimate control of the underlying data set presented to the user.
Video Walkthrough
Watch this 5 minute video that illustrates how to create an m-Power Data Model.
This document will walk you as a developer through the entire process of configuring Data Explorer, and ultimately creating and deploying data models for end-user consumption in a runtime environment. Please see this document to learn more about how to utilize the Data Explorer at run-time and creating designs from models.
Data Explorer is built right into the m-Power platform and is accessible to all developers who have login credentials to the m-Power Development Interface. This means from the m-Power development interface, a developer may explore Data Models they’ve created and save designs directly from these models. However end-user accessibility to Data Explorer to explore these Data Models and view/create saved designs in a runtime environment will require an additional license.
Please contact support@mrc-productivity.com for more information on licensing m-Power Data Explorer. If this is your first experience working with the Data Explorer, a timed trial license may be available.
Initial Configuration
- Install License – Whether you have obtained a permanent or temporary license, you will need to install it to your m-Power server. The private license should be placed in /m-power/proddata/conf. The public license needs to be stored in /m-power/mrcjava/. Please restart Tomcat after completing this step.
- Enable Security – The Data Explorer requires that Data Dictionary security be enabled for the current Data Dictionary.
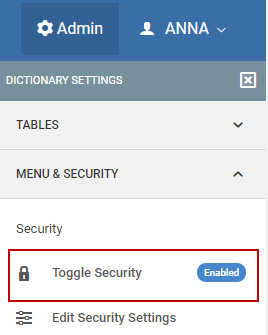
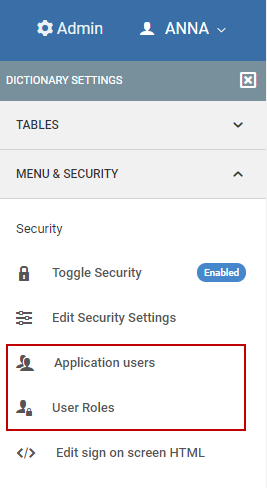
- Configuring User Roles – The Data Explorer utilizes the User/Role logic that currently exists for the m-Power end-user menu. When data sets are created, they can be assigned to user roles. When this occurs, only users who belong to this role can access the data set. You can access both User and Roles management via “Admin Menu” -> “Menu & Security.” You can add users via the “Application Users” button. You can assign these users to roles via the “User Roles” button. .
Verify Runtime Properties – The mrc-runtime.properties file located in /m-power/mrcjava/WEB-INF/classes needs to have valid properties enabled for “mrc_data_store” and “mrc_data_store_ip”. View this file in a text editor. If the two highlighted lines are missing, commented out, or incorrect, your Data Explorer will not work as expected. Any changes to this file require a Tomcat restart. Below is a screenshot of the default value that will work for most customers. Please be sure to adjust your port number if you are not using the default port 8011.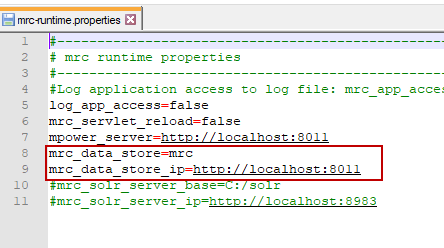
Creating Data Models for Data Explorer
- Create a New Model – To create a new Data Model, click the “Models” button in the header. Then click “Create New Model.” Create your model as you would create any application. Some important notes about creating Data Models:
- Data Models cannot be painted through m-Painter.
- Your end-users will have the option to control how they want their data to be grouped/subtotaled at run-time. The only fields available to be sub-totaled will be ones you’ve included in the “Dimensions” section of your model.
- Users can choose any field that you have included in the model. To help minimize the number of data set applications you have to create, err on the side of caution and include any columns you think a user may want to see at run-time.
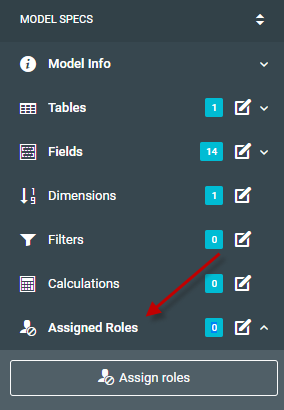
- Assign Model to User Roles – Now that your data set has been created, it can be assigned to user roles (Models that are unassigned are visible to all, assuming they have not been marked Private). To do this, click the “Assigned Roles” option at the bottom of the left panel. To assign, click the Role you wish to assign to this model. When completed, click “Close”
- Provide end-user access – To allow your end users to explore this Data Model, click the “Launch Runtime Data Explorer and Dashboarding” button on the Data Explorer menu:
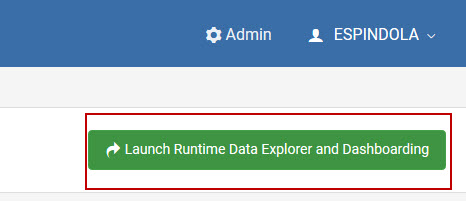
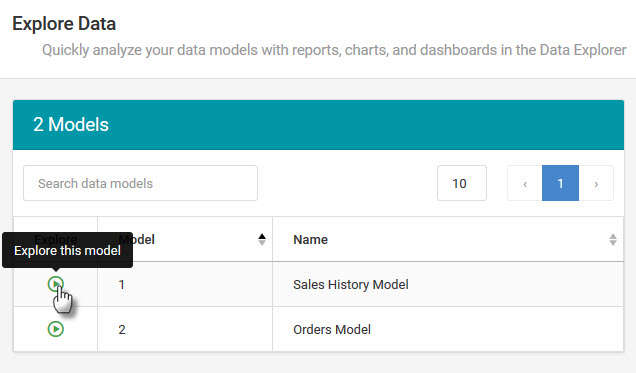
This will open the Data Explorer menu in a runtime environment. Click ‘Explore’ on the model you have developed for users.
In this separate runtime Data Explorer menu, an end-user is contained to Data Explorer and cannot access any features of the developer interface. This includes editing m-Power applications, Data Models, and accessing Admin features.
Once the Explorer window opens, you may copy and paste the URL from your browser to share directly with users. Otherwise if using m-Power’s built in menuing system, you may alternatively add this as an option on the menu for easier user access.
- Customizing the Dataset – While you cannot use m-Painter for your m-Power Data Model, you can utilize Field settings to control aggregate behavior, dropdown/calendar options, etc.
Promote to Production
When promoting Data Models, the following table lists out the necessary files required to be promoted:
| File | Location | Description |
|---|---|---|
| saved-data-models-vue.json | /m-power/mrcjava/WEB-INF/classes/DD | List of all Data Models within the data dictionary |
| DXXXXXs.json | /m-power/mrcjava/WEB-INF/classes/DD | Data Model specifications |
| DXXXXXp.xml | /m-power/mrcjava/WEB-INF/classes/DD | Data Model properties |
Important notes
- Linux users will need to add the following entries into their /mrcjava/WEB-INF/web.xml file:
<servlet>
<servlet-name>Analytics</servlet-name>
<servlet-class>com.mrc.analytic.App</servlet-class>
</servlet>
<servlet-mapping>
<servlet-name>Analytics</servlet-name>
<url-pattern>/servlet/App</url-pattern>
</servlet-mapping>

<servlet>
<servlet-name>analytic</servlet-name>
<servlet-class>mrc.AnalyticsServlet</servlet-class>
</servlet>
<servlet-mapping>
<servlet-name>analytic</servlet-name>
<url-pattern>/servlet/mrc.AnalyticsServlet</url-pattern>
</servlet-mapping>
- Question: I’ve run all the above but am getting a HTTP 404 when trying to run the Data Explorer. What am I missing?
Please check you /WEB-INF/web.xml file for the following entry. If it is missing, add to the end of the document, directly before </web-app><filter> <filter-name>LoginFilter</filter-name> <filter-class>mrc.LoginFilter</filter-class> </filter> <filter-mapping> <filter-name>LoginFilter</filter-name> <url-pattern>/servlet/App</url-pattern> </filter-mapping>