New m-Power customers (using a Windows Server) will want to follow the steps below for installing and configuring m-Power.
Installation
- Download the m-Power software. To download m-Power, please contact a member of our sales team.
- Before continuing, be sure to download and save your mrclicense.txt file to your c:\ drive.
- Install m-Power by double clicking the .exe file. (Administrator rights are required for installation).
- The installation program will install all necessary components of m-Power (including the Java Developer Kit, as well as service installation for your Tomcat application server).
- Once completed, you will be required to reboot your PC. m-Power will be unable to compile new applications until after this step is completed.
- Finally, you should be able to test that your system was set up correctly by going to (where 999.999.999.999 is the IP address of your Windows server). Note: If you can not connect, be sure that no firewall is blocking activity on Port 8011.
Configuring m-Power
You should now be able to access the m-Power Login screen. For Username, enter your database Administrator Username. For Password, enter your database Administrator Password.
Click Configure m-Power.
This install step requires specific authority to perform the following database functions:
- Create Schemas
- Create/Alter Tables
- Create/Drop Procedures
- Select/Insert/Update/Delete Queries
Click Initiate Configuration.
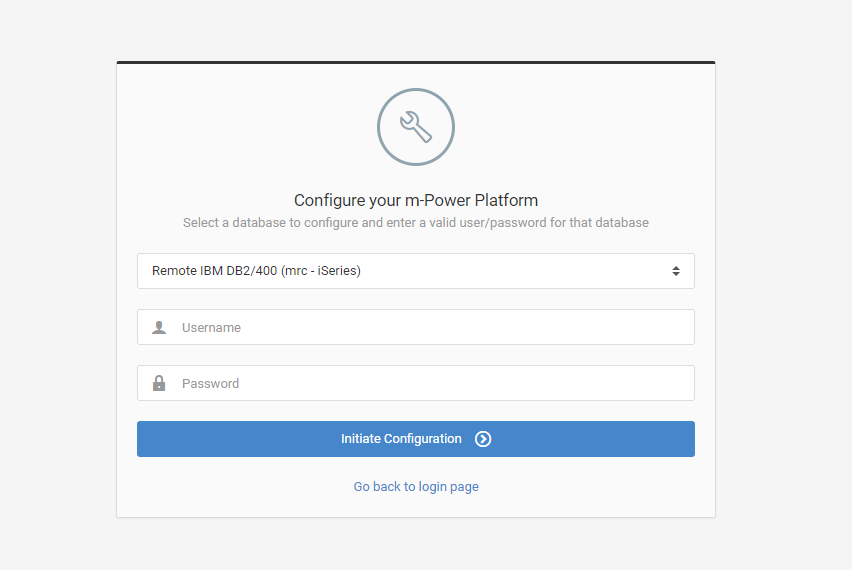
m-Power is now finalizing the installation process on your database. The MRCAPPLLIB and MRCMPOWER schemas are currently being built on your database.
Signing into m-Power
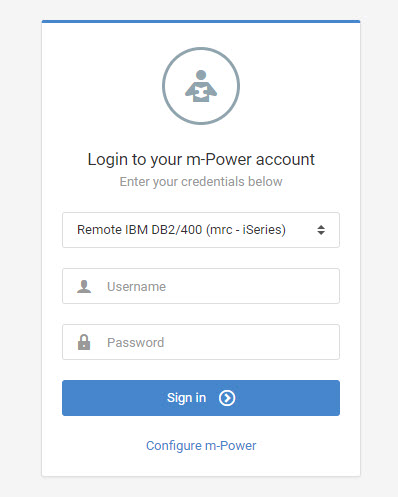
Once the configuration is completed you will be taken to the Database Selection Screen. Select the appropriate database from the drop-down list, enter your user name and password. Click Sign In.
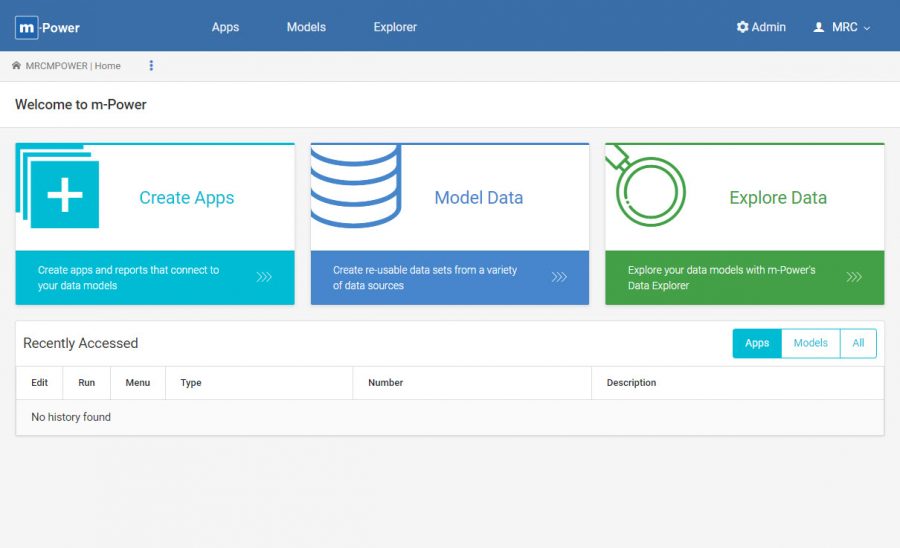
Once you are logged in you will see this screen:
Finally, click the “Apply Update” button when prompted. If you see an error, please ensure the admin user has full authority on the database. Once successfully completed, you are finished installing m-Power.