

One feature of Maintainers is to allow the uploading of files from your client machine to the server. This feature is unique in the fact that it will also add a record to the database, as well as upload the specific file to the server.
Getting Started
To begin, create a Maintenance application as you normally would.
- Navigate to Field Settings.
- Change the view dropdown box from “Basic field attributes” to “Form input attributes”.
- Locate the field that will serve as the File Name for the uploaded file.
- Check the box for “File Upload”.
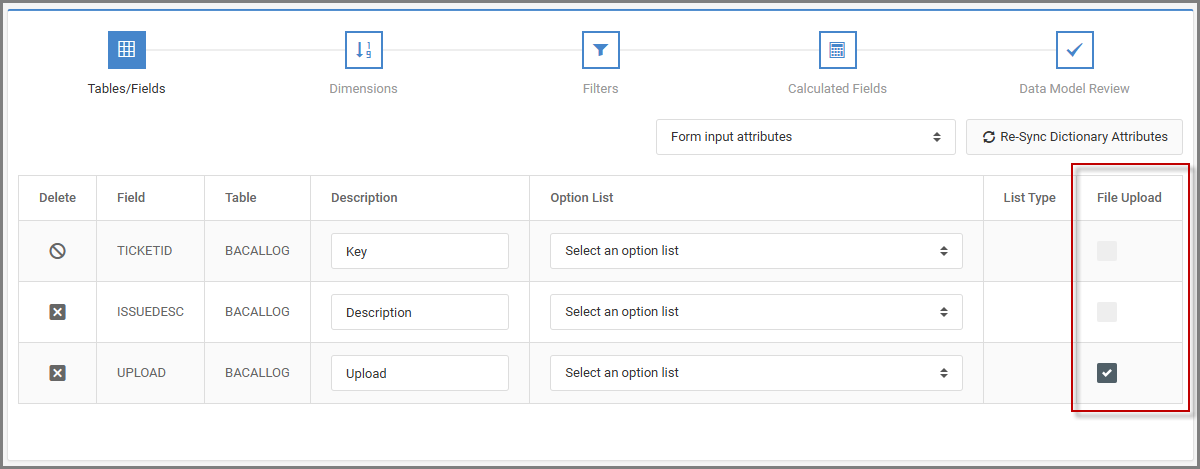
After compiling, m-Power will automatically transform this standard input field into an interactive file upload box.
App Properties
Before running the application, let’s look at the application properties for this program. Scroll to the bottom of the App Properties screen to find these three options.
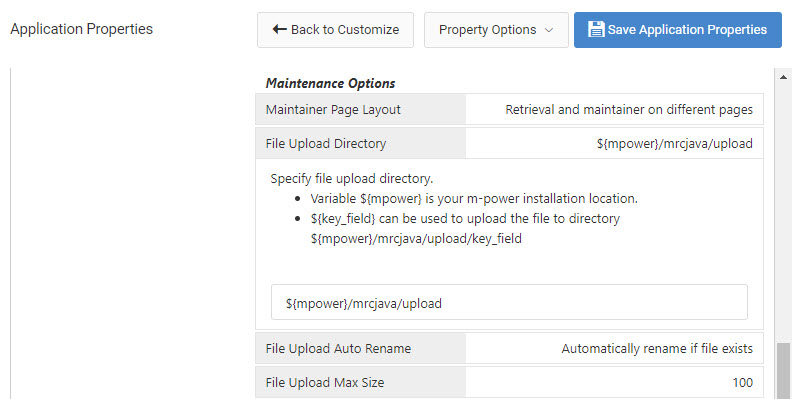
- File Upload Directory: The location on the m-Power server where the files will be saved. If the specified folder does not exist, m-Power will create it. While you must pick a valid drive, this property supports two substitutions for dynamic uploading:
${mpower}: Automatically selects the m-Power folder (highly useful for seamless deployment between development and production environments).${FIELD}: Replaces “FIELD” with the name of an actual field in your app. This allows you to route files to specific directories dynamically based on the form values your end-user selects.
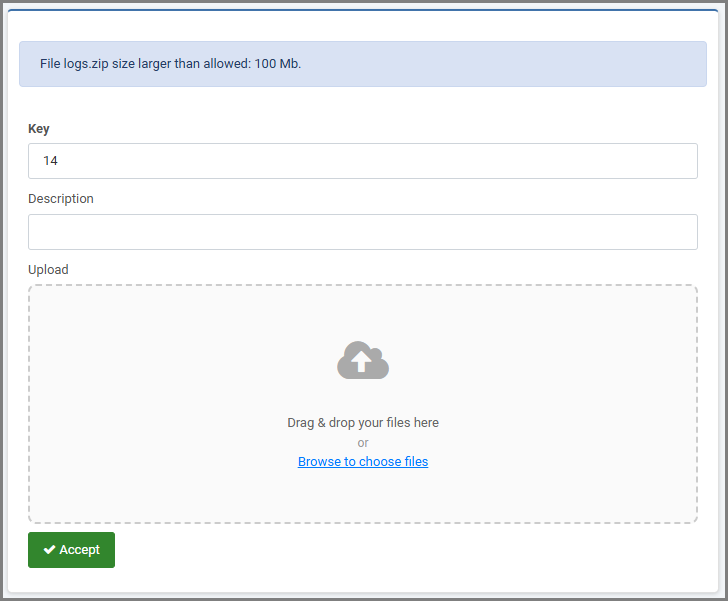
- File Upload Max Size: The maximum allowable file size, in megabytes. If a user selects a file that is too large, they will receive a runtime error prompting them to pick a smaller file. (Default is 100 MB).
- File Upload Auto Rename: Controls the system’s behavior when a file with the exact same name already exists in the destination directory. You can choose to have m-Power automatically rename the new file (e.g.,
file.txtbecomesfile(1).txt), or you can set it to automatically overwrite the existing file.
Make any necessary changes and click OK to save.
Runtime Usage
When running the application, the standard text input is replaced by a modernized upload interface. This interface supports uploading multiple files at one time.
At runtime, simply drag and drop your files directly into the upload box, or click the box to browse your local machine.
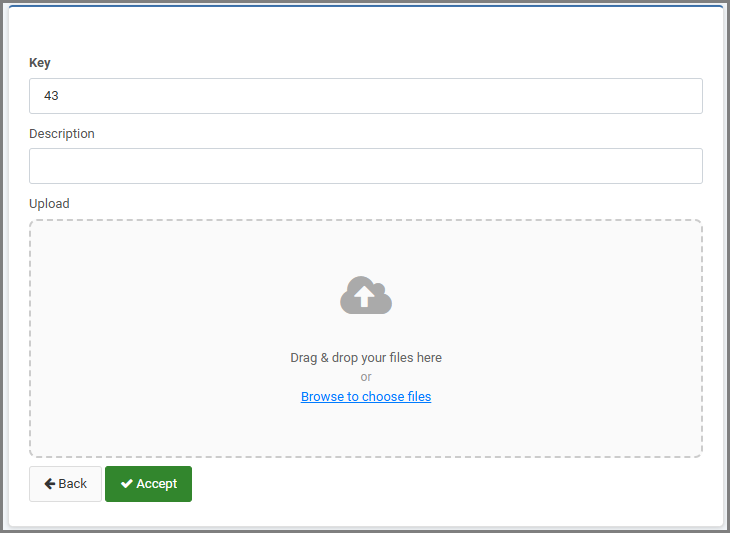
Once selected, the app will place the files into a temporary staging area (queue).
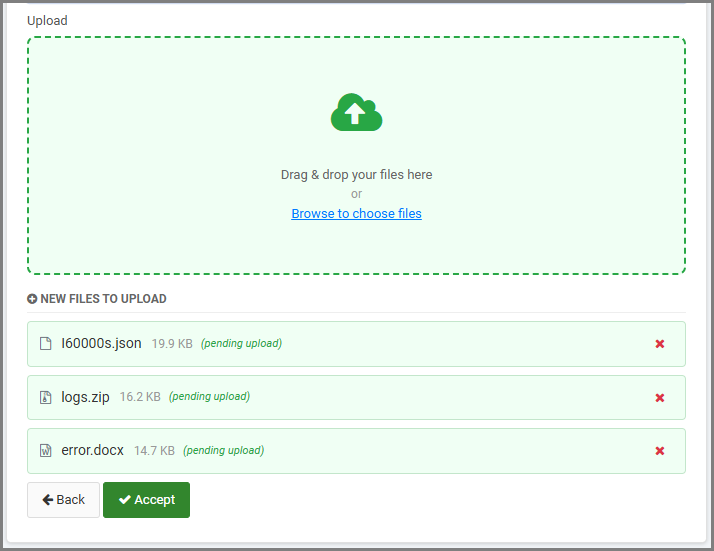
While the files are in this staging area, you have the opportunity to review them and remove any incorrect files before confirming the upload.
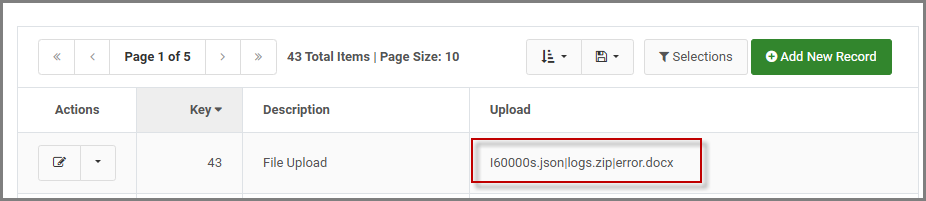
After submitting the form, all the different filenames are written to the same database field in a single record, separated by a pipe character (|).
Managing Files in Update Mode
When returning to an existing record in action update mode, you can easily view the previously uploaded files.
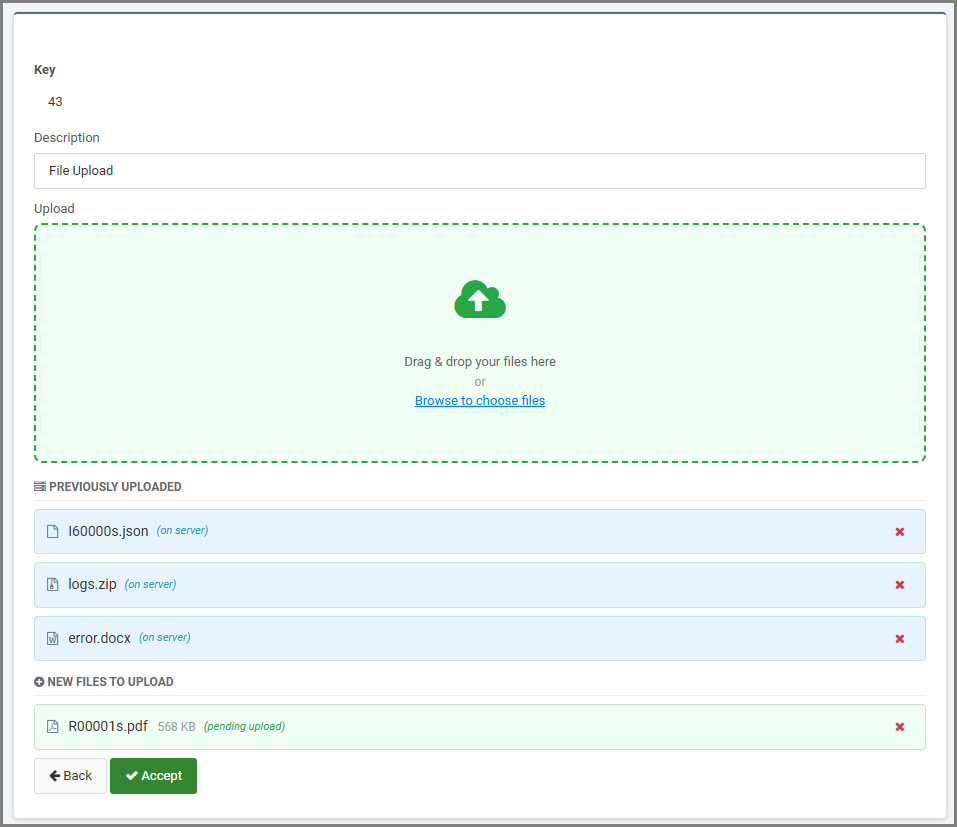
- Removing Files: You can choose to remove an existing file by clicking the red X next to the desired file name.
- Adding Files: You can also upload additional files while in this update mode.
After submitting your changes, the removed filename is deleted from the database record, ultimately breaking the relationship to the file on the server.
Error Checking
m-Power includes built-in validation to ensure that proper information is being uploaded. Below are the common errors a user might encounter:
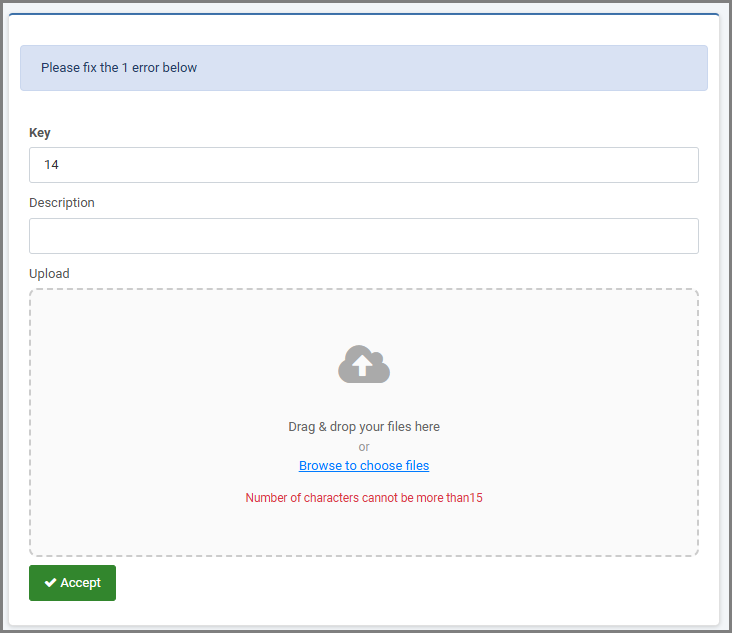
File Name Too Long: The total number of characters in the file name cannot exceed the length of the File Name field in your database. For instance, if you attempt to upload Damaged_goods.jpg (17 characters) into a 15-character alpha field, the upload will be rejected.
File Exceeds Maximum Size: If a user tries to upload a file that exceeds the MB limit defined in App Properties, the upload will be blocked.
Reverting to the Legacy Single File Upload
If you prefer the look and functionality of the legacy single file upload input, you can easily revert to it using m-Painter.
- Open m-Painter and click on the upload input field.
- In the blue navigation bar at the bottom, ensure that FORM-GROUP is selected.
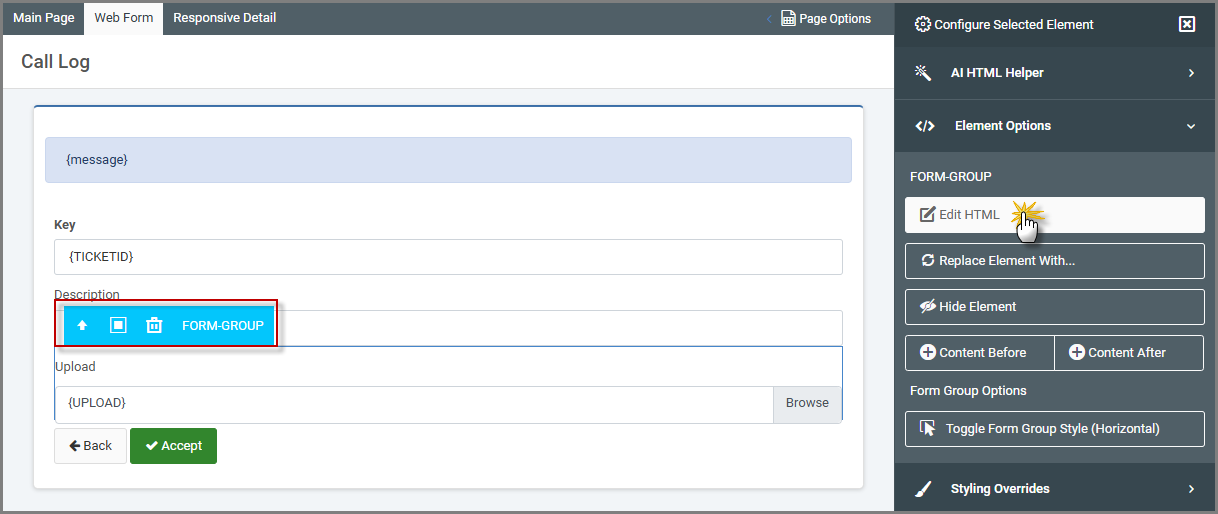
- From the right-side element panel, navigate to Element Options and select “Edit HTML”.
- Find and remove the class
"mrc-drop-zone".
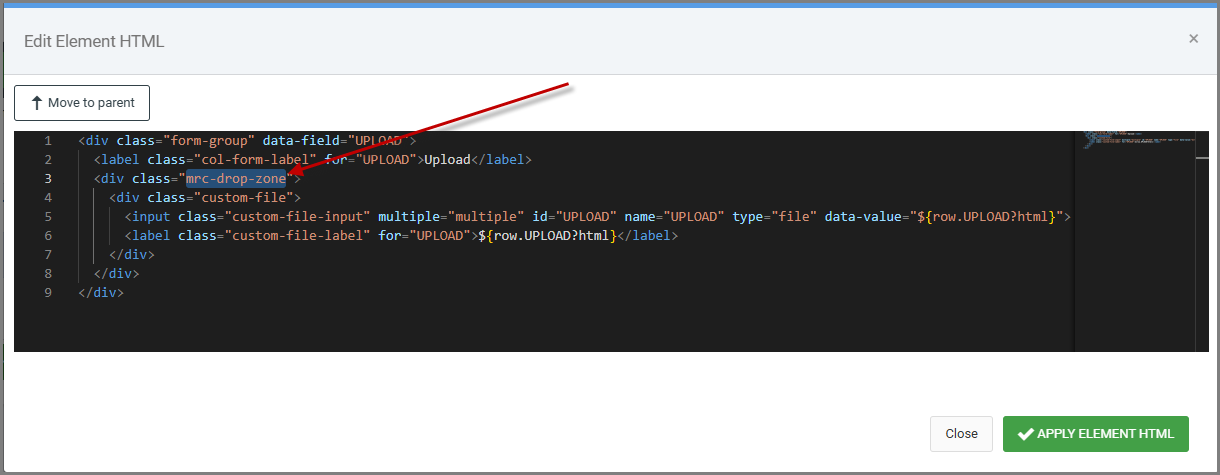
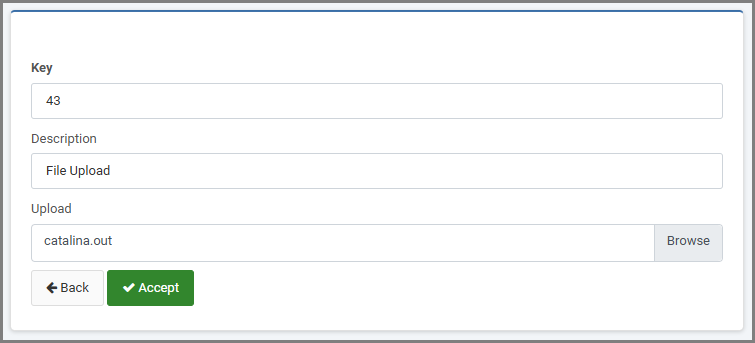
Once you save your changes in m-Painter and run the maintainer, the file upload logic will return to the legacy appearance and single file upload behavior.
Downloading files from the server
By default, the upload feature will not automatically include the ability to view or download any uploaded files. However, a developer may use m-Painter’s smartlink functionality to add a hyperlink to their uploaded file, thus allowing the user to view the uploaded view.
For how to do this, please see here.
Secure File Upload/Download
The above setup is the default method of uploading a file through an m-Power maintainer. Using the above method, the uploaded file is potentially available to anyone who knows the full URL of the file’s location. If there is a need to keep files secure behind m-Power/Tomcat security, please follow the below instructions.
Configuration
The required setup is similar for the maintainer to upload a file:
- Check the box for “File Upload” in the Field Settings -> “Form Input Attributes”.
- Set the App Property -> File Upload Directory to a valid directory. The secured directory of your choosing must be outside of the /mrcjava context. For example:
C:\SecureUploadis a valid directory.
Secure File Download
To download a secure file, users will still click a link to access and download the file to their local PC. However, with this setup the browser will no longer display the file’s location via the URL. Instead, a developer will assign an “output queue” from the m-Power Interface Messaging and Scheduled Task module to “hide” the location to the runtime users.
Output Queue Setup
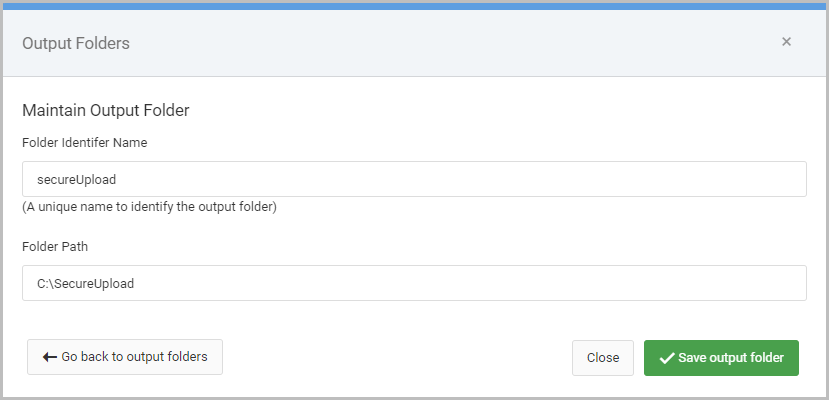
- Go to Admin -> Messaging and Scheduled Tasks -> Output Folders.
- Click “Add Output Folder”.
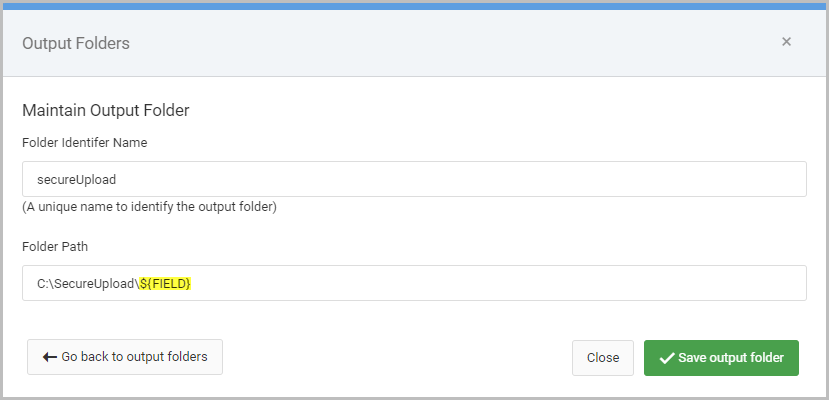
- Specify a folder name and specify the location of the secured directory as set in the maintainer’s app properties (e.g.
C:\SecureUpload).
Download Link Setup
m-Power Developers will build the link to access the secure file in m-Painter. Select the upload file data field. From the right-side element panel, click “Edit HTML”. Use the syntax below to construct the appropriate link URL:
<div data-filelist="row.SFFILENAME?html" class>
<a href="DATADICTIONARY.M12345s?downloadbinary=1&filefield=SFFILENAME&f=${file}&queue=SecureUpload&slnk=1&KEYFIELD=${row.KEYFIELD?url}&FIELD=${row.FIELD?url}">${file}</a></div>
See the explanation of the parameters below:
data-filelist="row.SFFILENAME?html": Tells m-Power which field to loop through to display the uploaded files. Replace row.SFFILENAME?html with your actual field.DATADICTIONARY.M12345s: This is the maintainer application (or it can be another app secured against Row Level Security. See below for steps on implementing Row Level Security). Replace these values with your appropriate dictionary and application number.downloadbinary=1: Specifies the secure file logic should be called to return a file, not call an application.filefield=SFFILENAME: Tells m-Power what field to look at to find the name of the file to download. Please replace SFFILENAME with your actual field.f=${file}: Specifies the exact filename to download in the URL.queue=SecureUpload: Tells m-Power to get the file from the secure location created in the Messaging and Scheduled Tasks Output folder. Replace SecureUpload with whatever Folder Identifier Name was chosen in the Output Queue Setup section.slnk=1: Tells m-Power to only grab data based on the the key passed.KEYFIELD=${row.KEYFIELD?url}– Tells m-Power, just like in a normal maintainer app, to only work with a given record. Please replace KEYFIELD with the actual key of your app. If you have more than one, please pass all as separate parameters (i.e.KEYFIELD1=${row.KEYFIELD1?url}&KEYFIELD2=${row.KEYFIELD?url}).FIELD=${row.FIELD?url}– Optional. Only required if using a field name within the Output Folder path, as shown in Figure 7.
Secure File Row Level Security
An added benefit of securing these files behind m-Power security is the ability to also introduce Row Level Security as an additional security level. This will allow a developer to control individual user access to a file based on the key(s) of the record containing the uploaded file name.
Two applications will be needed for this setup:
- Row Level Security retrieval will be needed to serve as the security agent controlling user access to the record. Follow the documentation steps to secure against the key value(s).
- Single Row Retrieval to serve as the application to hold the row level security agent. This is the application that will be used in the download link created above instead of the maintainer.
When the download link is clicked by an end user, the parent application will pass the key(s) to the retrieval from step 2. Row level security will be invoked to determine if the user should have access to the record and in turn, the secured file. If row level security allows the user to access the record, the secure file will be downloaded to the user’s local PC. If the user does not have access to the record, the file will not download.