Overview
Data Models are reusable datasets that can be utilized in a variety of m-Power features. They may be utilized in one of two places:
- m-Power applications
- m-Power Dashboards (for chart creation)
- The m-Power Data Explorer
Data Models are most useful when needing to repeatedly query an existing dataset from your licensed database. A single Data Model, when created over a specific data (such as customer information), allows the developer to repeatedly query that single data model; whether that be for creating new applications or for adding runtime functionality (via lookups, dropdowns, and AJAX feature) to existing applications.
Why should I use a Data Model?
As a developer, think of any table(s) in your database you find yourself frequently referencing in your applications. Or alternatively, you may have a dataset you want to build chart(s) over. These often will be good candidates for a data model.
Take the following three examples:
Example 1
You have a customer master table which contains every customer’s numbers (ids), customer names, addresses, city, state, etc. This table is frequently looked up in various ways, for example:
- You have various Web 2.0 Option List retrievals (dropdowns) that point to this customer information.
- You have different lookup features – such as AJAX Return Data, a JSON Lookup retrieval, or imports (access via m-Painter) that lookup the customer information.
A single data model can be built over this customer information and used to lookup the customer information for these features.
Example 2
You have many reports that query and join the same two tables: an order header table and an order details table. In addition:
- These reports frequently need the same runtime value prompt filters
- These reports share identical calculations across each app.
A single data model can be built over those two tables, performing the appropriate joins, filters, calculations, dimensions, etc. needed. All the information from the data model can then be “plugged in” to the new application being made, thus reducing redundancy during the build process.
Accessing Data Models
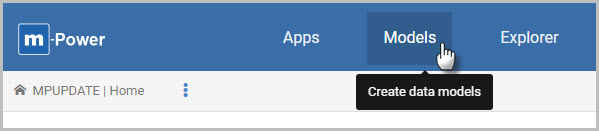
Data Models can be created and viewed from the blue header bar of the developer interface by simply clicking on Models (Figure 1).
This will show the Model Listing screen of all data models.
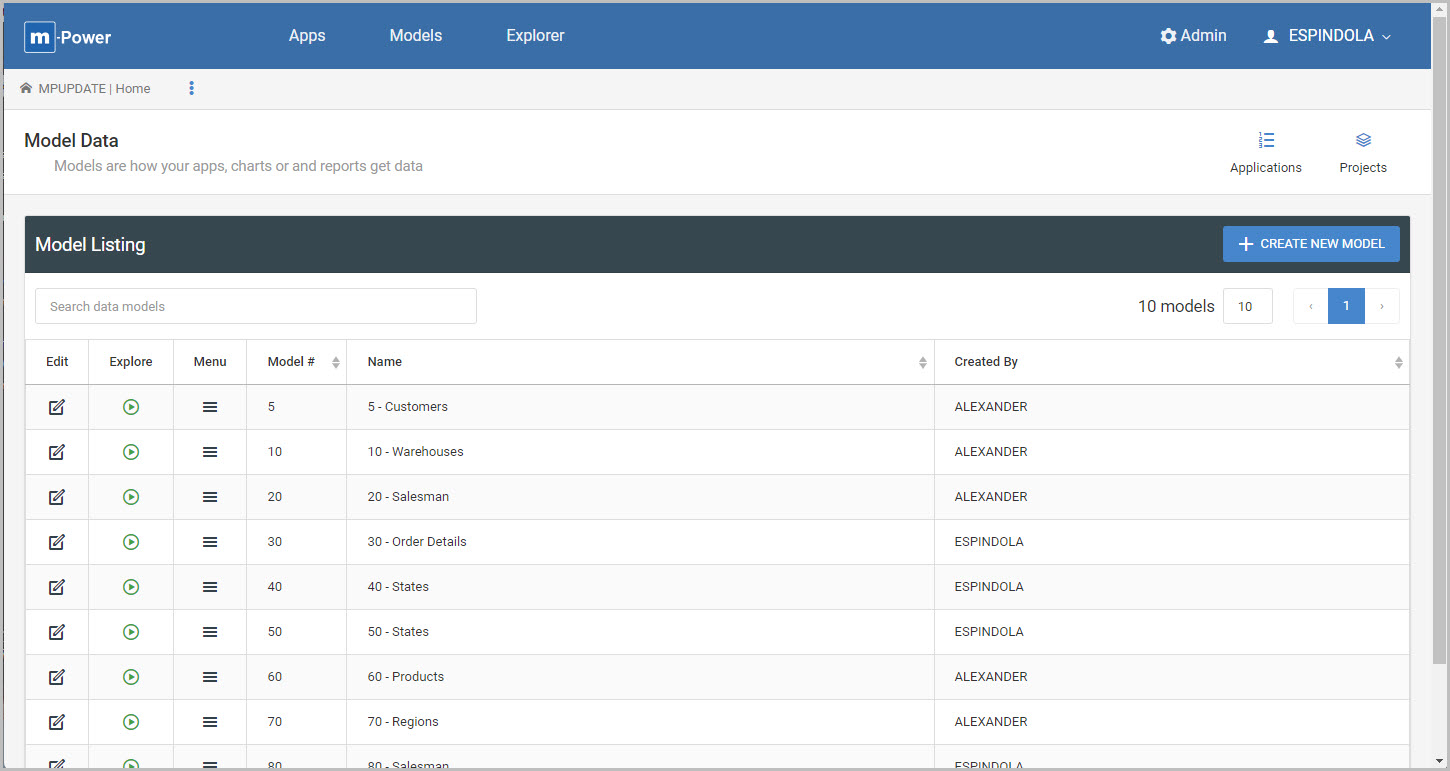
The options on this screen include:
| Icon | Name | Description |
 | Edit | Edit the existing model. |
 | Explore | Explore (run) the data model via m-Power’s Data Explorer. Useful if wanting to quickly query the data the model is built over*. |
 | Menu | Copy or delete the model, or modify the model’s existing properties |
Creating Data Models
Building an m-Power Data Model is nearly identical to building an m-Power application. A developer will select the appropriate tables, fields, dimension fields, filters, and any calculations needed in the data set.
However it’s important to understand some key differences.
- An m-Power application (ex. a Regular Report) produces a runtime output once built whereas a Data Model on its own does not have any standard output.
- Changes to m-Power applications require recompiling to commit those changes; a Data Model does not ever get compiled, but rather changes to the model are simply saved in real time.
Walkthrough
Step 1. Model Information
Start by pressing “Create New Model” on the model listing page. The appropriate options in the window that appears are detailed below:
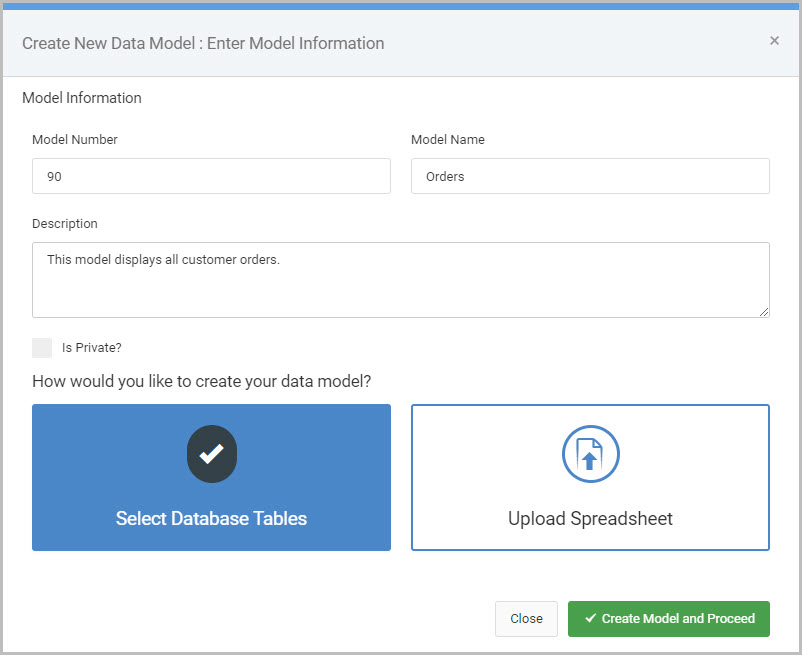
Model Number – A unique ID number that will be assigned to this model. Similar to the m-Power applications, this number will by default auto increment by 10, but may be changed only when creating the model.
Model Name – A descriptive name given to the model. Best practices are to give the model a name that any developer can immediately identify what information (data) this model is utilizing.
Description – Optional. A longer descriptive section to add any additional comments or information about this model. Will not be shown in the model listing screen (Figure 1).
Is Private? – If checked, other developer profiles will not be able to see or utilize this data model within the m-Power developer interface. This means the model will only be available to the developer who created it.
How would you like to create your data model? – Choose how the data model will get the data. Either utilize any existing database tables registered to the data dictionary (recommended) or upload an Excel spreadsheet into the database and utilize the table created from the spreadsheet.
Step 2. Tables/Fields
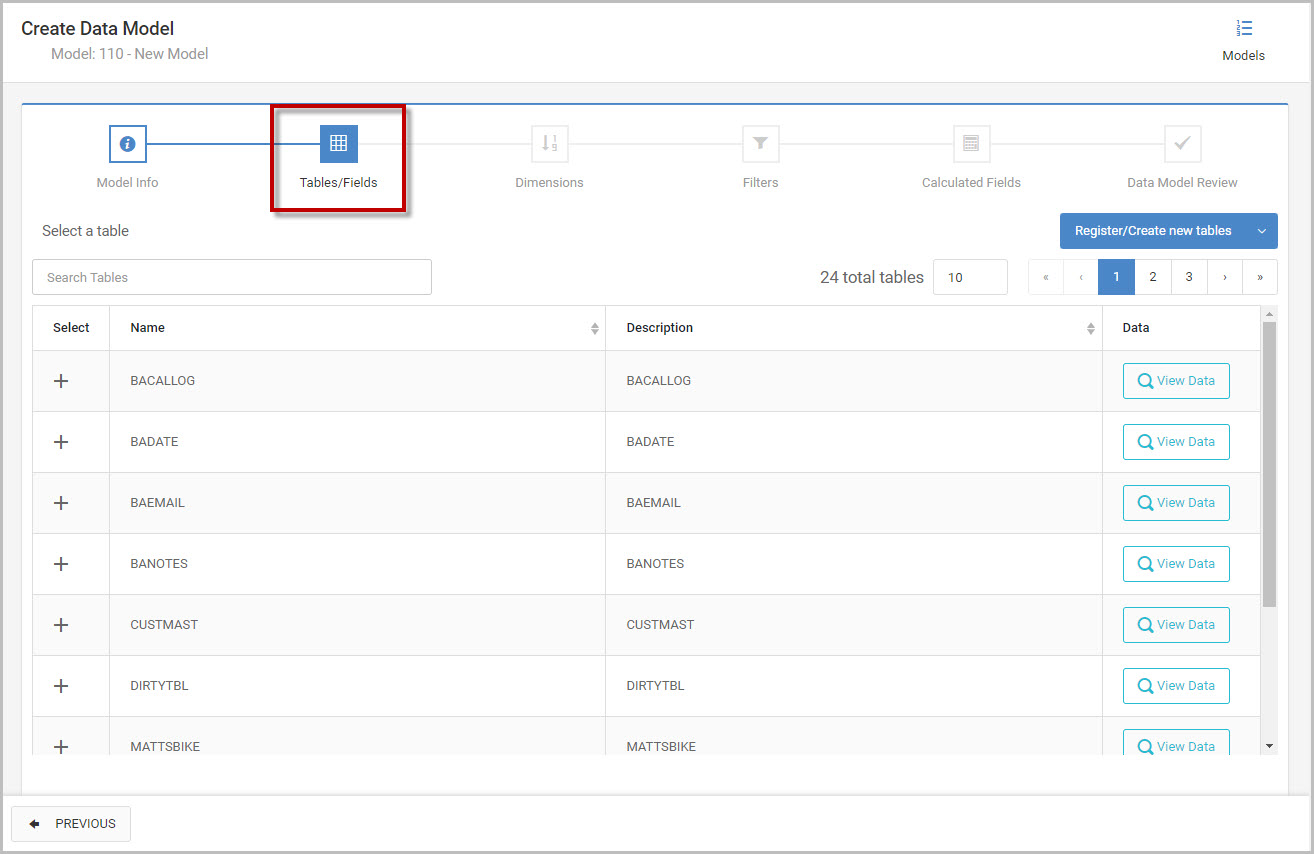
Here you will be prompted to select your data. At the bare minimum one table (and at least one field from that table) is required. See here for the complete documentation on the Tables/Fields section.
Step 3. Dimensions
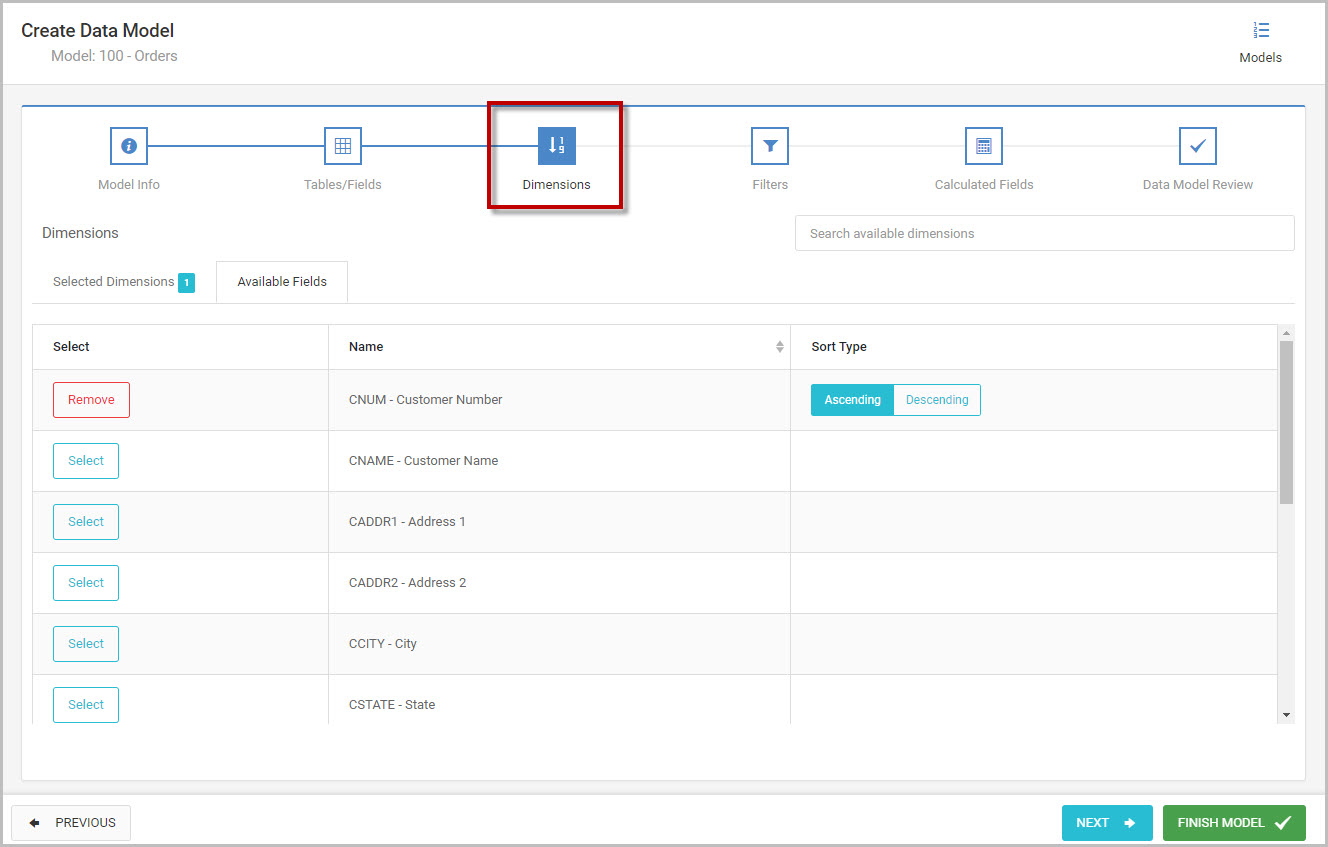
Here you will be prompted to select a dimension field(s) for the model. A minimum of one selected dimension field is required before being able to proceed forward to Filters.
Selecting a field as a Dimension will control how the data set is stored at runtime. See here for the complete documentation on the Dimensions section.
Step 4. Filters

Here you will be given the opportunity to add any filters (hard-coded or runtime) to the data model. See here for the complete documentation on the Filters section.
The Filters section is optional and may be bypassed.
Step 5. Calculated Fields
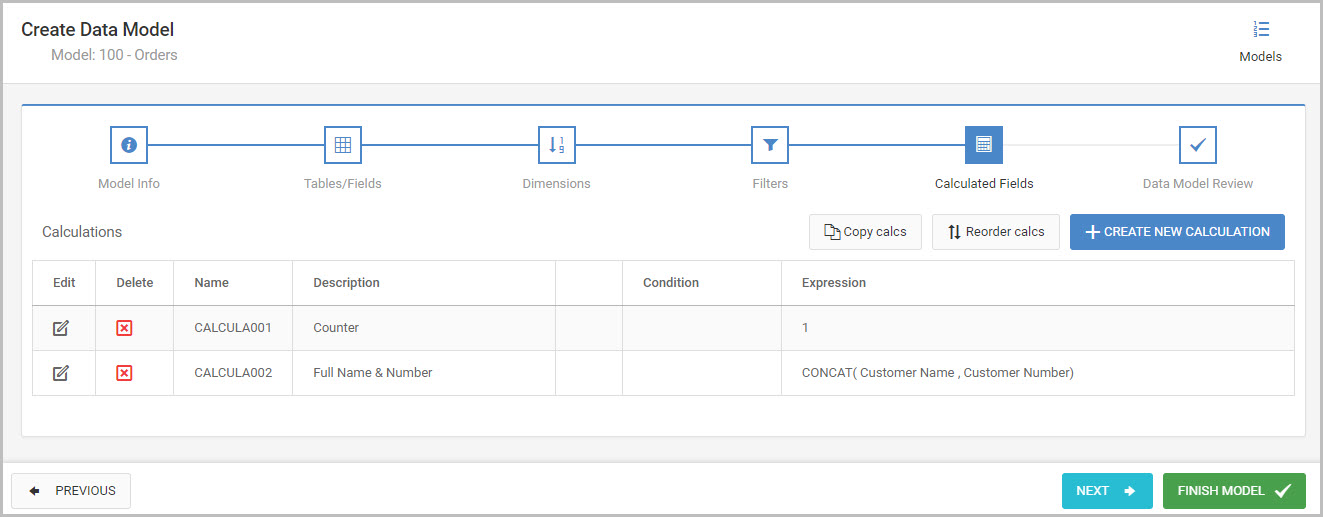
Here you will be give the opportunity to add any calculations to the data model. See here for the complete documentation on creating calculations.
The Calculated Fields section is optional and may be bypassed.
Step 6. Data Model Review
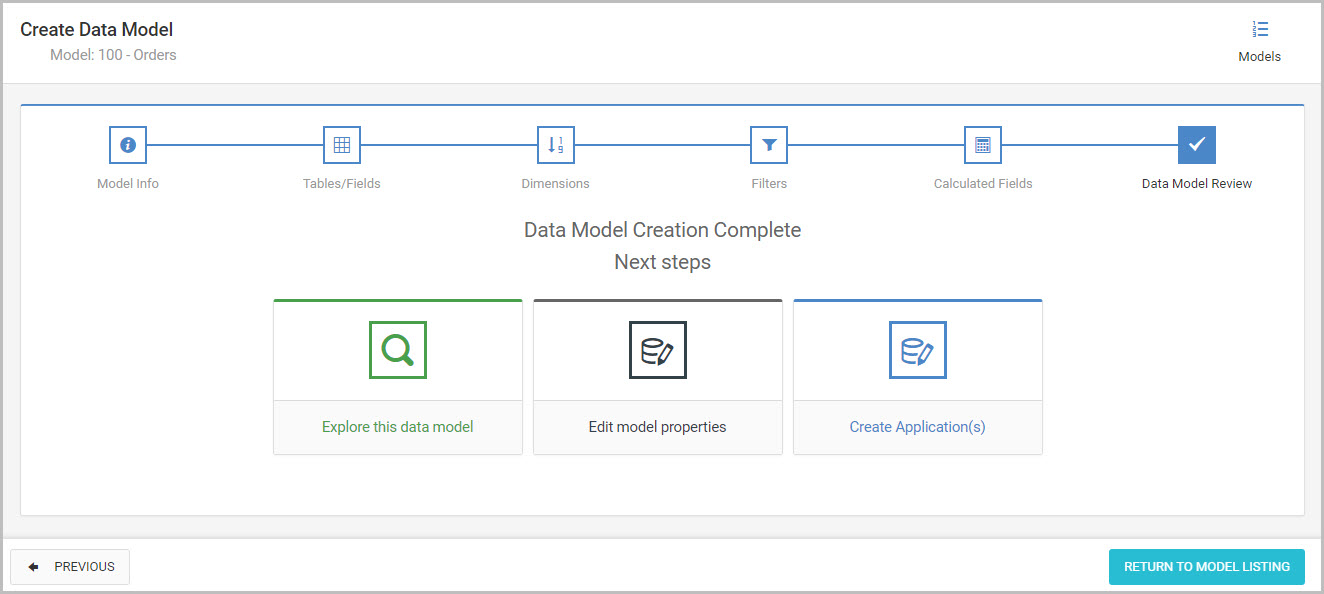
On this screen, the data model has been completed. From here, a developer can choose to immediately use the model in Data Explorer or for an m-Power application, if desired. The options from this screen are explained below:
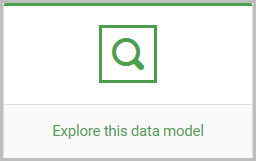
Loads the model in m-Power’s Data Explorer tool for data exploration. Can be used to simply view the data or make saved chart and report designs for consumption in the Data Explorer.
This feature is not covered in the scope of this documentation. More information can be found here.
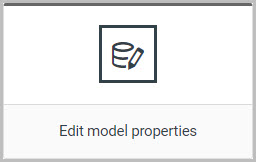
View and/or change any specific properties associated with this data model.
Most notably, the Max Web Records property will control the maximum limit of how records the model will return to the screen.
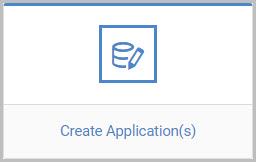
Selecting this will allow the developer to create a new application, with this data model serving as the basis for the new application’s model.
Once the application is created, it is no longer associated with the data model. Meaning, the individual application’s model (fields, dimensions, filters, calcs, etc.) can be changed without overwriting the dictionary data model.
Promoting to Production
Models can be promoted to production via the Promote to Production utility. When working in your promotion project, simply select the “Add Models to project” option from the Project Options pulldown menu in order to add any existing models to the promotion project.
Any models that have been added to the project will show in the Models tab (Figure 12).
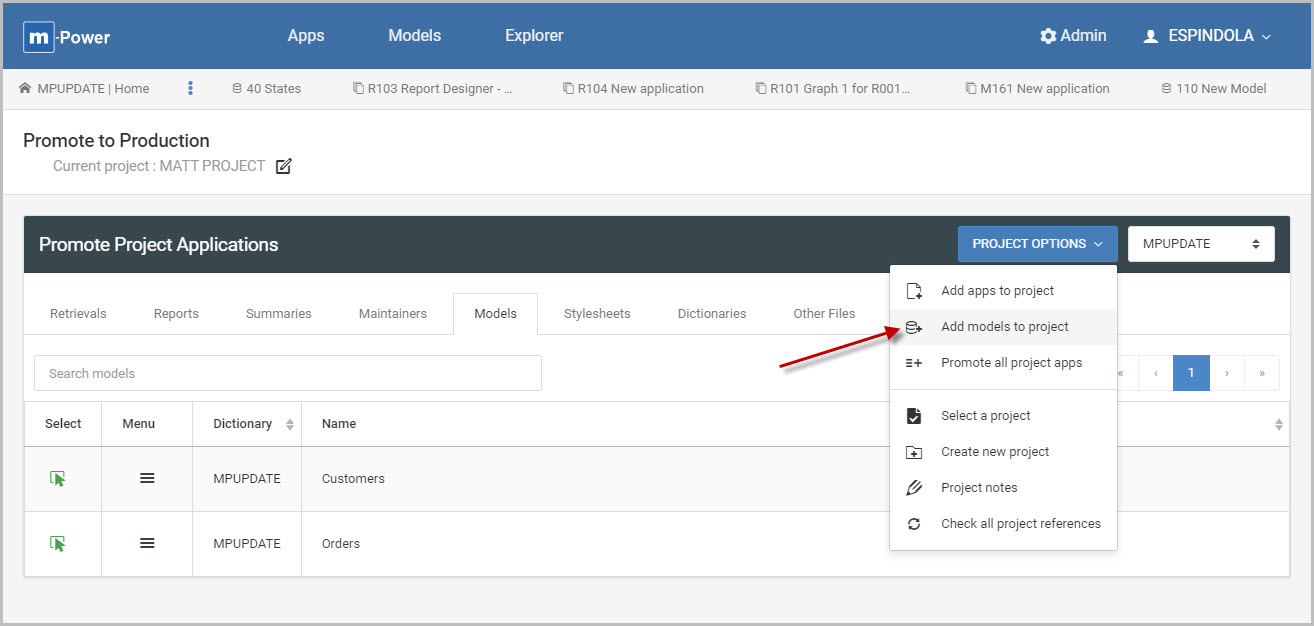
Once in the project, click the green “Select” button on each model in the project to add it to your promotion review.