Overview
The Messaging and Scheduled Task utility allows m-Power developers to call task groups on a scheduler or on-demand from their m-Power applications. This document will walk through a practical example of utilizing the Messaging and Scheduled Task utility to automate an email reminder.
Example Scenario
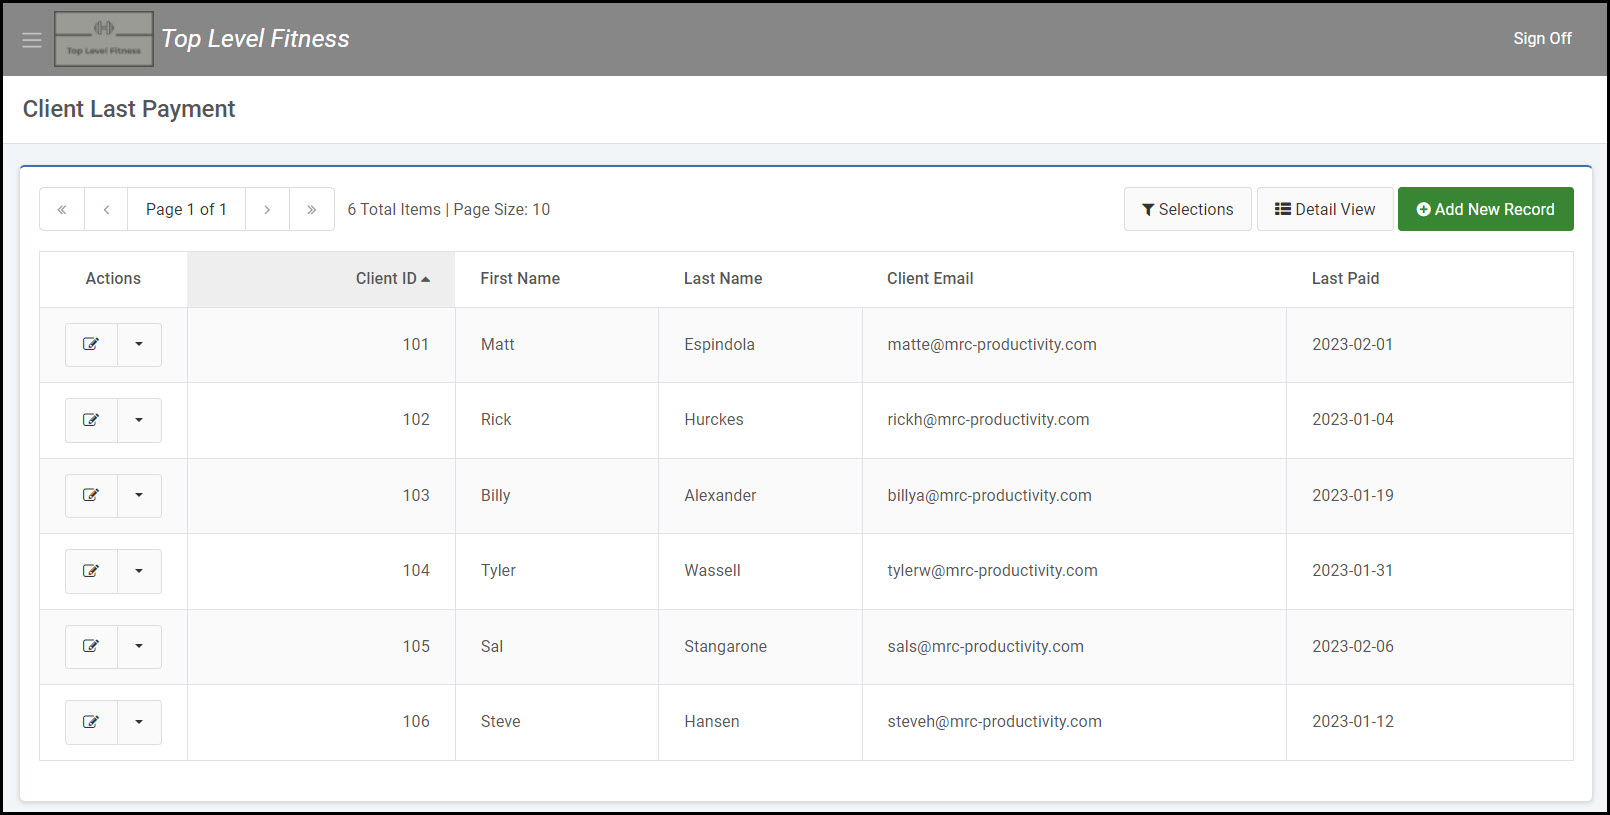
Our customer (Betty), runs her fitness center Top Level Fitness where members pay a monthly fee to utilize the facilities. Every time a member submits a payment, Betty enters the date in a maintainer to keep track of when the last payment was received from that member. Every Sunday, Betty checks to see which members are behind on their monthly payments and sends them an email reminder of the late payment. Betty would like to automate the process, and have m-Power send the message for her to make the process more efficient and less time consuming.
A Data List with Web Form maintainer is used by Betty to display each client’s information along with their last payment date. When a client submits a payment, Betty will update the ‘Last Paid’ date appropriately:
Steps
Utilizing the m-Power Messaging & Scheduled Tasks utility, we can create this solution for Betty in a few easy steps. This will involve the following:
- Creating an Address Distribution List retrieval –
- This application will contain the email addresses of each recipient who will be emailed on a given Sunday.
- Create a Single Row Data List retrieval.
- This application will serve as the message body of the email that is sent to the client.
- Create the task group in the Messaging and Scheduled Task utility.
- The task group will reference the two above retrievals by simply defining which users (emails addresses) and which application will be sent to the client.
- Add the task group to the scheduler to automatically fire every Sunday.
- Promote the applications and task logic to production
Step 1 – Address Distribution List
An Address Distribution List retrieval is built over the same table that is used in the maintainer application from Figure 1. This application uses the email field as the Dimension field and also has a calculation that uses date arithmetic to return the date one month ago.
A filter is added to the data model to only return records where the last paid date is less than or equal to the date exactly one month ago. When the Address Distribution List is ran, only two clients are returned based on that filter criteria:

Step 2 – Single Row Data List retrieval
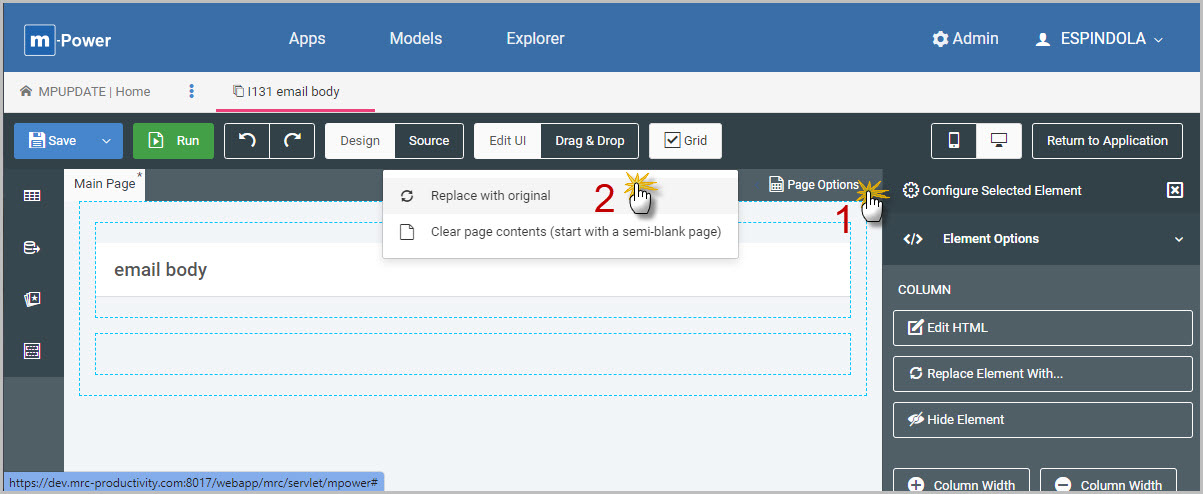
Next, a retrieval will be made that will serve as the email body. This should be over the same table where the maintainer writes the last payment date. Using the m-Painter editor, the fields can all be removed from the form via the Page Options in the m-Painter toolbar and select Replace with Original (see image below).
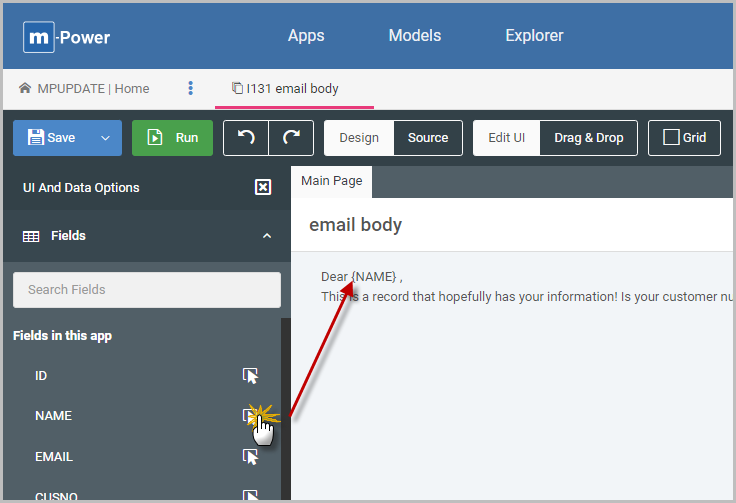
In the empty presentation, a table element and any desired free text may be added to craft the message.
Use the the “Fields” option in the m-Painter toolbar was used to appropriately pull in the client information for a more personalized message.
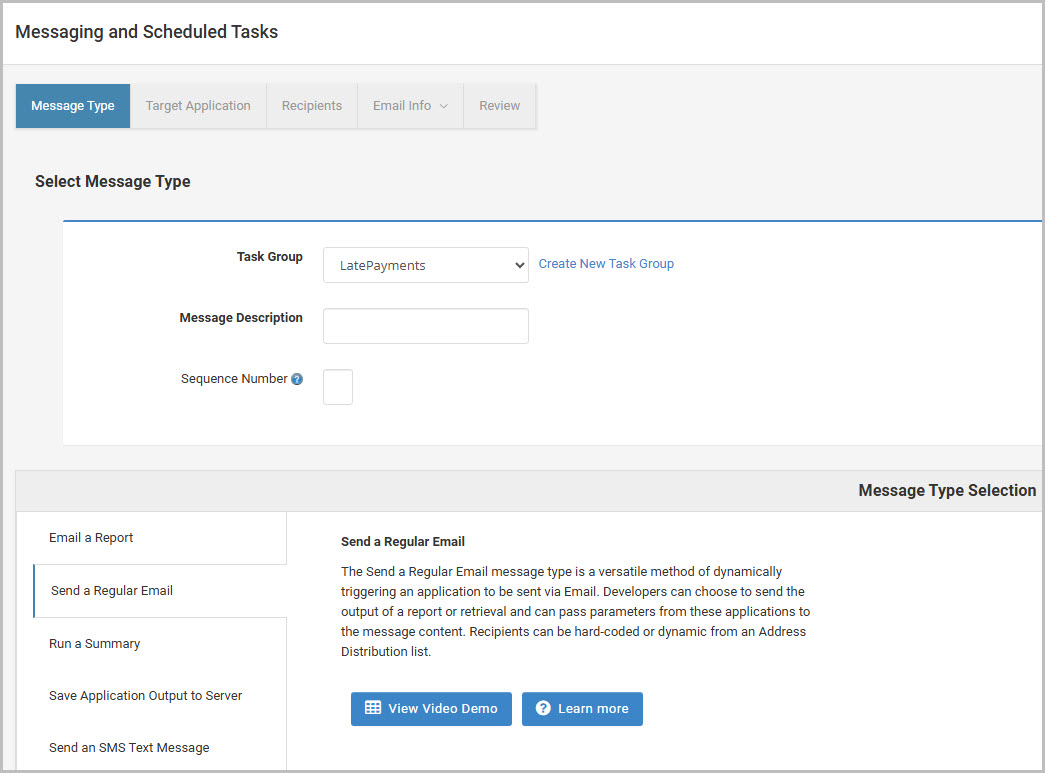
Step 3 – Create the Task Group and Task Message
Within the Messaging and Scheduled Tasks utility, a new Task Group will be created in order to send the retrieval from step 2, specifically it’s HTML content as the email body.
Within the task group, a single task message “Send a Regular Email” will be made, as shown below in Figure 5.
- In the Target Application tab of the task message, the single row retrieval from Step 2 will be selected. No additional parameters are needed, and the output format will be HTML.
- The “Map Fields to Target Application” option may also be ignored.
- In the Recipients tab of the task message, the Address Distribution List retrieval from Step 1 will be selected. Under the “Retrieve List of Addresses from Database Table?” select the created distribution list retrieval.
- No additional parameters, email addresses, or field mappings are needed.
- In the Email Info tab, simply a subject line (e.g. Notice from your local gym) is entered.
- In the Review tab, review the task configuration and press Finish when done.
Step 4 – Schedule the task group
In general, m-Power task groups can be invoked one of three ways.
- Manually from the Messaging & Scheduled menu (for testing purposes)
- On-demand via an m-Power application
- Automated via the task scheduler
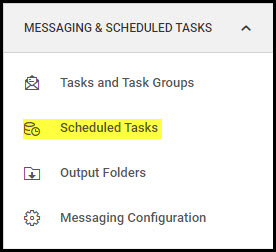
In this situation, the task group must fire automatically every week, so the Scheduled Tasks option will be utilized, as shown highlighted in Figure 6.
After selecting Scheduled Tasks option, choose the “Add Scheduled Task” button. The following window as shown below in Figure 7. When creating the scheduled task, the task group from Step 3 is selected with the appropriate frequency for the task group to execute.
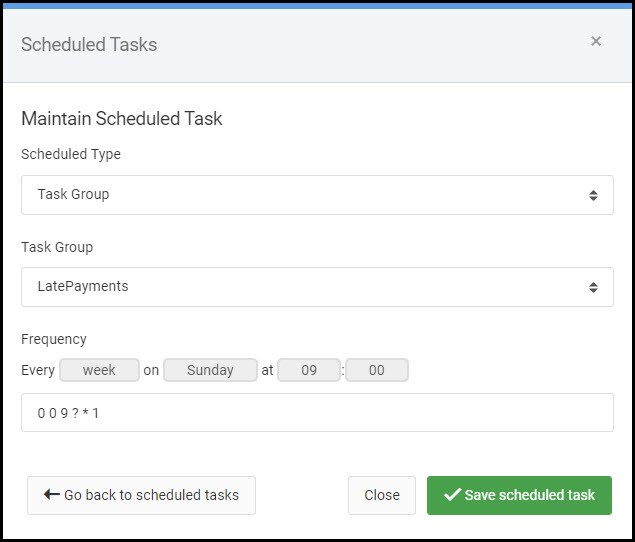
When selecting a frequency, the input box will be auto populated with the appropriate time, which is displayed in CRON time format. This input does not need to be manually edited, unless you have selected ‘Custom’ for the frequency.
Press “Save scheduled task” to return the Scheduled Tasks screen and the newly created task group will be shown. As will be indicated on the screen, changes to scheduled tasks do not take effect until the Tomcat service is restarted. For those with appropriate access, Tomcat may be reloaded from this screen.
Step 5 – Promote to Production
The applications and the task information will need to be promoted to production. mrc always recommends to run all scheduled tasks out of production, rather than within a development environment.
In Admin -> Promote to Production a new project is made to organize all the files and applications that will be promoted.
These items will need to be added to the project in order to then be promoted:
- The Address Distribution List and the Single Row Data list retrievals
- mrc_distributions.txt (Task Groups)
- mrc_distributions_jobs_mrcdb_as400_remote1.txt (Scheduled Tasks)
- web.xml
The file that enables the scheduler in production is the messaging.properties file. This file should NOT be re-promoted
The web.xml and both task specific files are found in the Other Files tab:
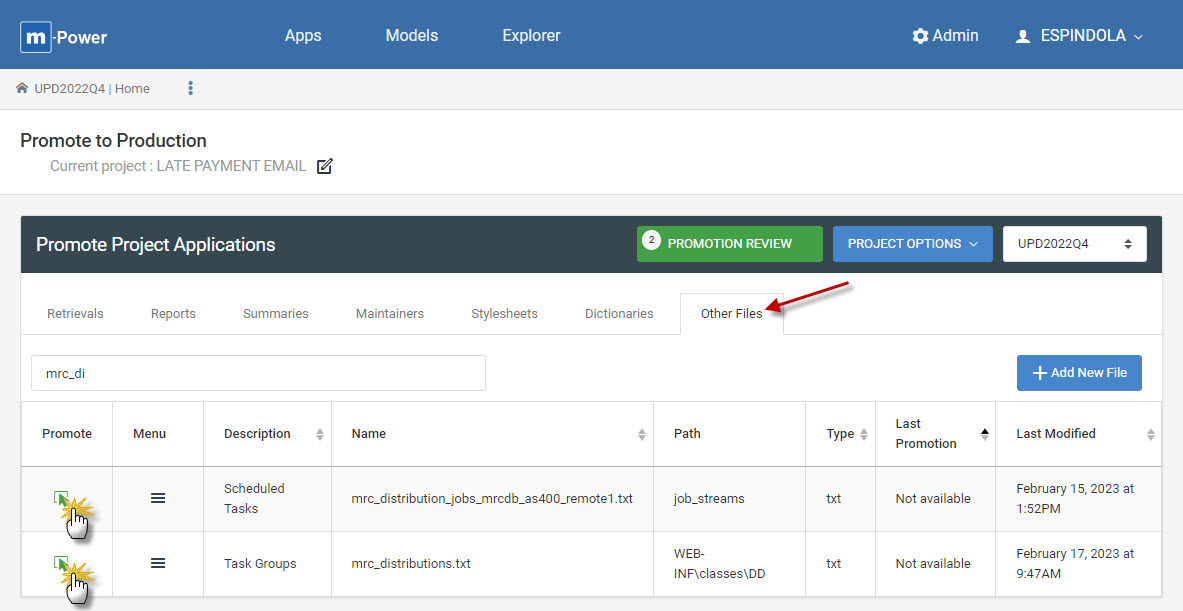
Once found in the list, press the green Promote icon as show in Figure 8 to add to the promotion review.
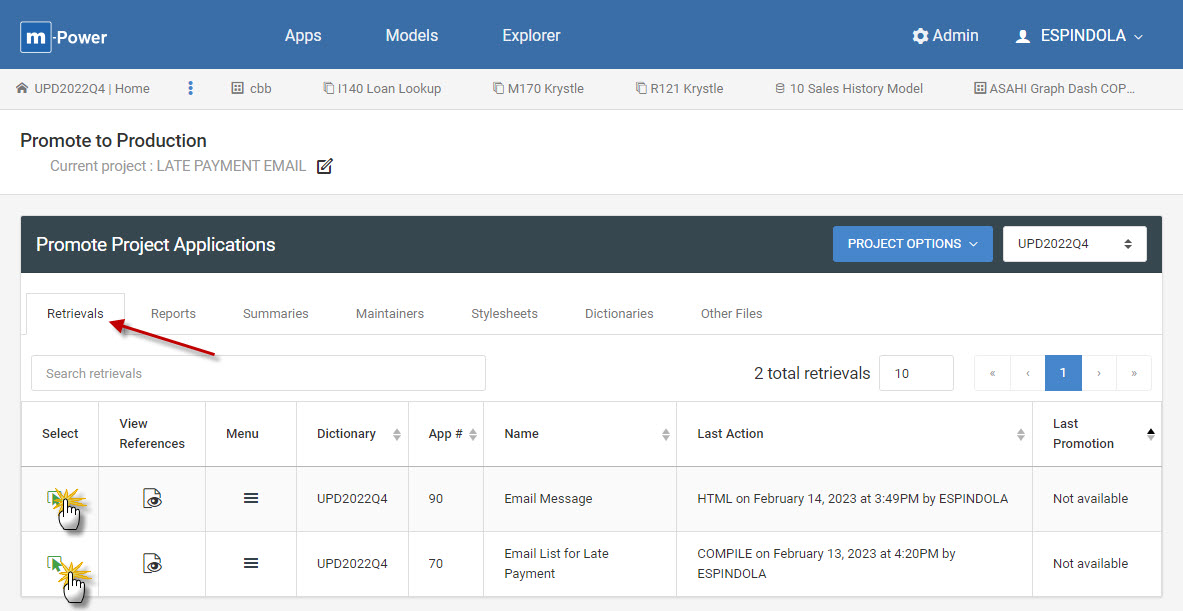
Any applications are added to the project via Project Options -> Add apps to project dropdown, and once added will appear within the appropriate application tab (ex. Retrievals). These will also be added to the promotion review:
Select the Promotion Review button to finalize the promotion process. In the Review section, all the files/application that are ready to promote will be listed.

Press Next to proceed to the Promotion Locations and promote the files to production. Make sure to restart production Tomcat once the files have been promoted.