Overview
This document aims to provide developers a list of common questions and subsequent answers to various topics relating to using m-Power’s m-Painter editor. You may scroll through the questions in this document, or click on the navigation menu on the right of this document to jump to a particular question.
How do I use m-Painter to…?
Apply a Smartlink to a field
- Click the field/image/icon/text etc. that you wish to apply the Smartlink.
- Select the “Insert Smartlink” button in the element panel.
- Choose m-Power Application, pick the desired application, then map the linking fields.
- Press Next to go to Link Options.
- Click Save.
Specify that a link should open in a new window?
- Click the element containing the link.
- Click the “Edit Smartlink” button in the element panel.
- Press Next to go to Link Options.
- Within the “Link Target” dropdown, choose “New Window/Tab”
- Click Save.
Change the text on a button?
- Left-click inside the button where the text is.
- Use the Backspace key to remove the text.
- Type your desired text.
- Click Save.
Stop a Column/Row/Table From Displaying in a Report?
Column
- Select one of the cells in the column and click.
- In the blue menu that appears, press the trash can.
- Click Save.
Row
- Select one of the cells in the row and click.
- Press the up icon within the blue menu. This action will select the cell’s parent: the table row element.
- Press the “Hide Element” button in the element panel on the right side of the screen.
- Click Save
Table
- Select one of the cells in the table and click.
- Within the right side element panel, click the “Select Data Table” button.
- Press the “Hide Element” button in the element panel on the right side of the screen.
- Click Save.
Make an input field required?
- Find the proper input field and click in the textbox.
- Click the “Input Properties” button in the element panel.
- Check the ‘Required’ box within the “Additional Input Options” section.
- Press Save.
Make a dropdown list required?
- Find the proper dropdown list and left-click inside the dropdown.
- Click “List” in the m-Painter toolbar.
- Remove the value for “Blank Option Text”
- Press Ok.
Increase the number of records allowed in a report?
- Open “Edit Properties”.
- Navigate to the “Options” tab (shown by default), and search for the “max_records” and “max_web_records” values.
- Modify these values up or down to your desired upper limits.
- Click OK.
Note: If the report is only run from batch, then only the “max_records” needs to be modified. If the report is only being run interactively (from a browser), only the “max_web_records” needs to be modified. However, both may be modified to ensure the limit is properly set.
Note: There is no “No Limit” setting for your protection.
Compiling
After an application is first created, a compile is necessary to create the proper output files, such as the HTML presentation layer(s), the app properties XML file, and the Java and Class files which control the actual data portion of the application. Compiling an application, (also interchangeably referred to as “building”) is accomplished by pressing the ‘Build App‘ button as show in the following image.
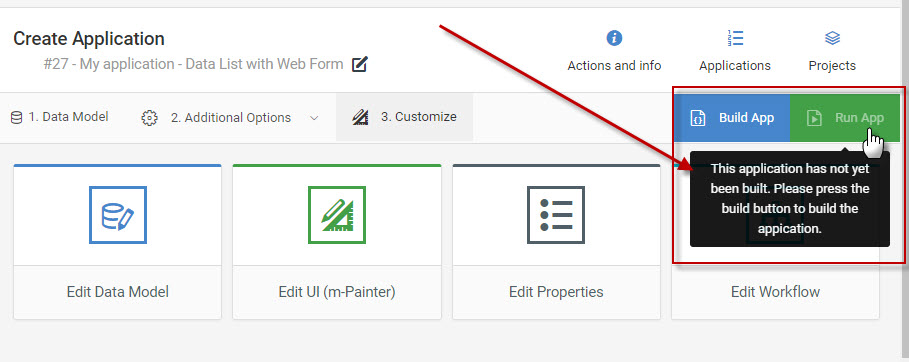 |
When to recompile?
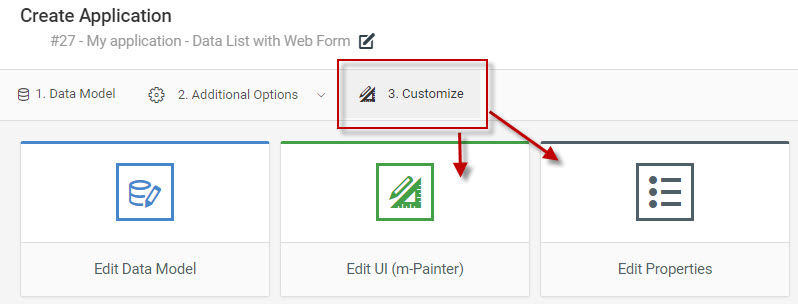
Once the application has been initially compiled, only then can the look and feel of the application’s presentation (HTML) layer can be customized via m-Painter. “Edit UI (m-Painter)” is within the  3. Customize option of the Application Navigation Bar.
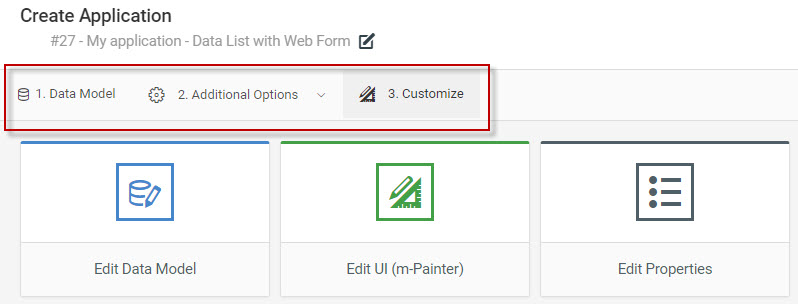
As a whole, only when a change to the application is made in the  1. Data Model or
  2. Additional Options options of the Application Navigation Bar, a recompile of the application is needed.
Recompile after painting in m-Painter?
No. m-Painter changes require you to just press the Save button within the m-Painter editor. This is concept is also true for app property changes in Edit Properties, you only need to save your changes.
Once the change is saved, simply re-run the application to see the change.
 3. Customize option.
When to overwrite the HTML?
When a user first begins to use the m-Power interface, one of the biggest questions they have is what to do when they come to this screen:
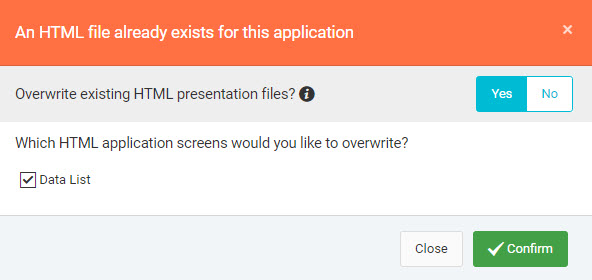
This screen is shown whenever someone tries to recompile an application that already exists (therefore, you will NOT see this screen when initially compiling a brand new application). Our logic checks to see if generated code already exists on the server, and if it does, we check to see how you want to proceed. Of course, we will update the back-end Java code to ensure your latest changes within the Application Menu screens are included, but we need to check with you to see how to handle the HTML presentation files (m-Painter).
Ideally should make all the necessary changes within 1. Data Model or 2. Additional Options first, and compile. Then save any customizations and changes in m-Painter until last. However, since that rarely happens, the following is a non-inclusive check list of situations that would not require an overwrite of the HTML during a recompile.
If you make changes that will not affect the general structure and look of your application, you can specify “No” for this option. Here’s some examples of some changes this would pertain to:
- Changing the display format of a numeric field in Field Settings
- Changing the expression add/or conditions of a calculation
- Adding/Updating/Deleting an External Object
- Changing the join fields between two linked tables
- Changing the join type between your linked tables (LEFT OUTER vs INNER JOIN)
- Adding/Updating/Deleting a hard-coded Filter
However, there are some changes that do require you to specify “Yes” for this option, which will overwrite the HTML layer and any changes you have made within m-Painter. This could include:
- Changing the selected template of the application.
- Adding a new field and wanting it displayed to the screen
- Changing the column headings descriptions in Field Settings
- Reordering Fields in Field Settings
- Adding/Updating/Deleting a runtime value prompt Filter
- Adding a new field in a Maintainer application
- Adding a Parameter type calculation
There is a very useful tip that can save countless hours regarding overwriting the HTML Skeleton. If you have spent a long time in m-Painter for an application, you probably don’t want to overwrite the HTML. If you need to add a field, you can always add the field through the interface, but specify “No” to not overwrite the HTML. Then, open m-Painter. You will not see your field, but you can still include it under the “Field Listing” from the “Data Options” panel.
Click on the arrow next to the field you want to add. Doing so will append this column to the end of your data table.
See also: When to Overwrite HTML/XML Flowchart