m-Power generated content is built with the idea that the developer will probably want to customize the output to make the look and feel of the UI their own. With this in mind, m-Painter gives developers many options to easily add their customizations. One such way to do that is to wrap content into either cards or tabs. These components give content additional structure and allows to be better defined/organized.
Video Walkthrough
Implementation
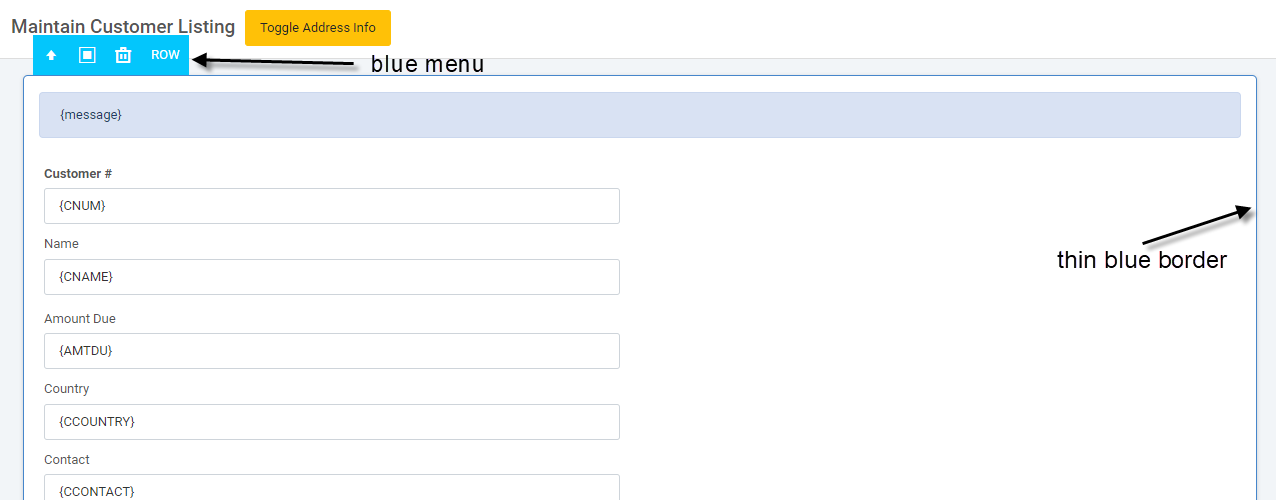
Open m-Painter and navigate to the area you wish to wrap. When you select the element, a blue label will appear as will a blue border around the selected element. If that is not the correct element, you can press the up arrow within the blue menu to select the parent element. Continue to do this until the correct element has been selected.
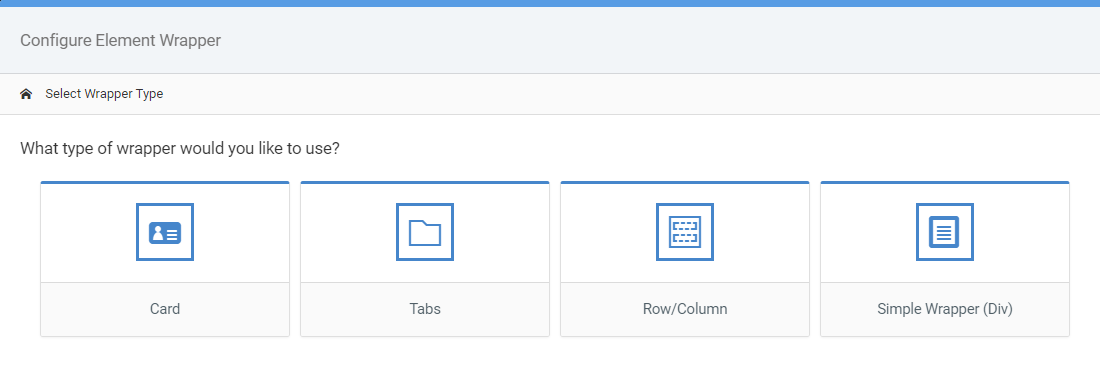
From the blue menu, click on the icon of the square wrapped in another square. This icon represents the functionality to wrap the selected element into a container.

From there a menu will appear allowing you to choose what you would like to wrap your content in. This documentation will cover wrapping in either cards or tabs.
Wrapping Content in Cards
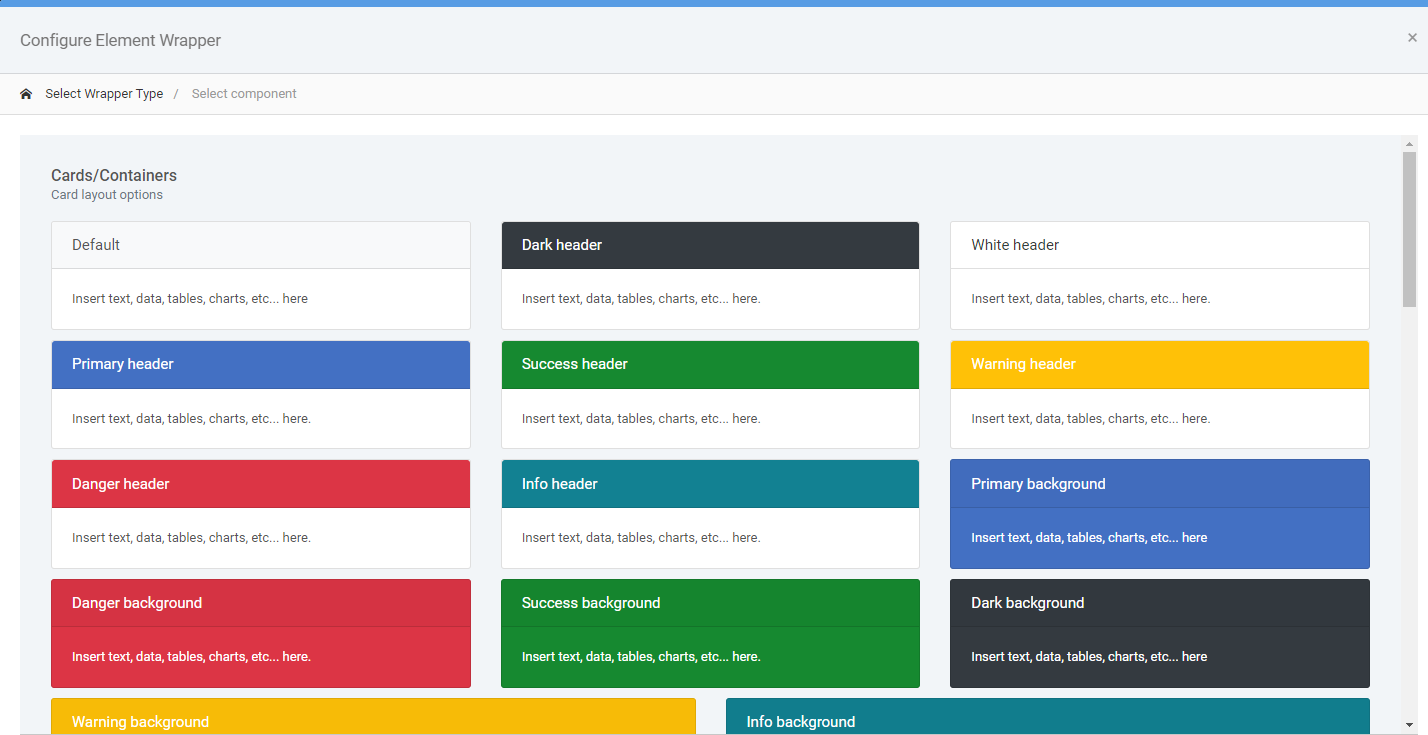
Choose one of the pre-built cards from the popup window.
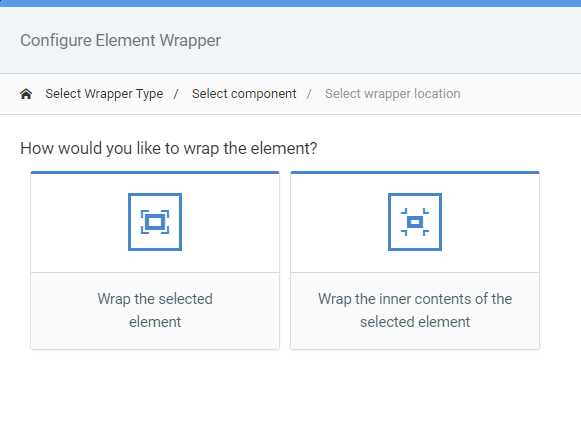
The following window, Configure Element Wrapper, allows you tell m-Painter if you want:
- Wrap the selected element into the card
- Place the new card inside of the selected element
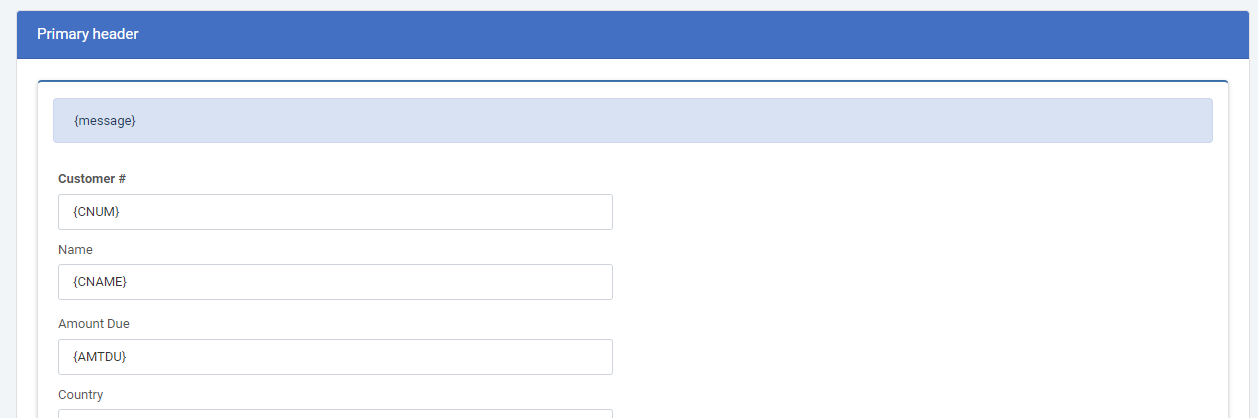
When completed, your application may look something like this.
Wrapping Content in Tabs
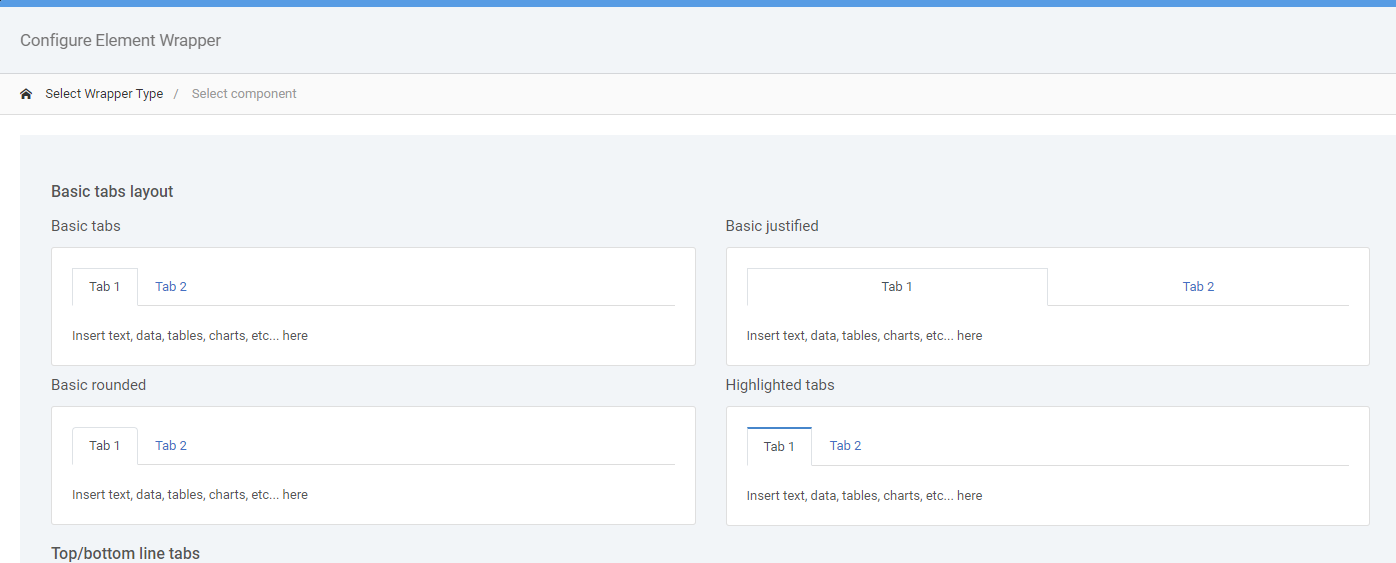
Choose one of the pre-built tab layouts from the popup window.
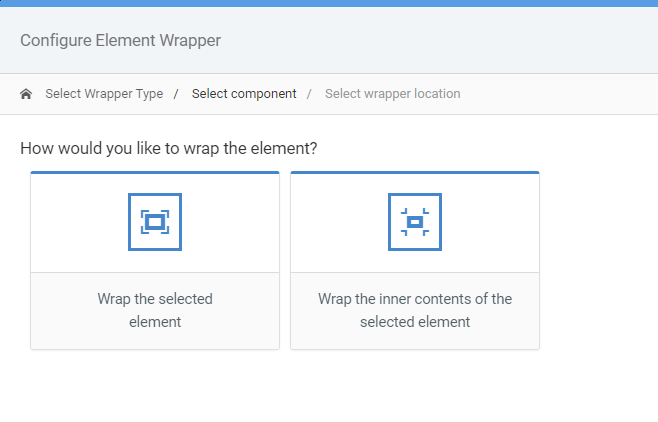
The following window, Configure Element Wrapper, allows you tell m-Painter if you want:
- Wrap the selected element into the card
- Place the new card inside of the selected element
When completed, your application may look something like this.
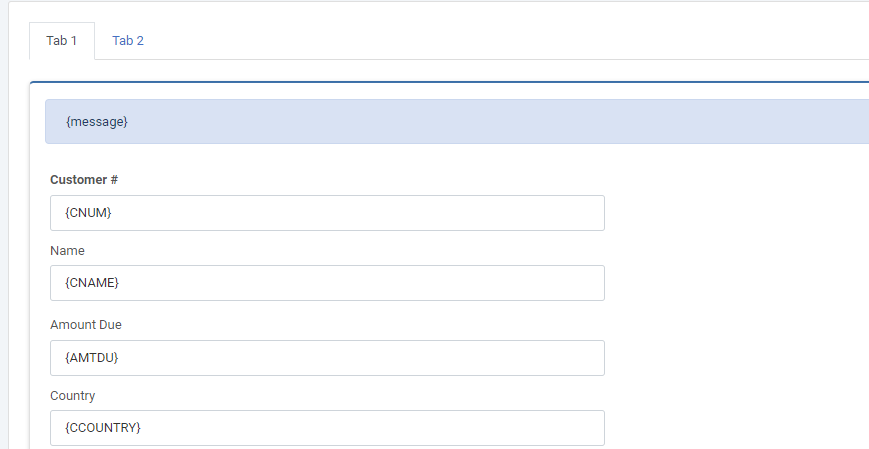
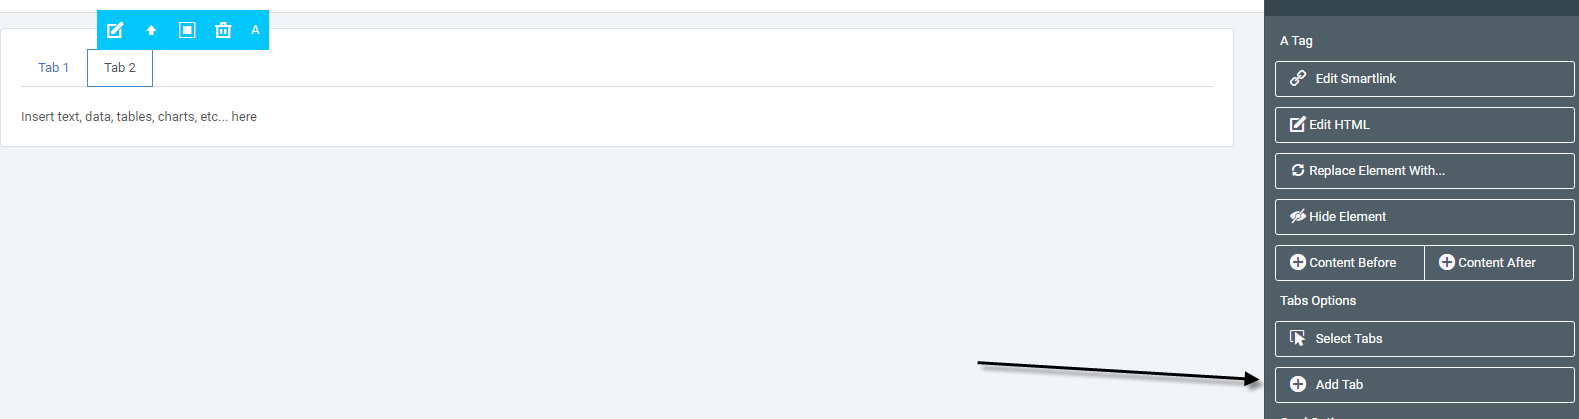
m-Painter will create a two tab layout, however you may want to add additional tabs. To do so click on either Tab 1 or Tab 2. Then, in the right side panel, click “Add Tab.”