One of the primary ways users interact with Artificial Intelligence (AI) is by user interaction. For example, a user types a question into a chat bot and their answer is then delivered to them in the same chat bot. This document is written to illustrate that you can also interact with AI after writing data via a Maintainer. This could mean something as straightforward as triggering AI after filling out a web form, updating an existing row, or even triggering a maintainer through a one-step maintainer.
The Components
To make this work, you will need the following m-Power components:
AI Assistant Template – This template is the same one you would build when creating a chat bot. The difference here is that the user will never interact directly with this AI Assistant. Instead, it will be invoked via your Maintainers workflow object.
Maintenance Application – As alluded to above, the maintainer application is what will be triggered to run the AI Assistant.
Workflow – Within the maintainer’s workflow you will see a newly available action, “Call AI Assistant”
The Response
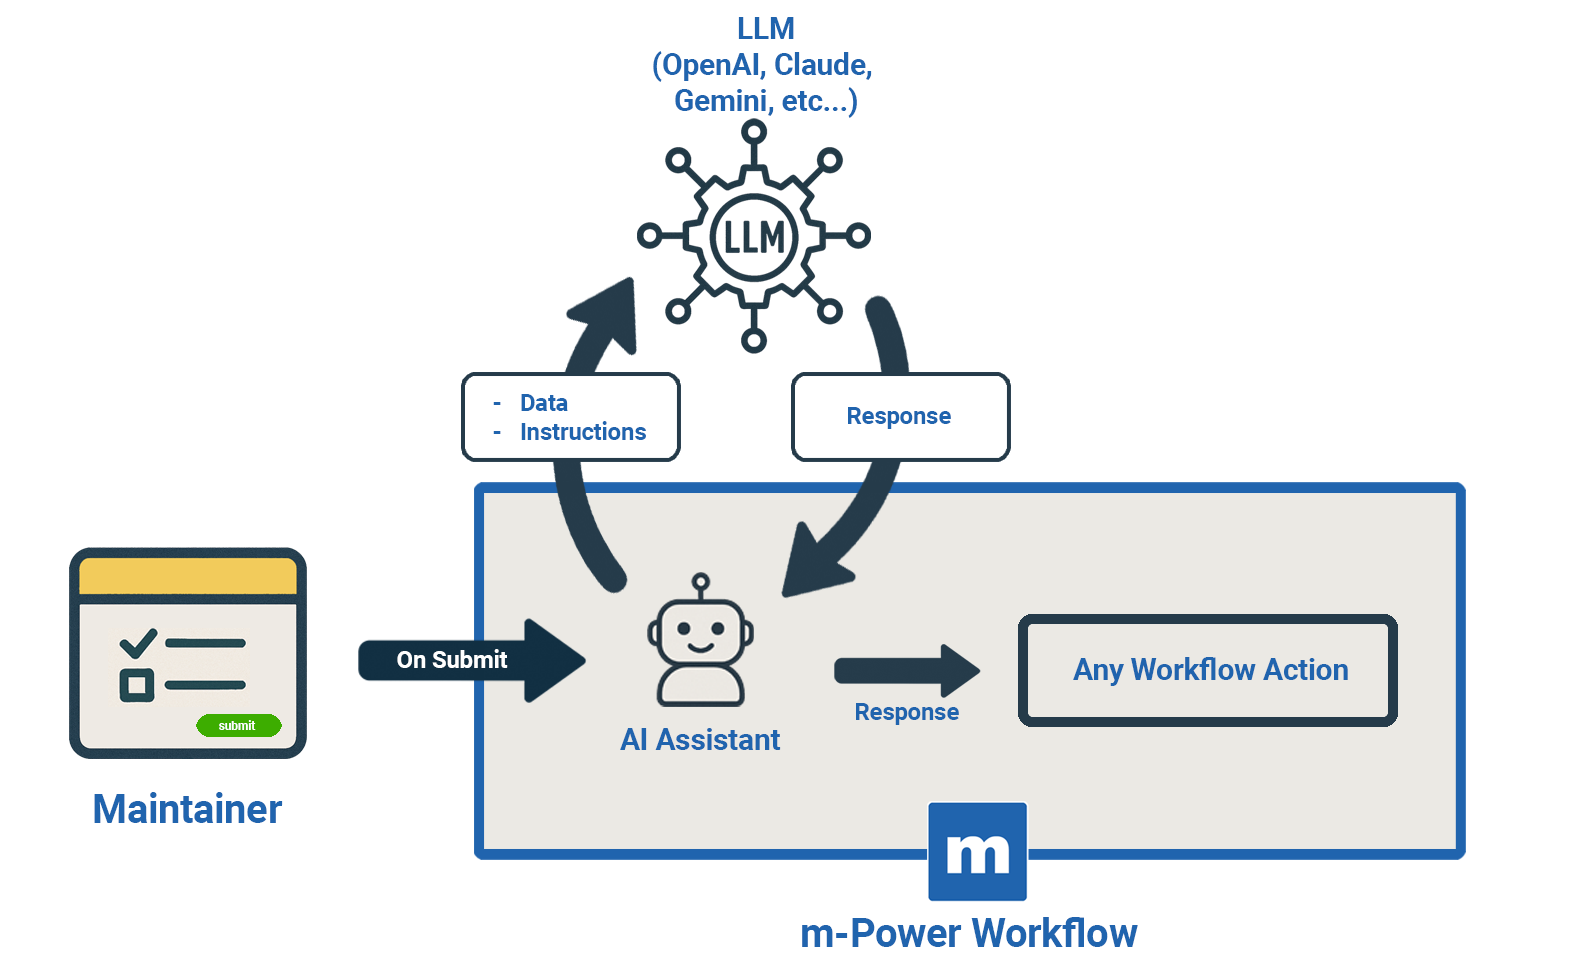
When using a traditional chat bot, the answer from the AI response, of course, is delivered in the chat bot itself. But without a chat bot, where will the response go?
The short answer here is that we need to treat the AI Assistant like an m-Power lookup. It’s job is to take some input and return an output, just like a lookup would.
Real World Example
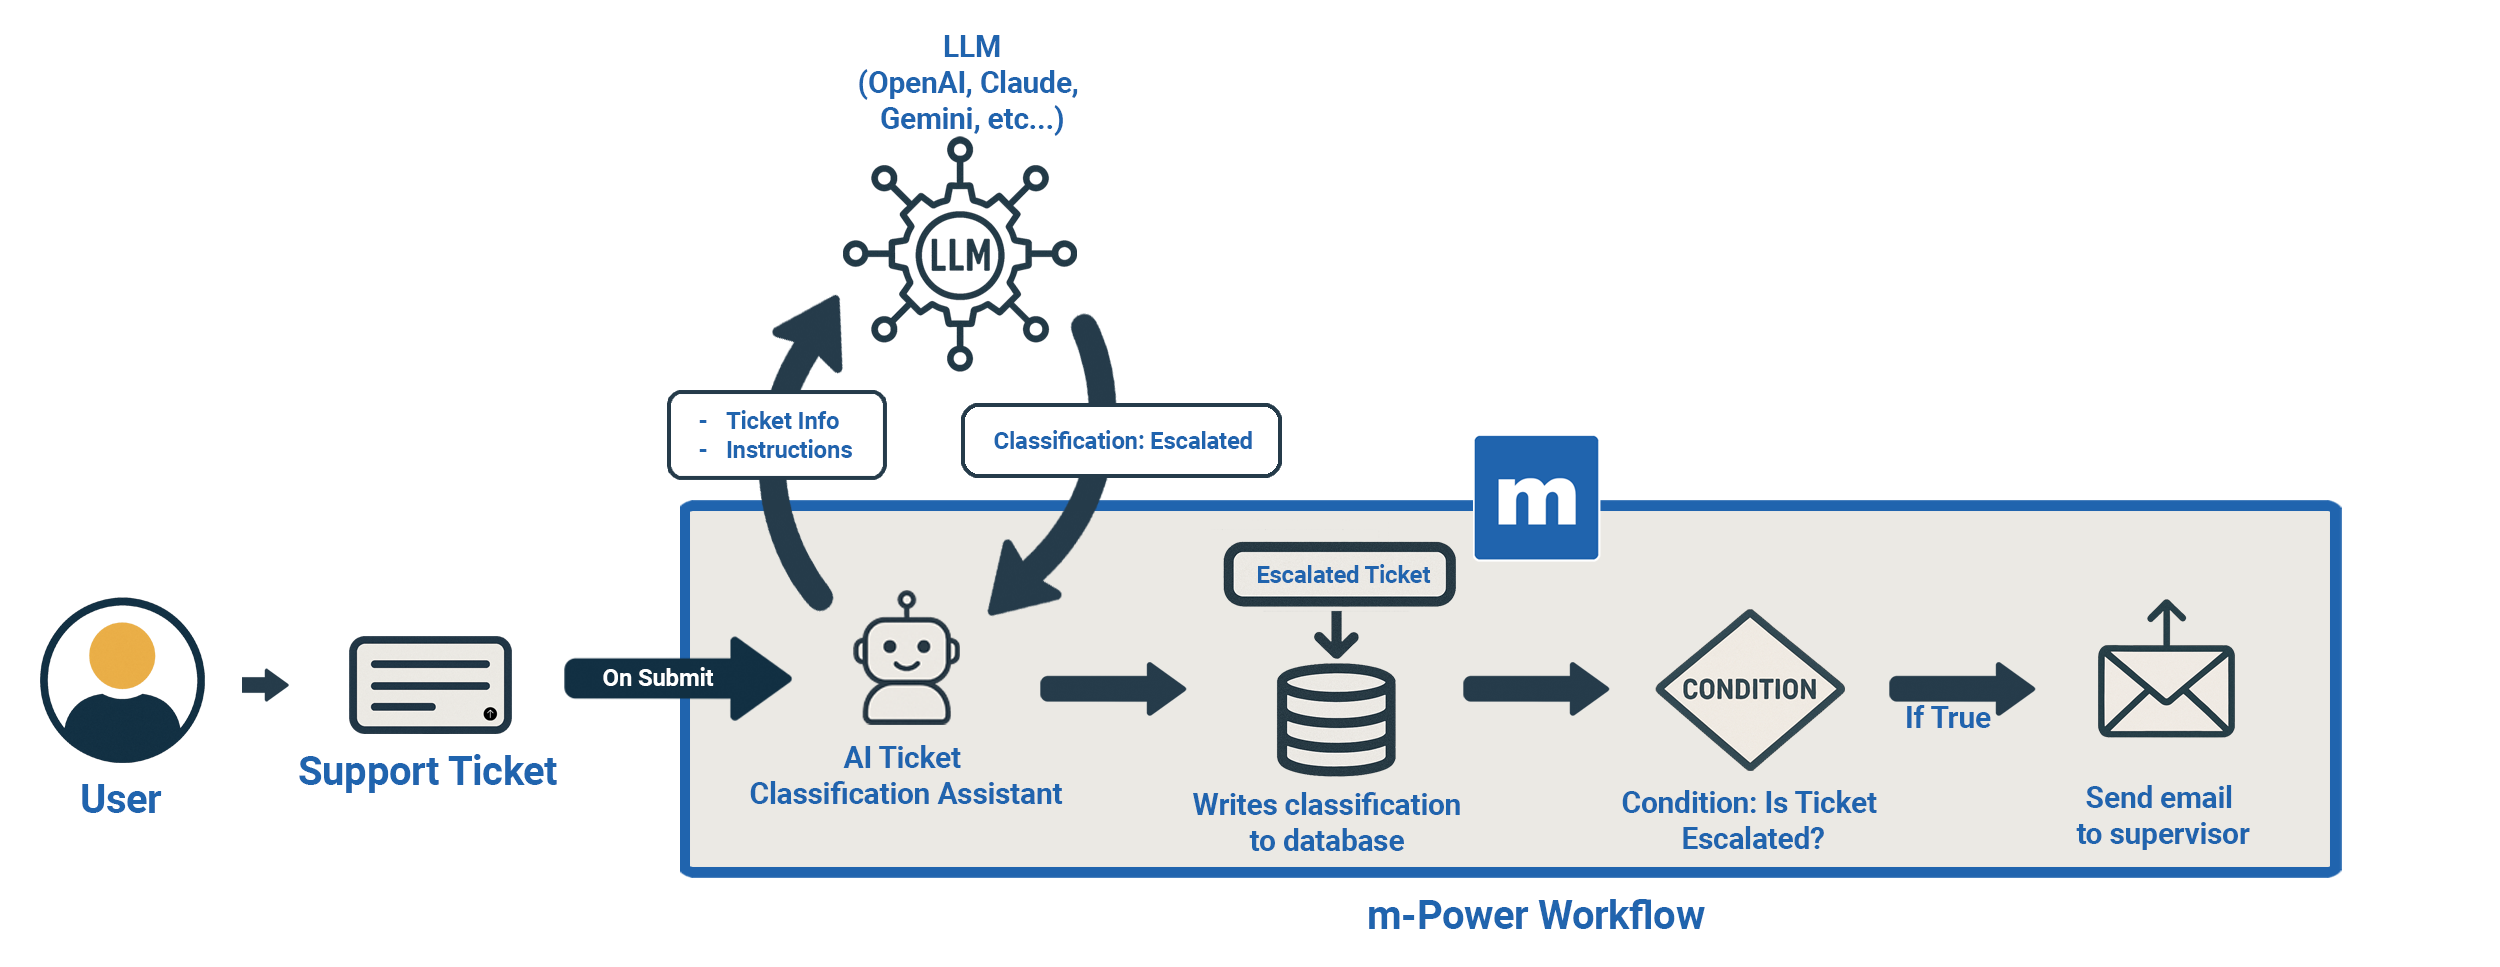
Imagine you are building a hotline ticketing system and you want to utilize AI to better help you classify/categorize high priority tickets. Based on various cases or scenarios that we will program into AI, we will let AI determine if a ticket should be categorized as “Standard” or “Escalated”. We will program m-Power to update the ticket with either of these categories. If it is Escalated, we will also trigger an email to the supervisor for urgent response.
Step 1: Build AI Assistant Application
No special configuration is needed. Simply, build an AI Assistant app and compile it. Learn more about the AI Assistant template here.
Step 2: Use System Prompts to Train AI.
The System Prompt is text specific to this AI Assistant that is sent to the LLM (Large Language Model) each time a request is sent. Think of the System Prompt as the instructions you send to AI to make it more knowledgeable. Learn more about writing System Prompts here.
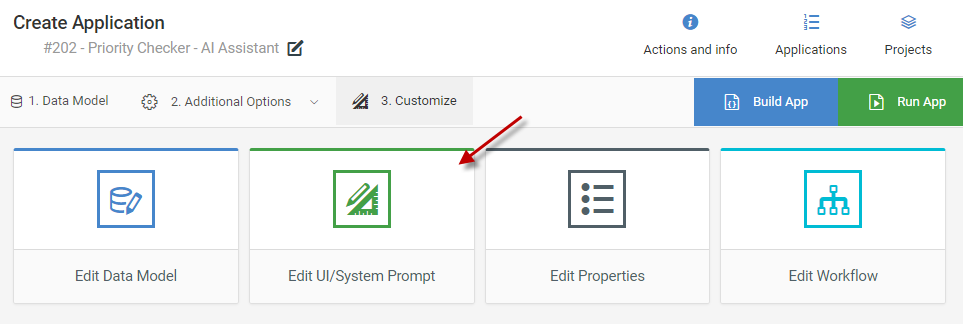
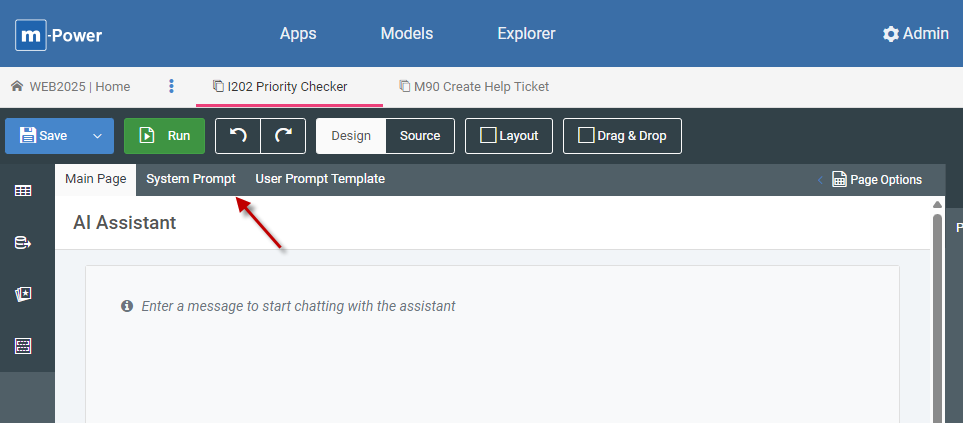
To add the System prompt, click “Edit UI/System Prompt” from your AI Assistant. Then click System Prompt.
In my case, I am going to add these instructions:
Your job is to analyze the input and only return a single value, either “Standard” or “Escalated”. Don’t return anything else.
You should return “Escalated” when the ticket is of a critical nature. Seeing things like “System Down”, “Emergency”, “Tomcat won’t start”, and “Production” are all good indicators of input that should result in an “Escalated” ticket.
“Standard” tickets should be used to classify all other prompts, especially ones that are of the “how-to” variety.
Examples:
I just took an update to my development instance and now my dropdown lists aren’t working.
Response: Standard
I’m not sure what happened but now my Tomcat instance won’t stay up and no one can access any applications. Help!
Response: Escalated
I am just wondering how to build an Interactive Report.
Response: Standard
My system just crashed and everything is down.
Response: Escalated
Step 3: Build User Facing Maintainer
After designing/painting your maintainer, open the Workflow Designer.
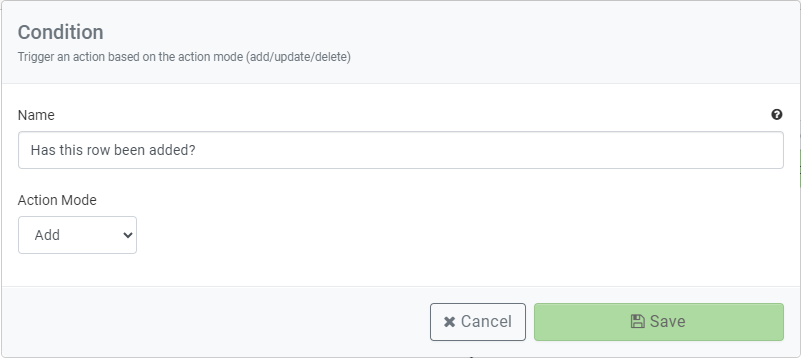
Click “Add actions.” Then choose “Condition”. Here you will select “Check the Action Mode.” Name the action and ensure the action mode is set to Add. The reason for adding this condition is that we only want the AI logic invoked on Aadd, not on update.
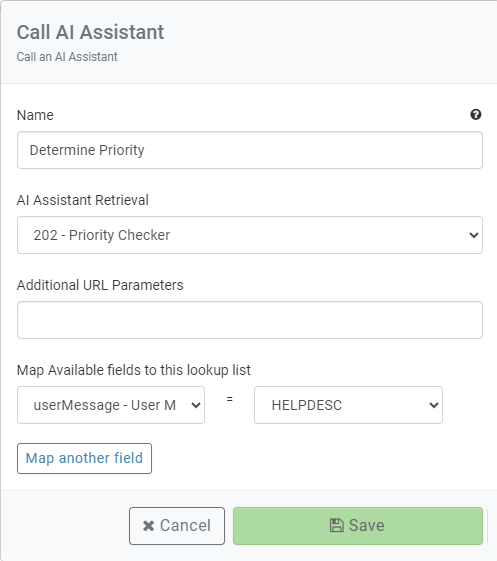
Click on the “If True” node. Click to add an Action, then select “Call an AI Assistant”. Select the AI Assistant Retrieval from the dropdown list. Then in the Map Available Fields listing, choose “userMessage” on the left, and choose the field where your user entered his or her help ticket description on the right. Since there is no user prompt, this step simulates the process of handing over what the user typed in the maintainer to the AI Assistant.
Step 4: Update the Ticket with the Result from AI
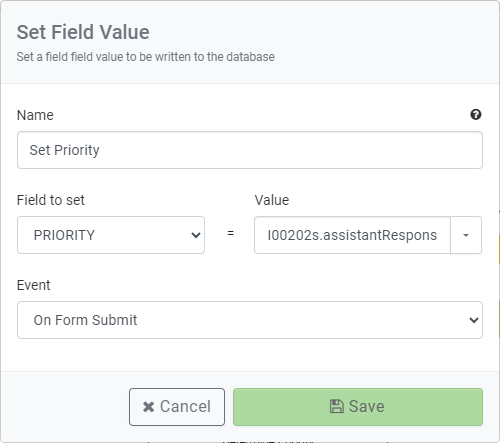
Continue editing the Workflow you were working on in Step 3. Click “Add actions” on the “Call AI Assistant” node. Then add an Action and select “Set Field value”
Map your Priority field to a value of AssistantResponse. This is the one word response that will be sent back from AI based on the rules established within the System Prompt.
Step 5: Sending Email on High Priority
Still within the same workflow, once again click on “Add actions” within the “Call AI Assistant” node and add a condition. Choose the “Compare a field value” option. In the field dropdown, select “assistant response,” set the relation to Equal to and set the Value to: Escalated. Press Save.
Click “If True” and add an Action and select “Send an Email.” Configure the Email to your liking.
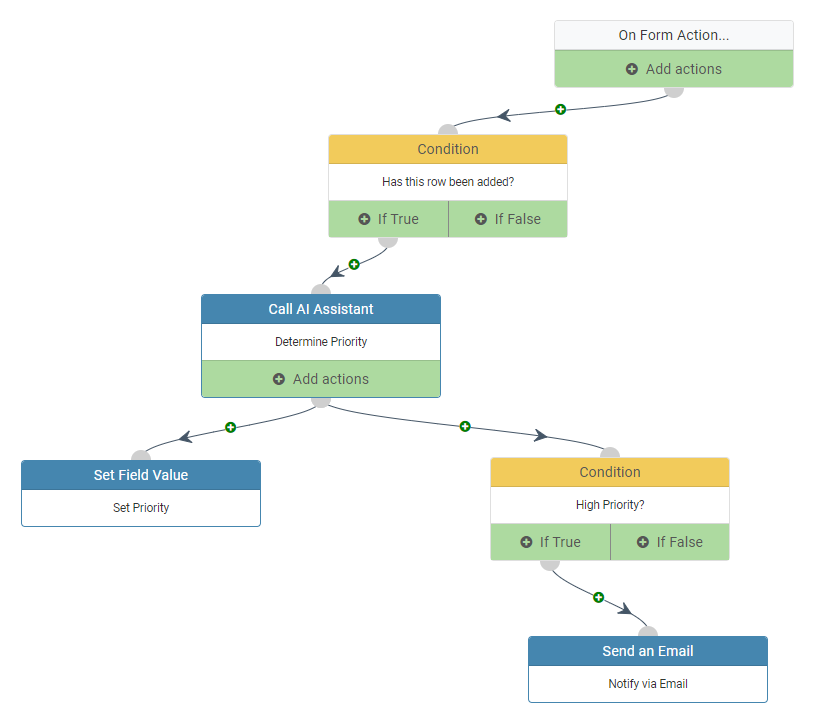
Put together, here is the layout of the entire workflow: