This documentation will showcase how to building and using AI Assistant template in m-Power.
The AI Assistant is one of two artificial intelligence templates in the m-Power software, the other being the AI Content Retrieval.
The AI Assistant template is a retrieval template, used to create most notably a AI chatbot interface for end-users to interact and chat with at runtime. While most visibly consumed as chatbot, the AI Assistant can alternatively be invoked via the workflow designer of an m-Power maintainer application, allowing developers to utilize their chatbot “behind-the-scenes” to assist with workflow processes.
Why would I use the AI Assistant?
In the simplest of terms, the AI Assistant can be though and will often be referenced in this document as a “chatbot”. Many m-Power developers have likely already interacted with chatbots in some capacity, with two notable examples being OpenAI’s ChatGPT or Microsoft’s Copilot. These “chatbots” are more generally referred to as large multimodal models (LLMs).
As is true with many LLMs, the capability of AI extends beyond just holding a conversation. With the m-Power AI Assistant, the developer will ultimately be responsible for defining the purpose and functionality of their chatbot, providing instruction and guidelines for what it can (and cannot do).
In the same vein, the developer will be able to query information in real-time, pass parameters into their chatbot for processing, and trigger workflow actions based on the response of their chatbot.
Creating an AI Assistant
The AI Assistant is a standalone template that can be selected when creating a new retrieval, as shown in Figure 1.

After creating, the developer will be shown the 3. Customize tab. At this point, the AI Assistant retrieval can be compiled immediately – no further action is required.
Customizing an AI Assistant
After building, all customizations to the AI Assistant can be access from the “3. Customize” tab of the application, as shown below:
Each area will be explained more in depth:
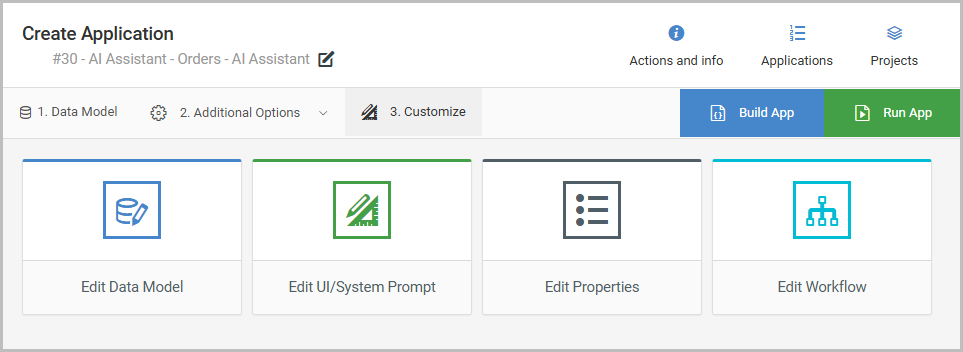
Edit Data Model
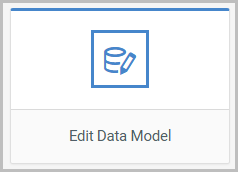
Unlike traditional m-Power applications that query the database (e.g. a Multiple Row Data List retrieval), the data model will not show any database tables or datasets.
The Data Model of the AI Assistant template will contain just the userMessage and assistantResponse as the two “fields” selected, as shown in Figure 2. This is normal and will represent the input (message) to the assistant and the output (response) from the assistant.
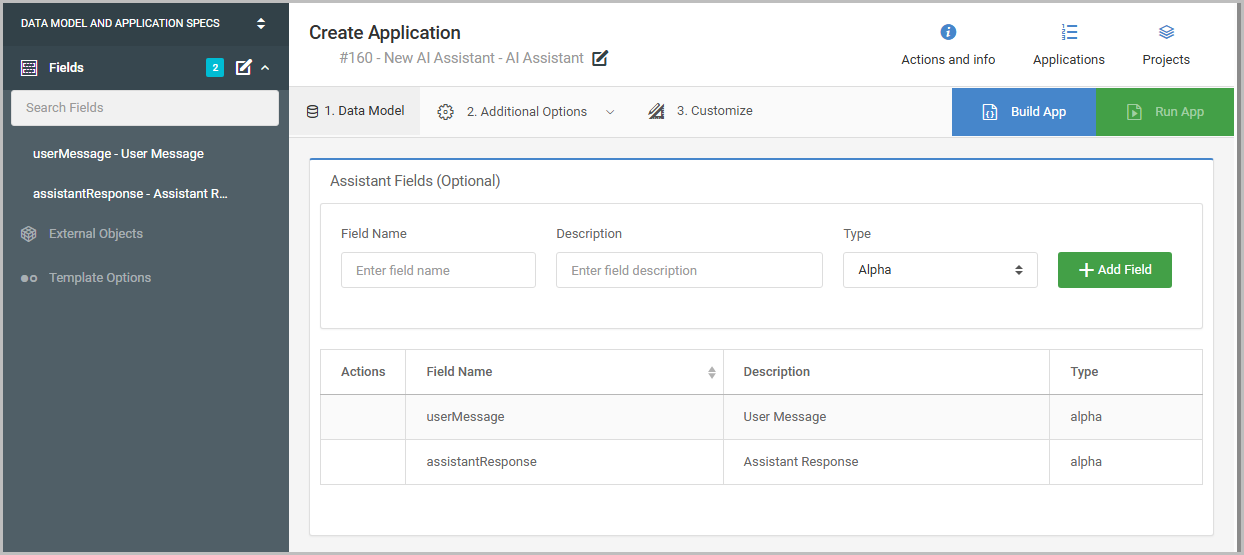
On this screen, the developer has the ability to (optionally) add Assistant Fields to their data model, which can be though of as parameters, or placeholders for values that the assistant can fed a value into when it’s utilized at runtime.
Adding Parameters to the Data Model
To add parameters that will capture information for the assistant, type in the field name and description, type, and then press Add Field.
Edit UI/System Prompt
The heart of your AI Assistant is configured here. This option will open up the m-Painter editor, where various configuration files associated to the AI Assistant can be edited.
While the presentation of the assistant can be customized, this is not the main purpose of this option. Rather, this option is used to configure your system prompt to provide instructions and guidelines for how the AI Assistant chatbot will operate.
Each of the three files shown in the m-Painter editor will be discussed for more in-depth understanding:
System Prompt
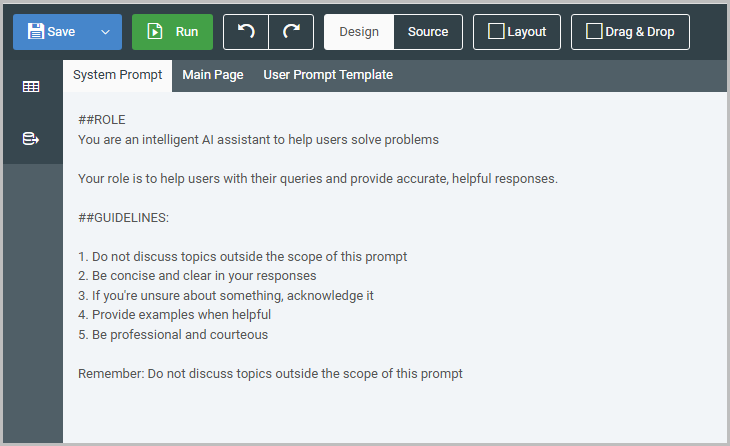
The System Prompt page defines the AI Assistant’s identity and instructions.
Within the System Prompt a developer will be writing specific guidelines and instructions as to what the AI Assistant’s purpose is, how to behave and response, as well as the output format of the response. To put it in an analogy, this file is the “job description” of your chatbot.
At runtime, these text based instructions will be passed automatically to the LLM when a user message is sent. The information here should be seen as largely static – meaning the instructions and defined rules will not change in the context of a interaction.
Any new assistant will generate a default set of instructions (shown in Figure 3) that are expected to be modified by the developer, in order to outline the tasks they intend the AI Assistant to perform.
The text displayed can be edited just by clicking inside the editor and typing, whether in Design mode or the HTML Source mode.
Main Page
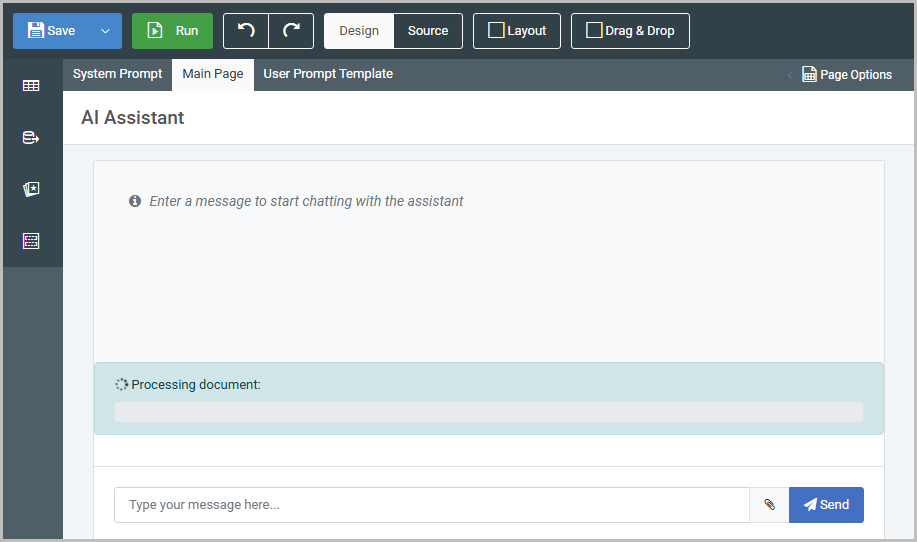
The Main Page is used exclusively to customize the appearance of the chat interface the end-user will see.
Aside from changing the title or instructions on the page, generally speaking this page will be left as-is, as edits to this screen are purely cosmetic, rather than functional.
User Prompt Template

The User Prompt defines the input (data) to the AI Assistant.
In any AI Assistant out of the box, the input is simply the user message that is directly typed into the chat interface and sent to the LLM. The entire user message is encapsulated in the ‘message’ variable shown by default (see Figure 5):
${message}There may be situations where the AI Assistant will not be interacted with directly via the chat interface. Meaning the user does not type and send a message to the LLM themselves, but rather the AI Assistant is called and sent a message “behind-the-scenes” by another m-Power’s application workflow.
In those situations, parameters will need to be passed from workflow designer to the the AI Assistant. The User Prompt Template can be customized to define the inputs (parameters) that will be dynamically fed to the assistant:
Customer Name: ${row.CNAME?html}
Zip Code: ${row.CZIP?html}
In the above example, each time the AI Assistant is called, this is providing context to the chatbot that the customer name and a zip code are dynamic piece of data that will be supplied . More on parameters will be discussed later on.
Edit Properties
The Edit Properties section contains various settings and configurable properties associated with the AI Assistant.
Selecting this will provide three sections (tabs) with different properties.
General
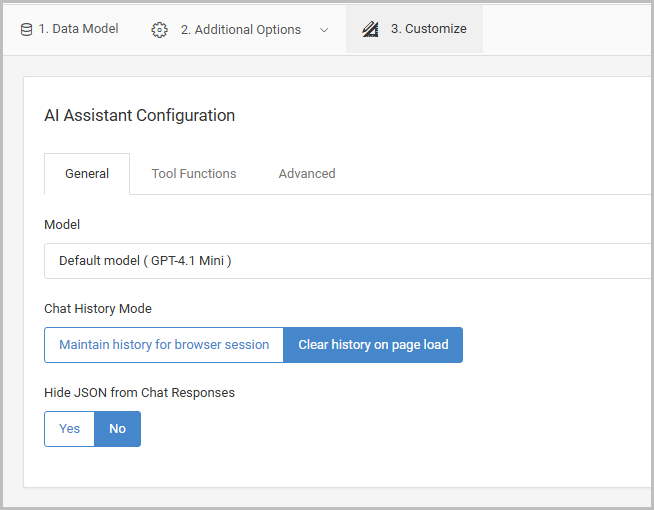
Most notably, the model (LLM) that will be utilized by the AI Assistant is selected here. mrc does not recommend a particular model over the other, as the choice of which model is utilized is entirely dependent on the developer
Tool Functions
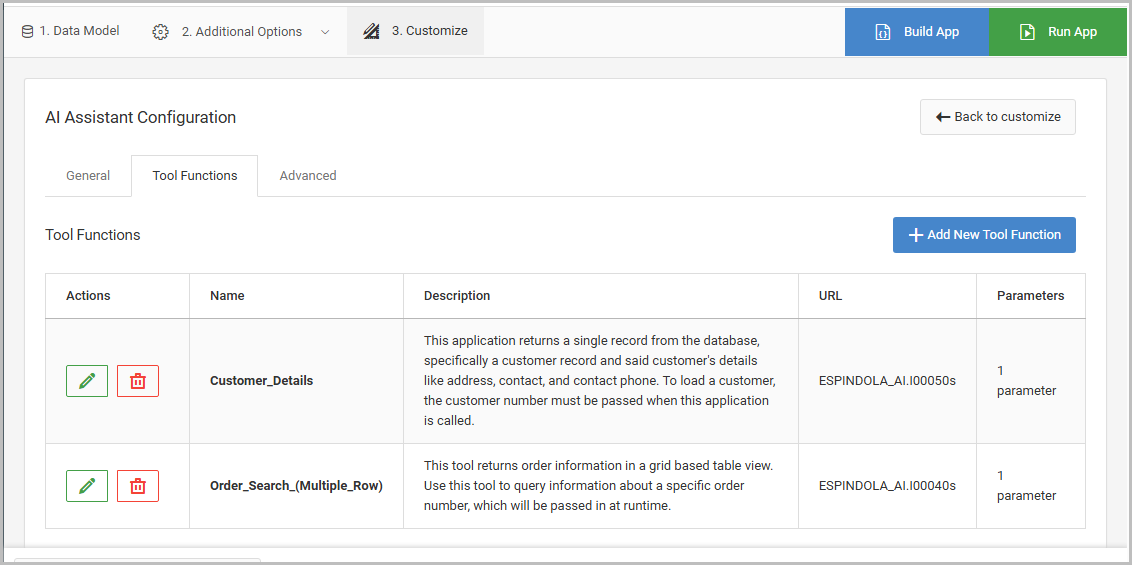
Tool Functions are supplemental calls to data the AI Assistant can utilize at runtime. This will allow the AI Assistant to optionally query live data via retrieval, query information from a document repository (an AI Content retrieval), or fire an External Object when it’s interacted with.
For more information on using tool functions, please see the following links:
- Using a Content Retriever Tool Function in Your AI Assistant
- Using Application Tool Functions in the AI Assistant
- Using External Object Tool Functions in the AI Assistant
Advanced
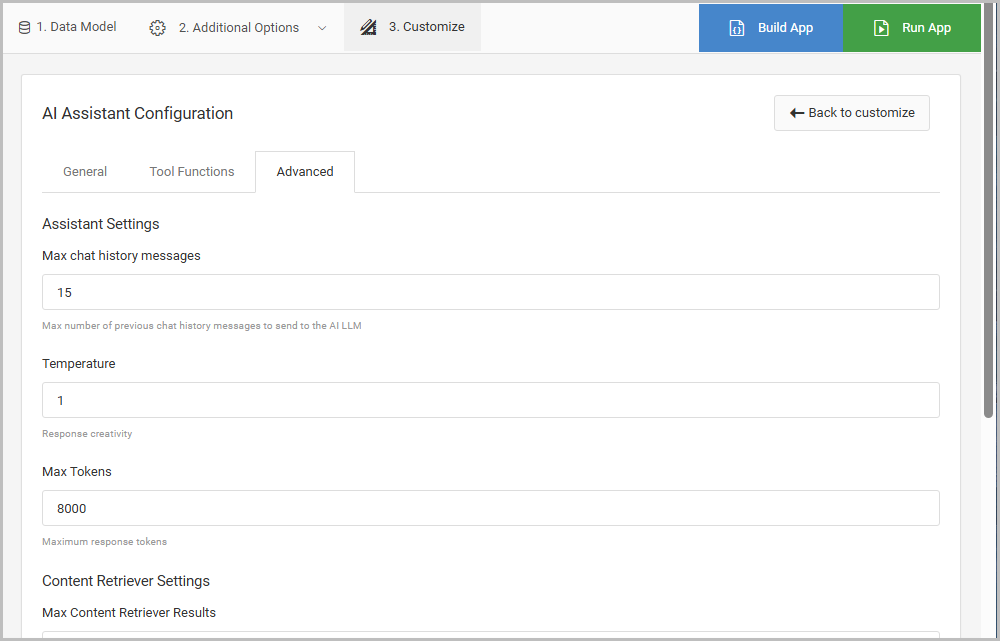
The other properties as the name implies are considered advanced options for the model selected. Generally speaking, these should not be altered without the direction from the mrc staff.
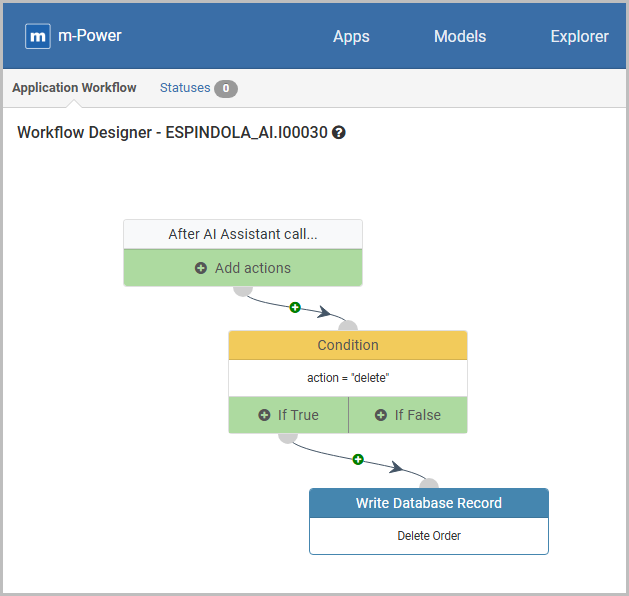
Edit Workflow
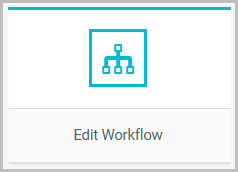
The option opens the Workflow Designer tool.
The workflow designer allows developers to establish and define workflow processes that should occur after a message is sent to the assistant.
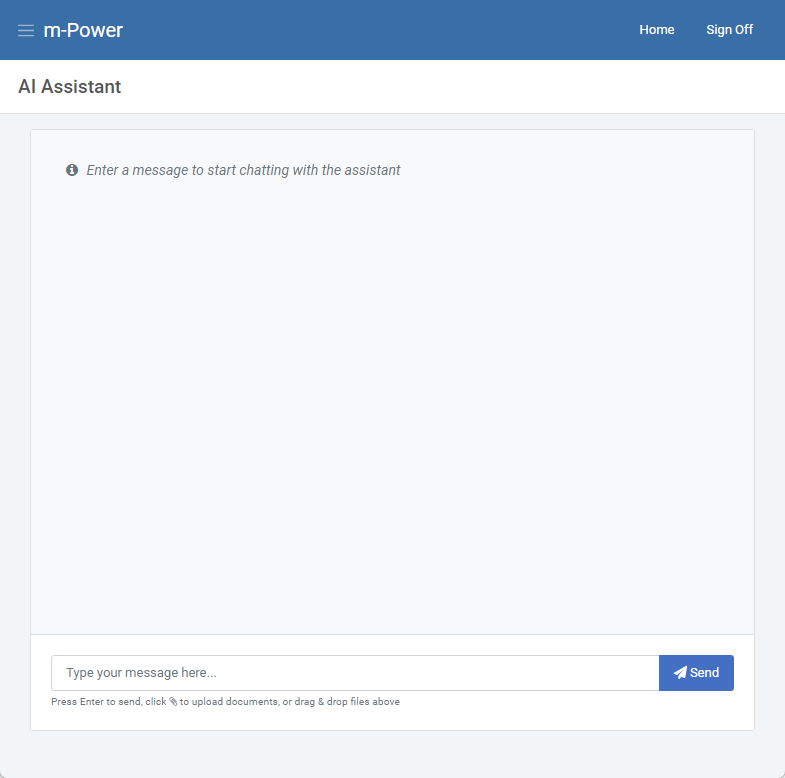
AI Assistant at Runtime
Executing the AI Assistant standalone will bring up a chat interface (Figure 10), where messages can be sent to the assistant.
(How-To) Embed an AI Assistant in another m-Power application
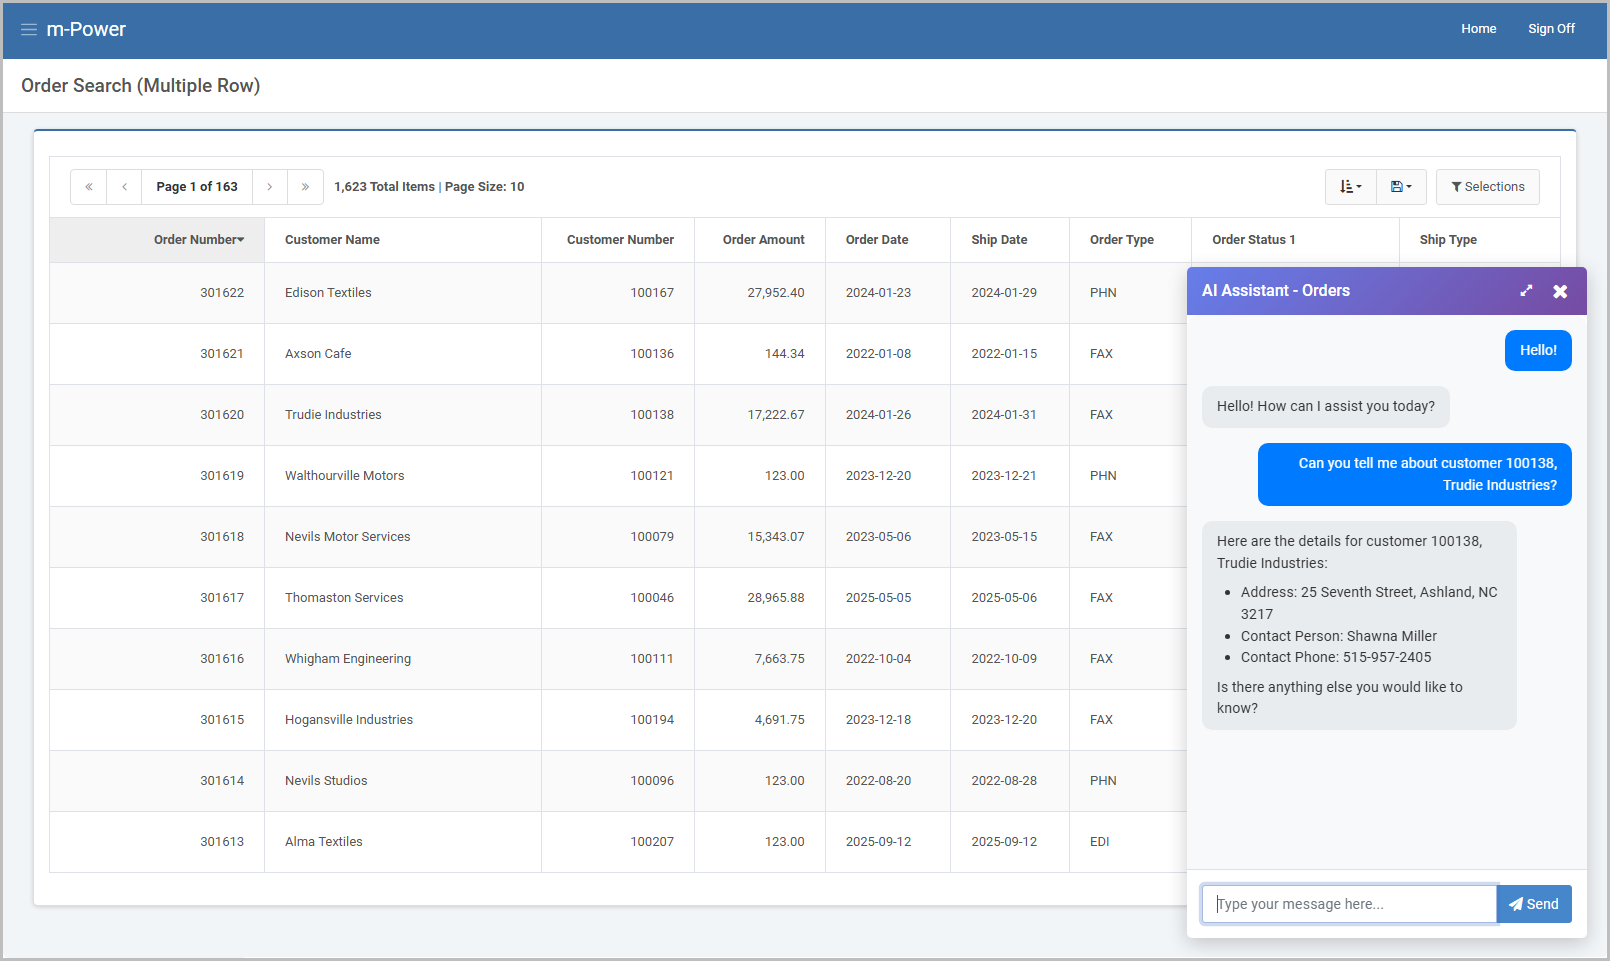
While it is possible to utilize the assistant standalone as it’s own application, the AI Assistant can be accessed and embedded into a separate m-Power application. For instance, if my AI Assistant returns information about order statuses and customers, then I want my AI Assistant on the application screen where the end-user will view the orders.
Using the m-Painter editor, an AI Assistant can be embedded into any m-Power application. It can be done via the m-Painter GUI or the HTML source.
m-Painter GUI
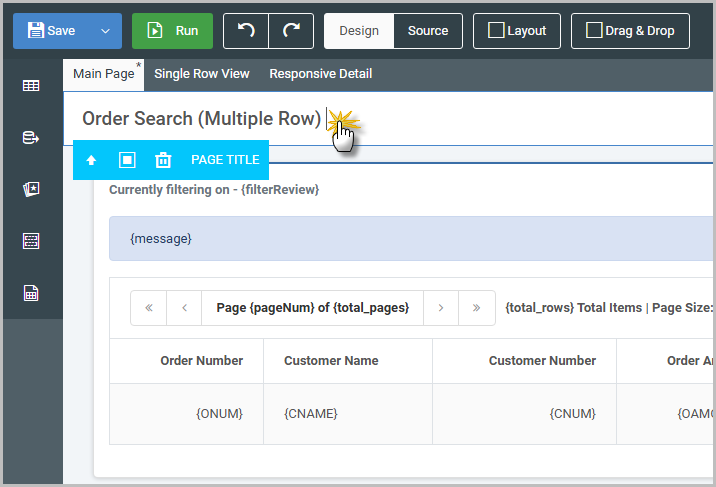
1. Open m-Painter for the main application and click inside the title bar.
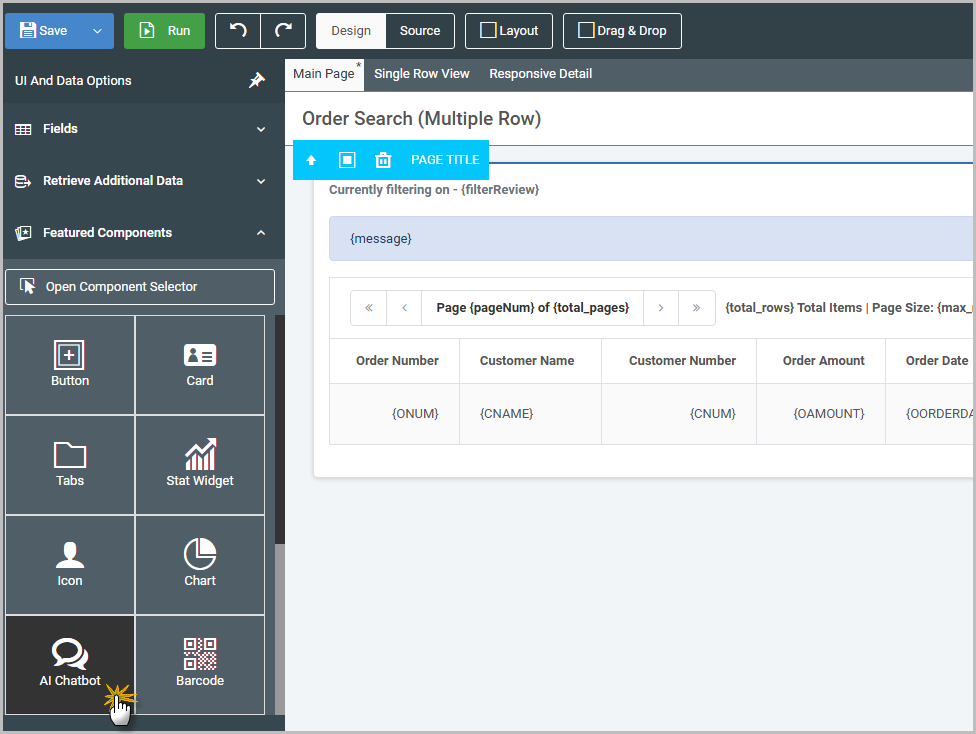
2. Select the AI Chatbot option from the Featured Components section:
3. From the Insert/Edit Chatbot Popup, select the AI Assistant retrieval that will be embedded.
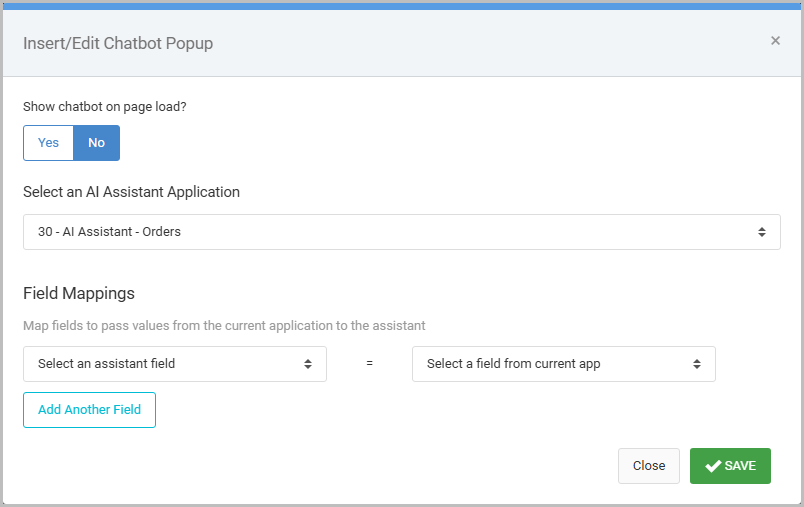
4. After saving m-Painter and running the main application, the AI Assistant will be accessible from the bottom-right corner of the viewport.
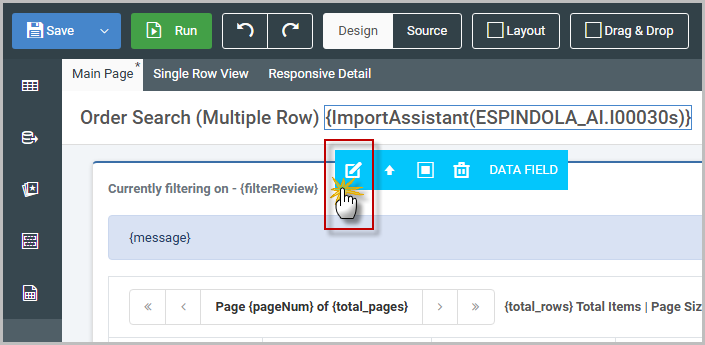
5. The m-Painter editor will show the embedded assistant call using Freemarker syntax. Use the Quick Edit (pencil button) to edit if necessary, as shown below:
HTML Source
When working in the HTML source directly, the following syntax can be inserted to embedded your AI Assistant using this import statement:
${Import("DICITIONARY.I#####s","assistant","false")}Replace with the following values as necessary:
DICTIONARY.I#####s– the dictionary name and application of the AI Assistant you want to import/embed.false– if set to false, the assistant will be suppressed on page load. If set to true, then the assistant chat interface will automatically open on page load.