Add Google Maps to your Applications
Some common purposes of the Google Maps are:
- Map a list of available products and where your customer base may find them
- Visualize the location of your nationwide fleet
- Embed closed order addresses to determine shipping logistics
- Map a list of current clients to see what geographical areas need more of your sales attention
- Create a graphical representation of your partners' locations for easy customer search
Please follow the steps below to integrate a Google Map inside of your web application:
Note: Before applying a Google Map to your application, your organization will need to license the Google Maps service directly from Google. Please see the Google Maps Terms of Service for information regarding plans and pricing and visit Get API Key to register for an API Key.
Once you have your API key value, you will need to insert this into your mrc_servlet_config.xml file. This is accessible from the Admin Menu -> Edit Dictionary Files -> Servlet Properties. Open text mode from the 'More' button on the right. Find the following property and insert the API key value into the empty value string:
<google-map-key pdesc="mapkey" value="" />Save and restart Tomcat.
The following steps need to occur each time you wish to generate a map:
- Click the Globe within the m-Painter toolbar (shown below highlighted with a red outline).

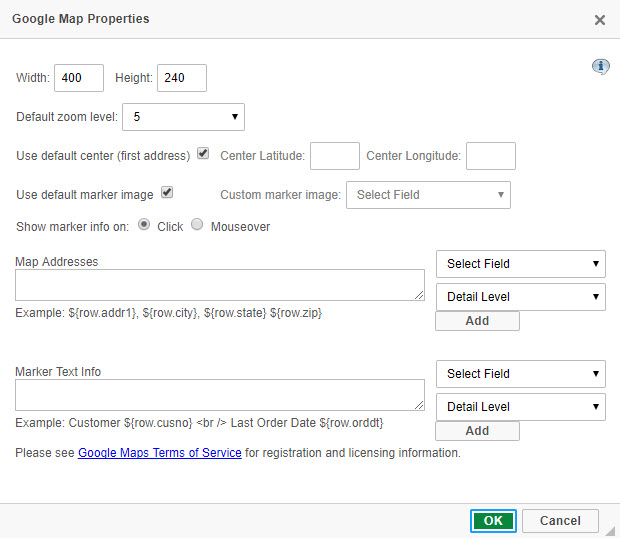
- A helpful pop-up will appear that will allow you to customize your map. Options include:
- Ability to control the Width and the Height of your map (in pixels).
- Control the Default zoom level (The higher the number, the more zoomed in you are by default).
- The ability to control default centering (By default, maps will center upon the first address, however you can center by a Latitude/Longitude line)
- The ability to control the marker type (By default the marker will be the red Google flag, however, you can conditionally use different images by entering the path to an image within a calculation. In this case, you would select the given calculation from the Custom marker image dropdown. Lastly, you could specify "Other" from the drop-down and hard code a static path to an existing image.
- Show marker info allows your end user to control how they see additional "balloon" information. By default, the option is on click. However, changing the value to "Mouseover" will activate the balloon window on mouse contact.
- Map Address — This option is perhaps the most important, as it controls what is mapped by Google. You can specify an entire address, a city, a zip code, or even just a state. So long as it is a valid location, it can be mapped! Select the necessary fields from the "Select Field" drop-down. Then press the "Add" button. Note: Be sure to add the necessary delimiters, such as commas where necessary.
- Marker Text Info — This option controls what data is seen in a balloon pop-up when a user clicks on a marker within the map. As a developer, it is your decision what data, if any, should appear in the balloon pop-up.
- When completed, press "OK" and Save your application.
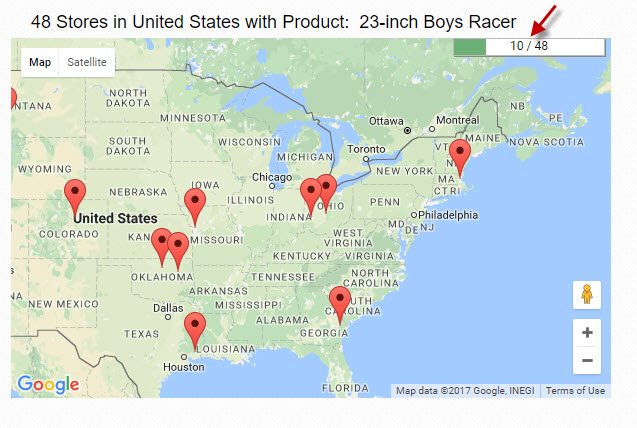
- When your application executes, you will see your Data markers begin to fill the screen as a progress bar within the map informs you of how many points have been populated:
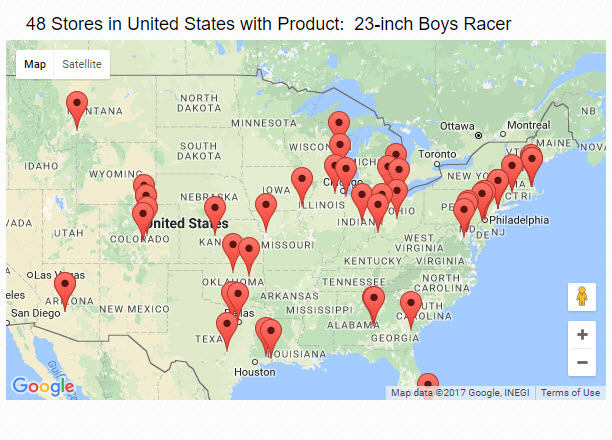
- Once completed, your map will look something like this:
Additional Notes:
Question: I have some existing m-Power maps that were created before 2014 and use the old Google Maps (v2) logic. What can I do to make these work?
Answer: To convert an older map to the latest logic, simply open the application in m-Painter and click "Save." m-Painter will make all of the necessary changes to your existing map to convert it to the proper (v3) syntax.
Question: My application was heavily painted and I've had to change m-Painter to text-editing mode. How can I still upgrade to v3?
Answer: To manually convert an existing application, make the following two changes:
1. Add "${mapScripts}" directly before "<script type="text/javascript" id="mrcmap">"
2. Change "document.observe("dom:loaded", function() { " to "jQuery(function() {"
3. Save.