Working With Links
Click here to view the current documentation for this feature.
After highlighting text or clicking on a field substitution, you have the option of inserting a link. While there are many options for inserting links into your applications, this document will cover the Insert/Edit Link window and some of the things that can be done.
Basic Links
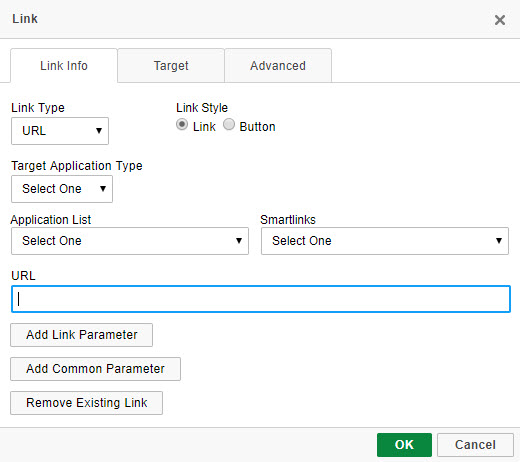
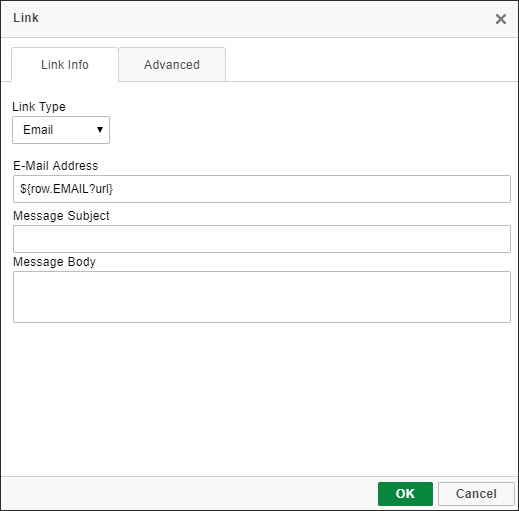
When you first click to add a link, the window shown above is what will be displayed. Under the Link Info tab, Link Type will typically be 'URL'. If you are creating a Lookup window, you should use 'Return Data'. More on Lookup Windows can be found here. Select 'Email' if wanting to open the end user's default email app to send an email. With 'Email' URL type selected, you may specify the recipient email address, email subject, and email message body. If the recipient address is in your dataset, you may use the field substitution in the E-Mail Address field.
The next three dropdowns are the Target Application Type, Application List, and Smartlinks. The first two are used to automatically link to any application within the current data dictionary, and Smartlinks is used to automatically link to any smartlinked application within this application which will also pull in the correct parameters to pass between the two applications.
Note: If you want to link to an application in a different dictionary, please type the application’s link manually into the URL input.
The final input on this tab is the URL input field. If selecting an application from this dictionary or a smartlink, this will be automatically populated. You can then use the associated buttons below to Add Link Parameter, Add Common Parameter (date, time, user, etc.), or even Remove Existing Link from the highlighted text/field. The URL value is where the link will redirect to when clicked and can be any valid URL address.
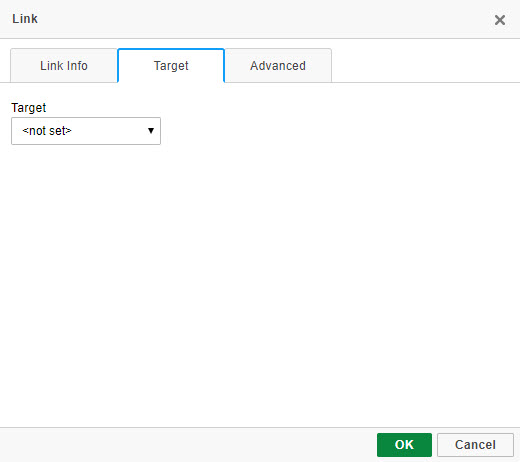
This tab controls the behavior of the link when clicked in terms of where the linked content will open. At first, the Target dropdown is the only option on this tab. However, once a selection is chosen, there may be several other options to further customize the current link’s behavior such as window size, whether there are scrollbars, or even whether the new window will be resizeable.

This tab controls the advanced features of the link such as the link’s ID or class, what relationship this link has, what character set to use with this link, etc. This tab fully allows the link to be fine-tuned to behave and look exactly as needed within your applications.
An important option here to mention is the Protocol dropdown. For linking to m-Power apps, you will want to use Relative. The other options will add the text to the beginning of the specified link (i.e. choosing https:// in the dropdown will cause www.google.com to actually go to https://www.google.com.
Hover Window
There are numerous functions for links with a hovering capability. However, perhaps the greatest use would be drilling down to detail information on one particular record. With the hover window capability, your user can now drill down to detail information without navigating away from the header information. Thanks to AJAX capabilities, your users will have a more streamlined browsing experience, allowing them to access more data on one screen.
- Highlight the text or field substitution where you would like your hover link to appear.
- Click the “Link” button in the toolbar or right-click on the text/field and select “Insert/Edit Link”.
- Choose the proper application and parameters. If this is a smartlink, simply choose the correct smartlink from the dropdown. If it is a different application, select the proper application as well as any needed parameters to load the correct record(s) in the hover window.
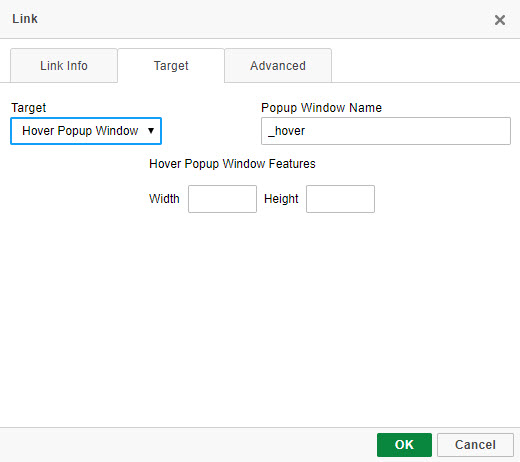
- Navigate to the Target tab and choose “Hover Popup Window” from the dropdown.
- Choose the appropriate size for your height and width. Note: If you are unsure what size to choose or require a dynamic size, type “auto” for the width, height, or both.
- Click OK and then save your application.
At runtime, hovering over this link will show a window with your content displayed inside.
Popup Window
Popup windows allow the linked content to be displayed in a separate window loaded in front of the current screen. This is useful when you have content you would like to display in a separate window, but have too much content for a hover window or want more control over this window’s look.
- Highlight the text or field substitution where you would like your popup window link to appear.
- Click the “Link” button in the toolbar or right-click on the text/field and select “Insert/Edit Link”.
- Choose the proper application and parameters. If this is a smartlink, simply choose the correct smartlink from the dropdown. If it is a different application, select the proper application as well as any needed parameters to load the correct record(s) in the popup window.
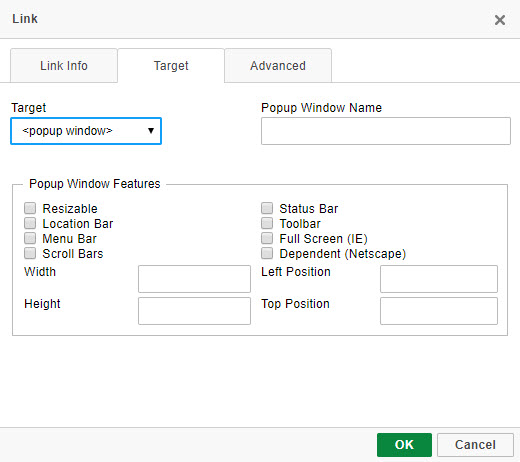
- Navigate to the Target tab and choose “
”. - Select any necessary features for this popup window such as whether it can be resized, the location of the popup window, the size of the popup window, etc.
- Click OK and save.
At runtime, clicking on this link will open a popup window above the current screen with the options you have selected.
Popup Dialog
While there are numerous uses for a popup dialog, the primary function of such a feature is to call a Maintenance application via a popup, write a Record to the Database, and close the popup window. As the developer, you have the option to redirect the original page if desired.
- Highlight the text or field substitution where you would like your popup window link to appear.
- Click the “Link” button in the toolbar or right-click on the text/field and select “Insert/Edit Link”.
- Choose the proper application and parameters. If this is a smartlink, simply choose the correct smartlink from the dropdown. If it is a different application, select the proper application as well as any needed parameters to load the correct record(s) in the popup window.
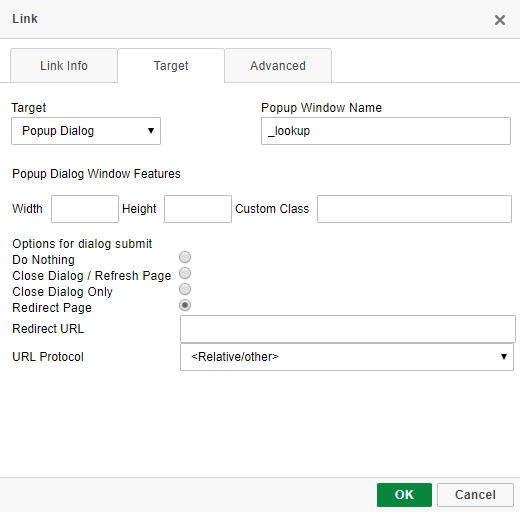
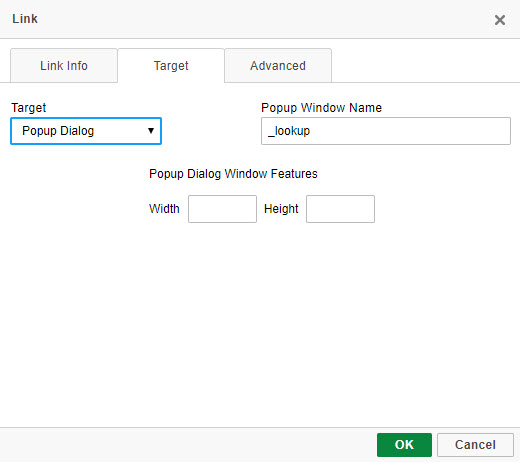
- Navigate to the Target tab and choose “Popup Dialog”.
- Choose a name if desired, or a width and height.
- If the linked application is a maintainer, you will have the option to redirect the original page upon submitting the record. Enter this URL in the input box.
- Click OK and save.
At runtime, clicking on this link will open a modal window with this application. This window can be closed or will be redirected upon record submission if desired.
If the application you are linking too is a maintainer, you have the additional option of specifying what the application should do once the user submits the form. Options include:
- Do Nothing — The dialog window will remain open
- Close Dialog/Refesh page — The dialog window will close and the underlying page will be refreshed.
- Do Nothing — The dialog window will be closed but the underlying page will not reload.
- Redirect Page — Specifying this option will cause the underlying parent page to be redirected to the URL of your choosing.