Visibility Controls via m-Painter
View current documentation for this feature here.
m-Painter offers several visibility control methods to add to your application to allow you to have finite control over which elements of the page are displayed and to whom based on several different configurations. At present, m-Painter supports three such methods:
- Conditional Visibility — Show/Hide elements based on other on-screen inputs
- Control Access with Roles — Show/Hide elements based on the current user's menuing role
- Control Access with User Privileges — Use table-driven logic to control which elements on the page will be shown/hidden
These features are only available within Bootstrap Templates. Some options may not always be available. For instance, "Conditional" Visibility" is only available when working with form input based templates.
Conditional Visibility
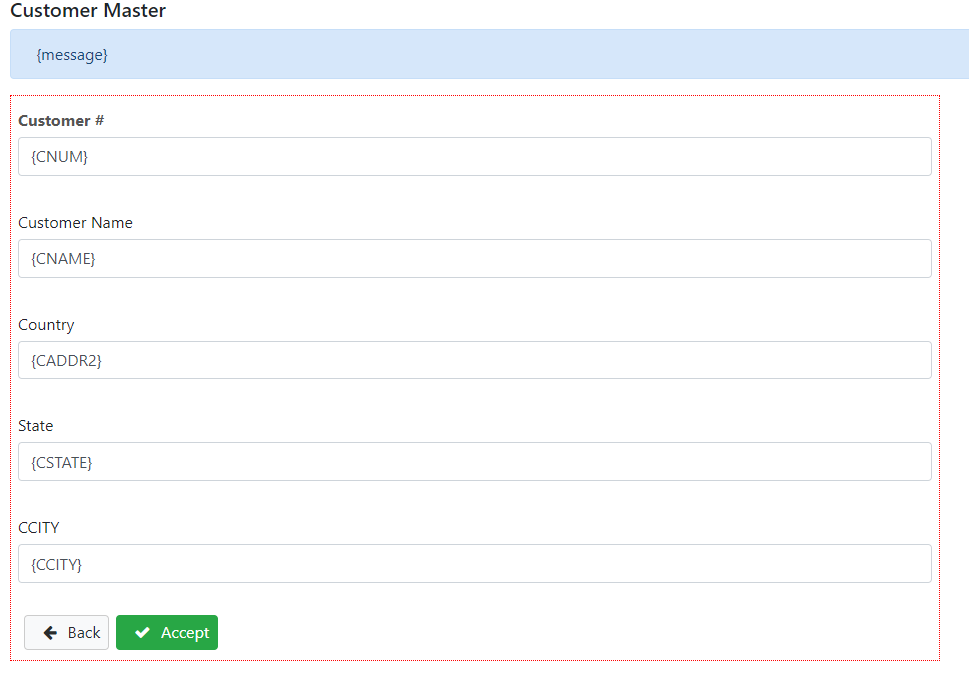
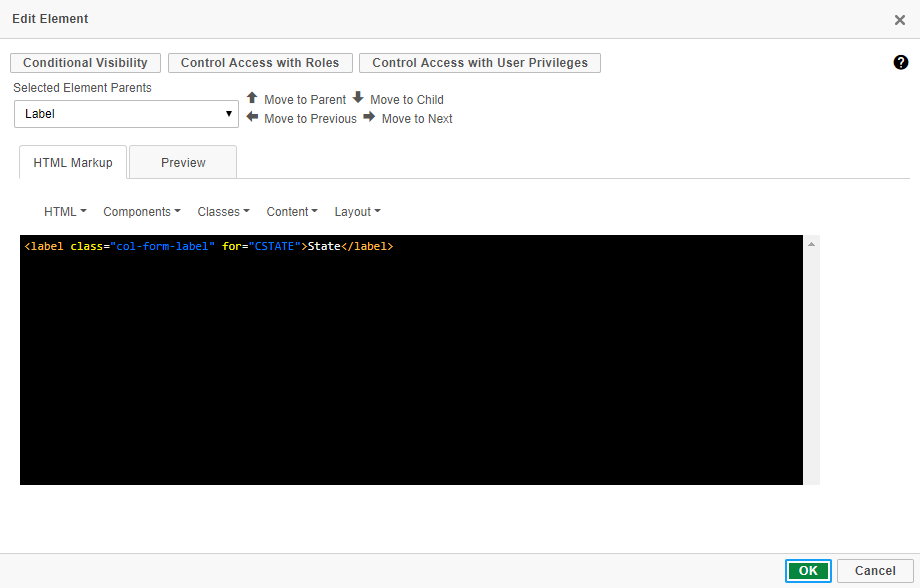
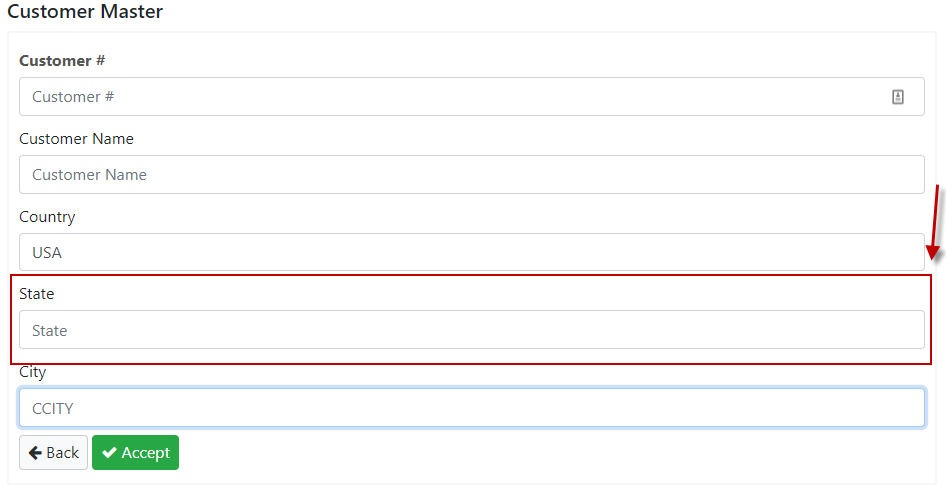
Available in maintenance applications where users enter data, this feature will allow you to conditionally show/hide elements on the page based on other values the user has entered. For this example, I am going to conditionally show the "State" input only when the user enters in the country name of USA. First open m-Painter and right click on the label "State".
Select "User Interface", then select "Edit Element."
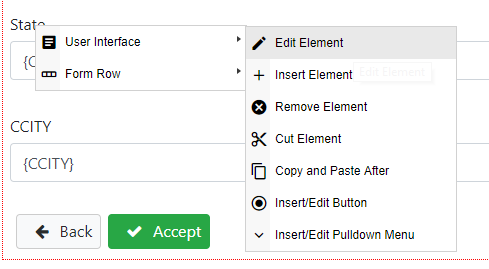
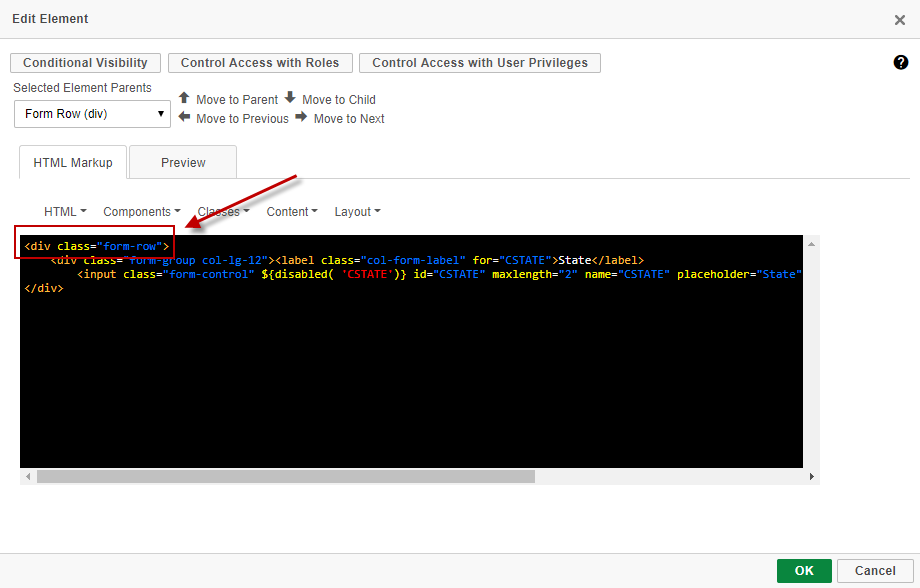
The "Edit Element" window now shows you the label you selected. Since we want to hide the label and the input, click the "Move to Parent" option. This now shows the label and the input, but we want to move up one more level to select the entire row. Do so by clicking "Move to Parent" again.
Seeing that we have the proper element selected (see screenshot below), we can now click the "Conditional Visibility" button.
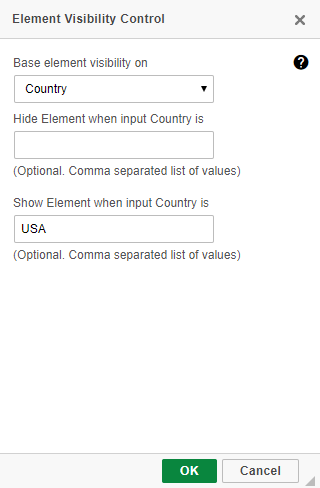
Use the dropdown list to control the field/input that is controlling the visibility. Then choose to enter information for
Note: If you want to run tests off of a blank value, use the value of "BLANK" or "NOTBLANK".
When completed press OK to exit the "Visibility Control window" then pres OK again to exit out of the "Edit Element" window. Finally save your changes.
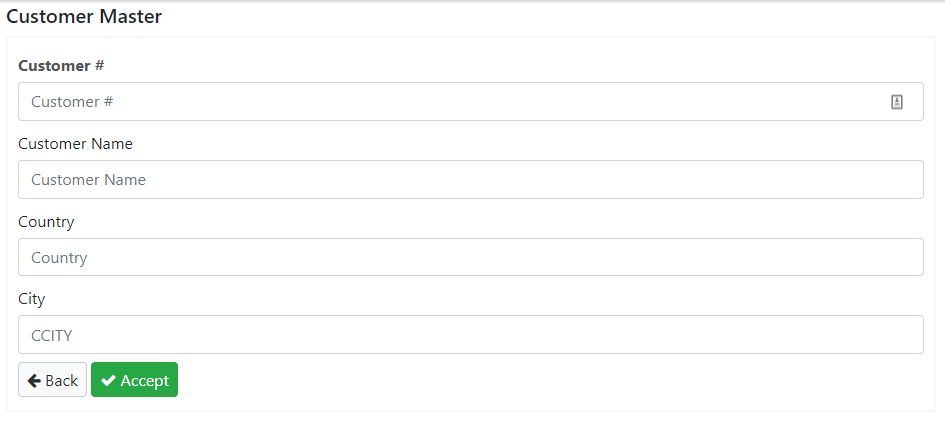
Below you can see the "before" and "after" of my change once I've entered in a country value of USA.
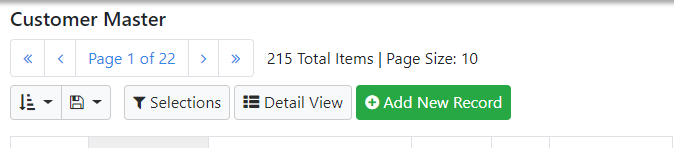
Control Access with Roles
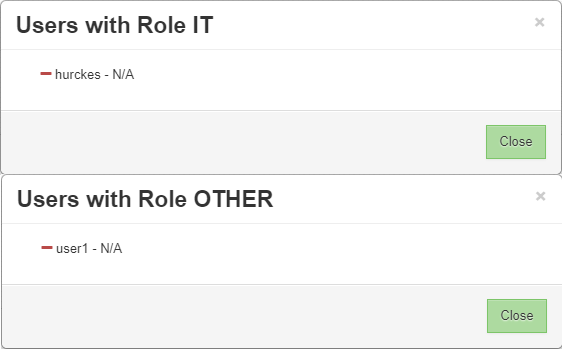
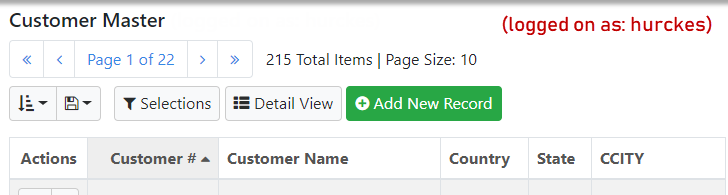
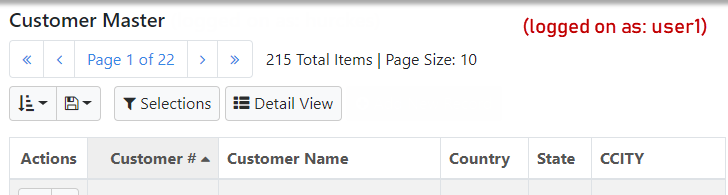
Since most users utilize the built-in menuing system (along with sign-on security), m-Painter allows you to leverage those configurations to further control what options are shown/hidden on the page. For this example, we are going to conditionally hide the "Add New" button based on a user's role. There are two users, "hurckes" as a member of the "IT" group and a second user, "user1" who is a member of the "OTHER" group. More information about assigning users to roles can be found here.
Note: This feature requires that you have both your menuing and sign-on security enabled and configured.
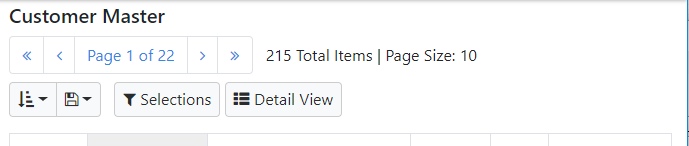
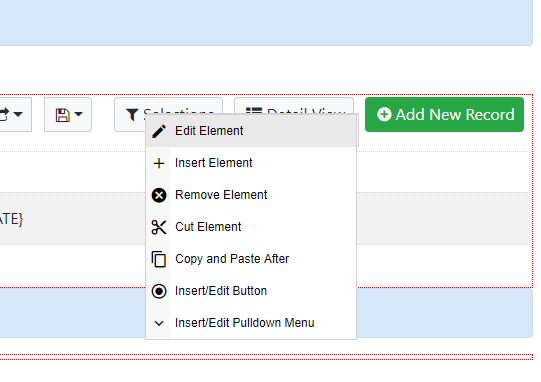
Open m-Painter and right-click next to the "Add New Record" button. Select edit element

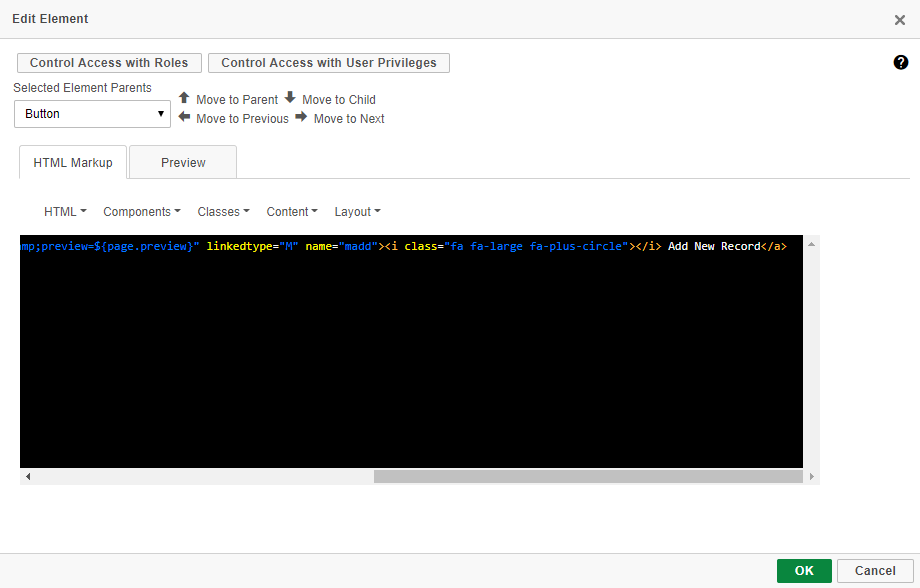
Your "Edit Element" dialog will look similar to this. If you scroll to the right, you'll see the "Add New Record" text.

Click the "Control Access with Roles" button.

You can select multiple roles. Whichever roles you select will be the only ones who will be able to view this element. When finished, press OK to exit the "Role Control" dialog and press OK again to exit the "Edit Element" dialog. Be sure to save.
Below you can see the difference of what the display looks like based on the logged in user.
Control Access with User Privileges
Developers who want more control of which users can have access to specific functionality will find the User Privileges feature beneficial. More information about configuring User Privileges can be found here. This section assumes you have already created the table, retrieval, and configured the mrc Signon configuration file.
This example will illustrate how to use User Privileges to hide/show an element (The add new record button) based on the current user privilege. First, open m-Painter and right click next to the element you wish to control.
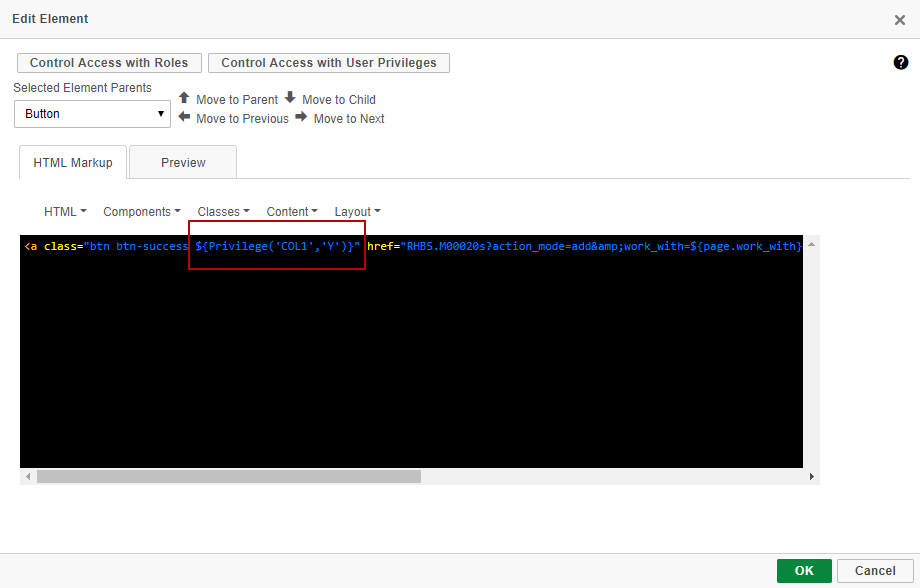
An "Edit Element" dialog will appear. Be sure you've selected the proper element by using the parent/child navigation arrows. Once the proper one is selected, click the "Control Access with User Privileges" button.
Next, in the privilege name, enter the name of the column you are wishing to apply the privilege. This field must match a mapped field from your app listed in the mrc Signon Configuration file. Lastly, enter the Privilege value. At runtime, we will examine the user's record to see if the value listed in the field in question matches what is specified here. If it is a match, the element will be displayed. If it does not match, the selected element will be hidden.

When completed, press OK to exit the User Privilege window. You'll see the highlighted code has been added. Click OK to exit the Edit Element window. Finally, click save in m-Painter and run your application.
In my case, the first image is based on a matched User Privilege. The second image is an unmatched privilege.