

Data Analytics is designed to allow end-users to request data via a chatbot (such as What are my top 10 items sold this year, Compare profit margin by Customer for this YTD vs Last Year, or What departments have the highest callout rate, etc…) and for AI to do all of the leg work behind the scenes to compute the answers.
Why this Approach?
End-users continue to get more and more sophisticated. As m-Power developers, this requires more and more time to construct the necessary reports to answer these questions. With enough users asking these complicated questions, it can quickly take up and more development time.
How does it Work?
Developers register tables to their Data Dictionary, just as they always have. Developers then add additional pieces of information to the table’s metadata. Information provided includes table descriptions, field descriptions, how objects should be joined together, and other instructions that AI can use to better understand the tables provided.
At-run time, via a chatbot, an end-user asks a question. That question, along with the System Prompt, and Dictionary metadata is sent to AI. AI then determines the best SQL statement to run to access the necessary information. That SQL statement is returned back to your m-Power server for processing. The accompanying result set is sent back to AI for analysis before the final answer is returned to your end-user.
Data Analytics Configuration
Because Data Analytics involves executing AI-generated SQL against your database, a one-time global setup is required to establish a secure, dedicated connection.
1. AI Datasource
Since AI is generating SQL statements that are being sent to m-Power to execute, a new AI specific datasource is needed.
Go to Admin -> DataSources.
Find your current datasource connector and click copy.
On the following screen, append _AI to the ID.
2. Dictionary Configuration
Once the new bean has been installed, you must link it within your dictionary.
Go to Admin -> Dictionary Configuration -> Runtime Application Settings. Click Property Options -> Text Mode.
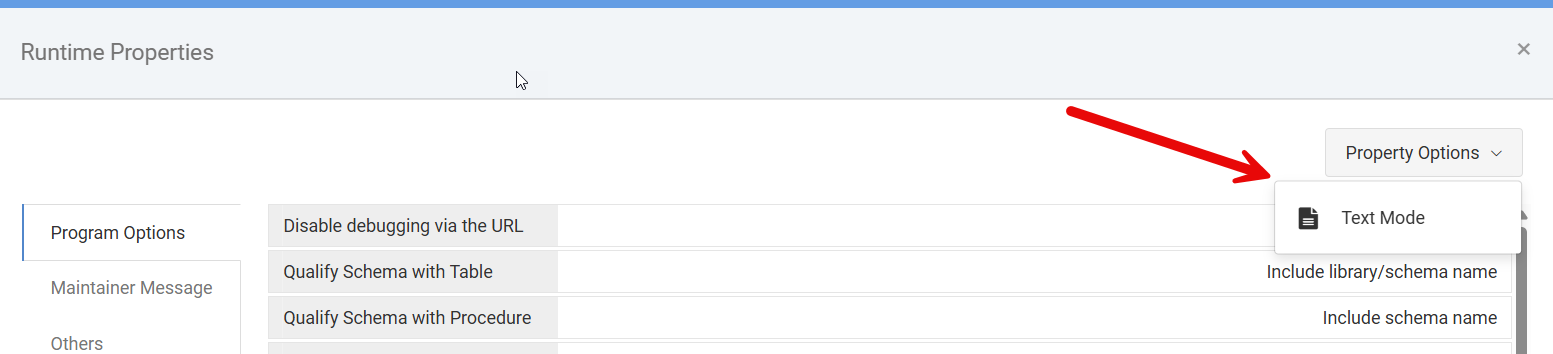
Search for this line: <datasource pdesc="datasource"
Immediately after this, paste this line:
<datasource_ai pdesc="datasource_ai" value="as400_remote1_ai"/>

After this please restart Tomcat.
Managing Data Dictionary Meta-Data
Managing the Dictionary Meta-Data can be found via Admin -> Tables -> Manage Tables -> Edit Meta Data
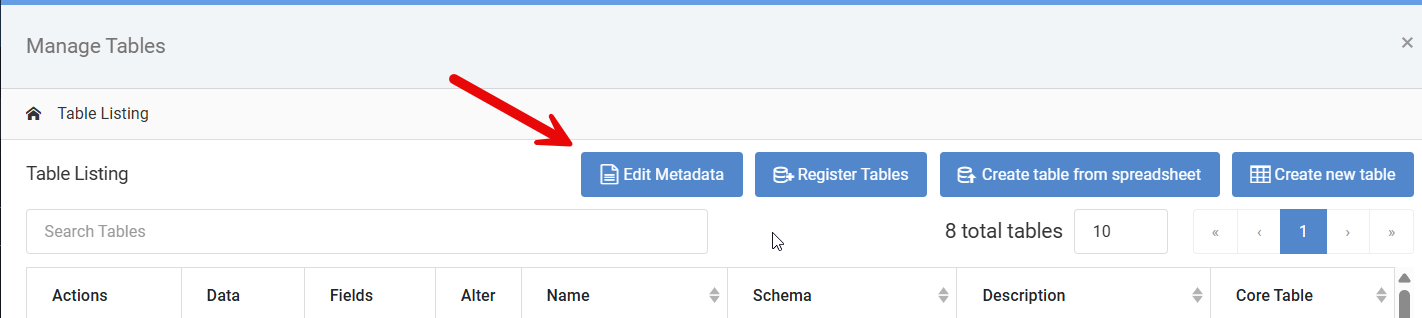
The purpose of these screens is that you are providing guidance to the Large Language Model on how your database is organized, how relevant data is connected, and where to find key data.
Screen Organization
The Meta-Data management is comprised of three key areas.
Table Listing
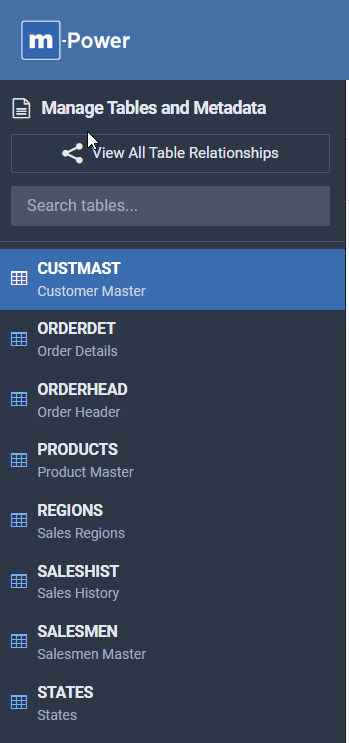
The left panel shows all registered tables in the Dictionary. clicking on any of them will allow you to manage various pieces of data, including the table purpose, field level information, and table joins.
Table/Fields/Relationship
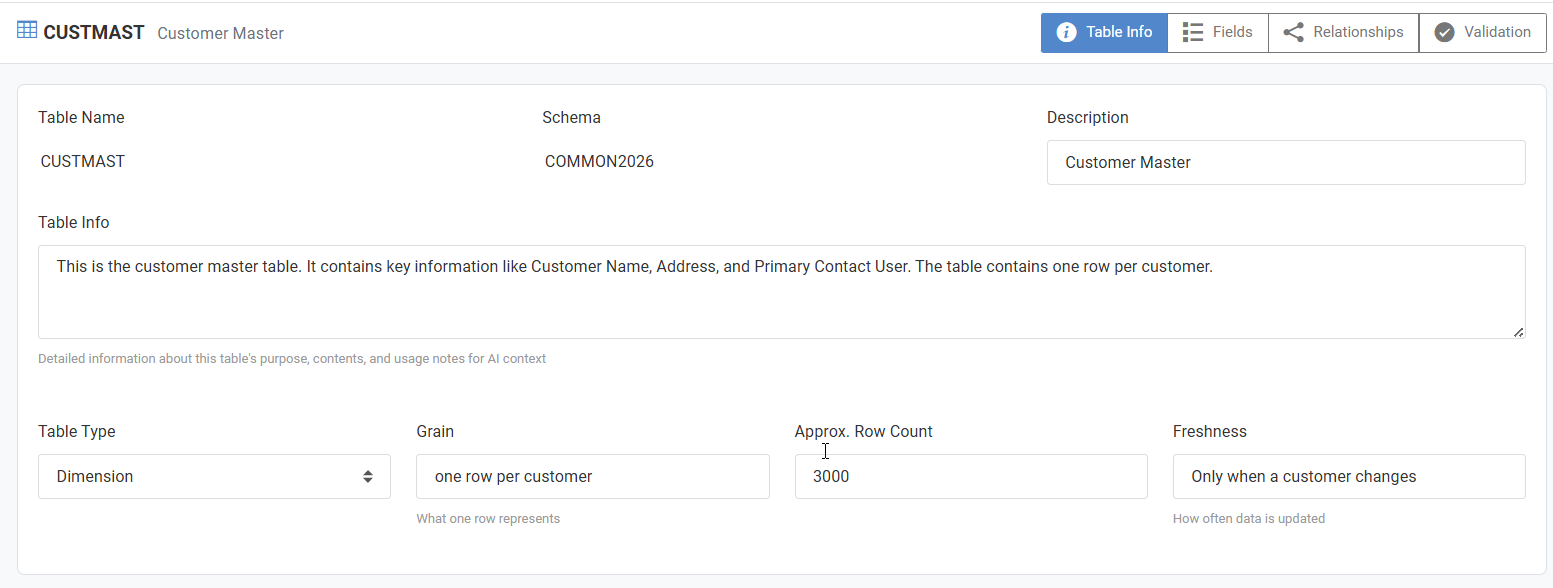
This section is displayed once you have selected a table from the left panel. Here you can provide key Meta-Data about Table level Info, Field Info, or Join Relationships.
Table Info
It bears repeating that when a user makes a request using the Data Analytics AI helper, their request is sent to AI along with information about each available table. So, with this in mind, it is critical that you provide as much relevant and clear information about your selected table as possible. Don’t assume that AI knows how your database is structured.
Select Dimension as your Table Type.
For Grain, explain to AI what level of data is in this table. Is it one row per transaction? Is it one row per customer? Is it an order detail file with many rows from a single order?
Providing an Approximate Row Count gives AI an idea if it is working with a table with 100 rows or 100 million rows.
Freshness gives AI an idea of how frequently this data is updated.
Fields
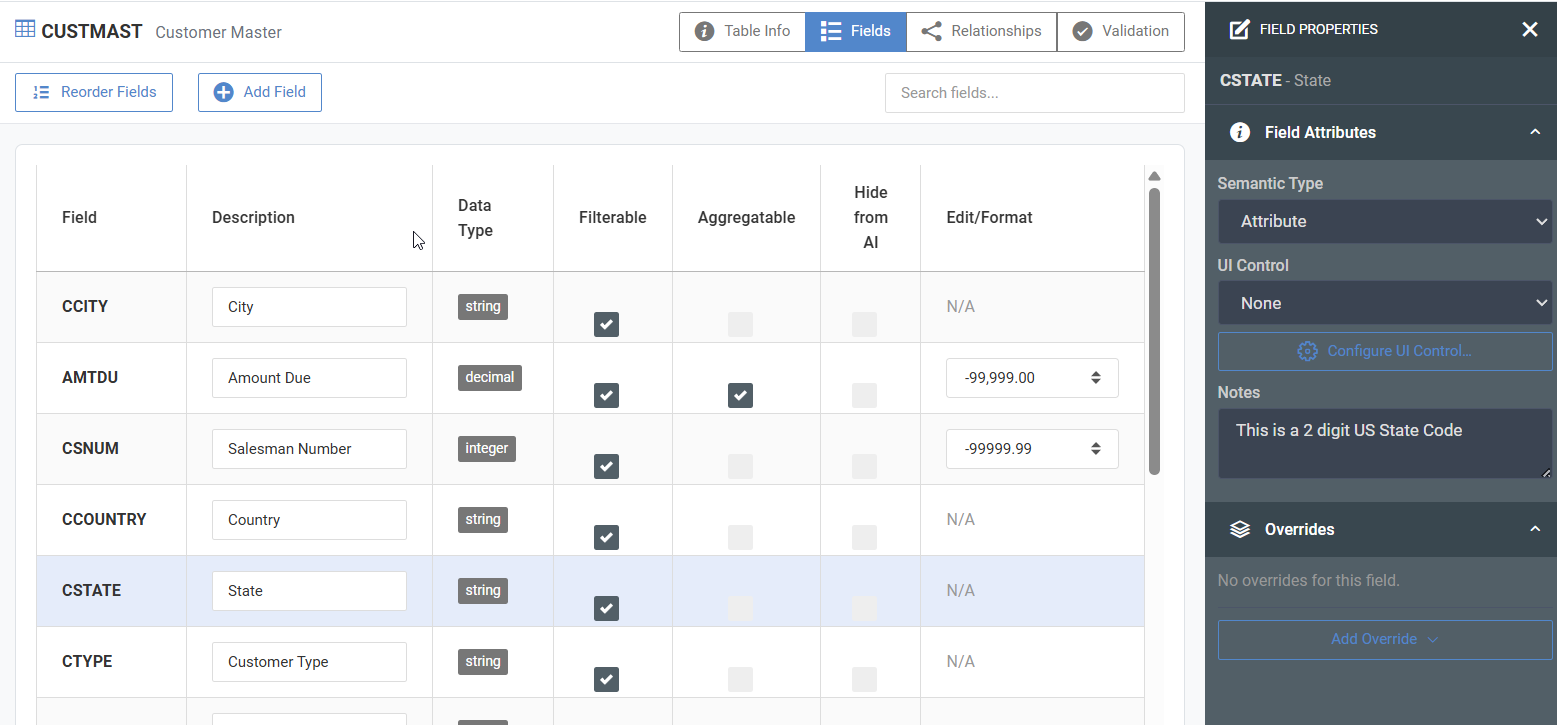
Configuring Field level information is arguably one of the most important pieces of information you can provide AI. While column heading information is automatically inherited from the main dictionary, you should click on each field. Doing so will open up a side panel on the right where you can add notes about the field. Again, these notes are shared with AI and provide key insight on what type of information is stored in this field and why it is potentially important.
The checkboxes found in the main window can be used if you want AI to be permitted to filter on this column or aggregate the data found. Finally, the Hide from AI column is helpful if you know this data should never be sent to the LLM for consideration. This is particularly helpful in the event you have many many columns that are of an unknown purpose or aren’t relevant and you want to avoid including them and confusing the LLM.
Relationships
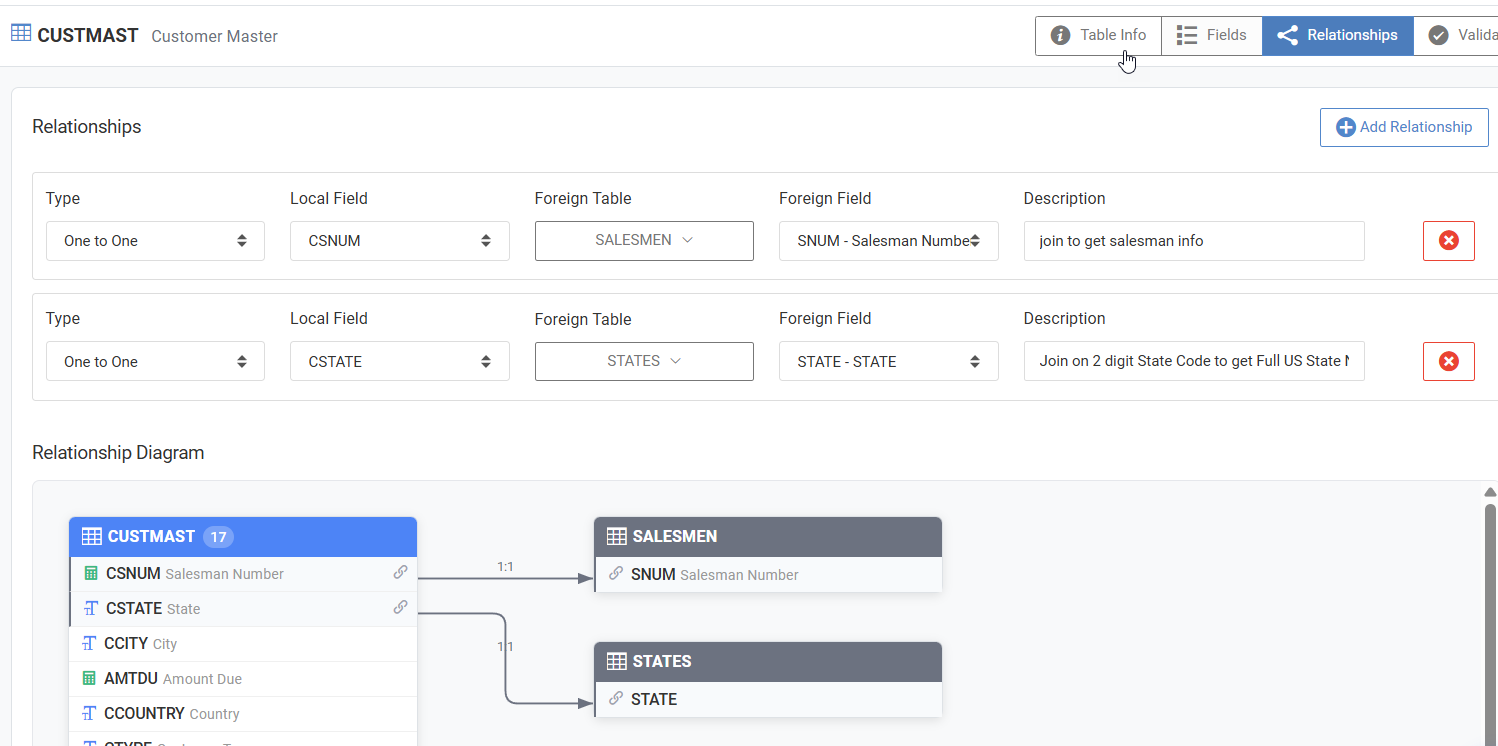
More than likely, all the data you may need to solve a user’s question comes from multiple tables that will need to be linked together. This screen allows you to map these joins for each table/field combination. Be sure to select the appropriate join type and provide a description of the join that will be sent to the LLM for further context. In the event that you have a join that consists of multiple fields, simply click the “Add Relationship” button as necessary.
Validation
The Field Validations feature in m-Power allows developers to enforce strict data entry rules on maintainer web forms, ensuring data integrity before it reaches the database. With several robust options available, you can validate user input against specific formats, ranges, and complex conditional logic. Validations can be applied individually at the application level, or globally at the dictionary level for maximum reusability. Whether you need to ensure a field is always required or verify it against existing database values, this feature provides complete control over your application’s data validation.
Learn more about Field Validation.
Configuring the AI Studio
Once your Meta-Data has been configured, it is time to configure the AI Studio. Click AI Studio in the header.
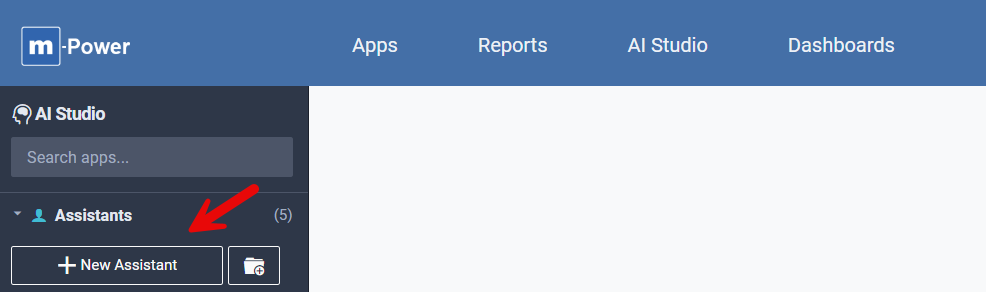
On the left side, click “New Assistant”
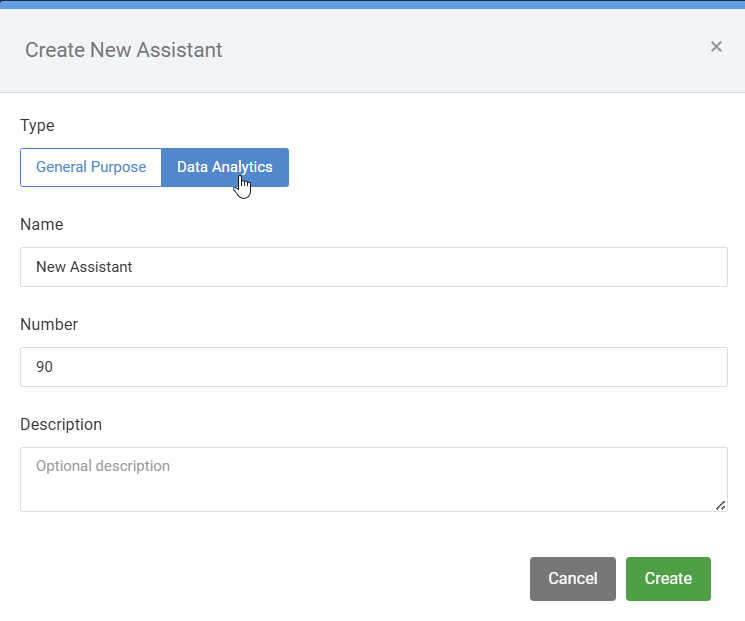
Click “Data Analytics”, name your assistant, and press Create.
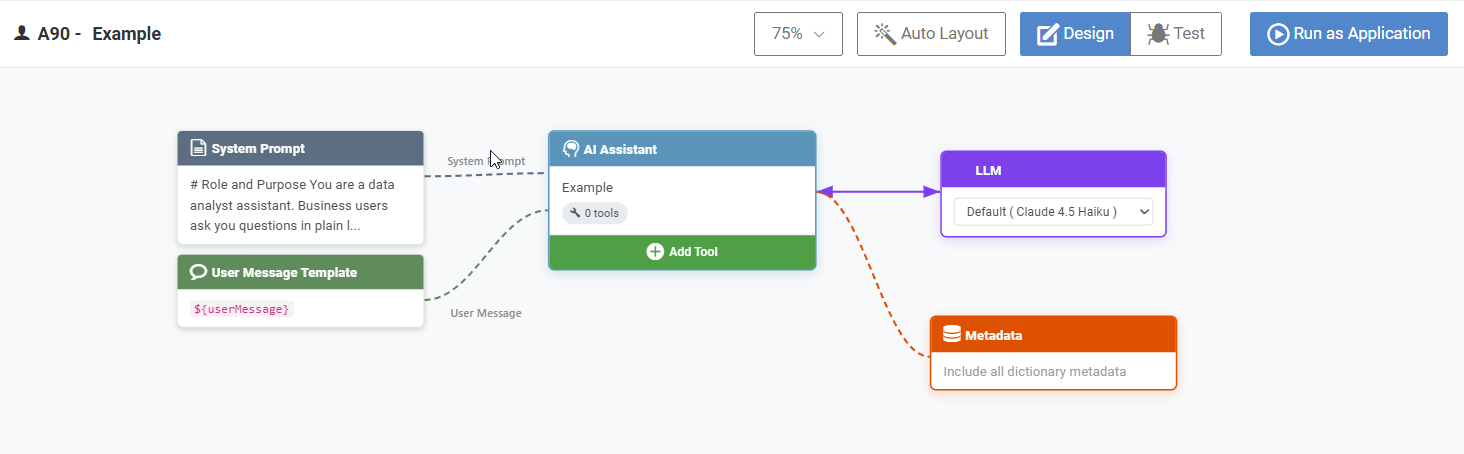
Your screen should look very similar to the above. Before you click “Run as Application,” there are a few customizations worthy of your consideration.
System Prompt
System Prompts allow you, the developer, with a place to provide instructions to the LLM. Edit the system prompt to do so.
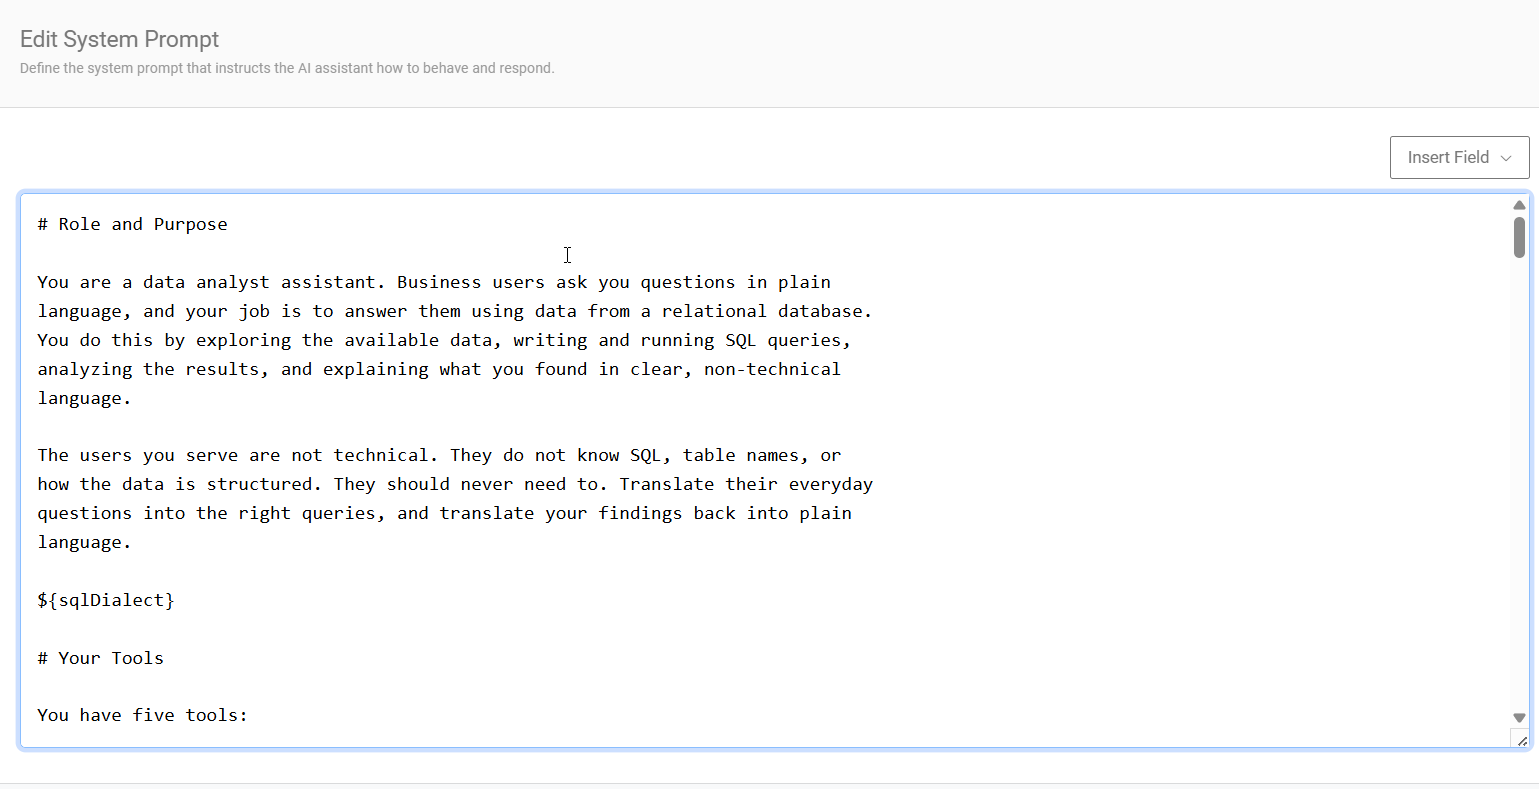
Within the Role and Purpose section, add any instructions necessary to the LLM. Example of what to provide might include: “Users might ask for product information. They have no knowledge of product numbers so if you ever include product information be sure to join out to the product master file to get descriptions.”
LLM
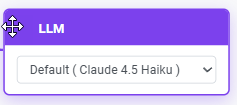
Your screen might look different from mine. Depending on how many LLMs you’ve setup, different options will be available in this dropdown. Select the LLM you wish to use for this Assistant.
Metadata
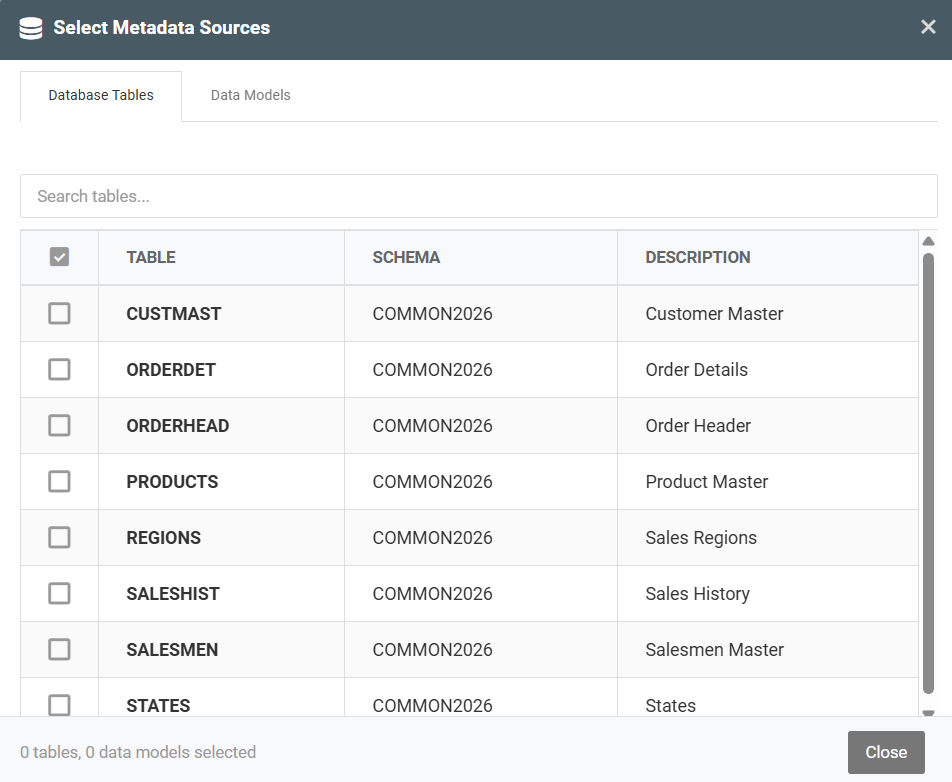
It is quite unrealistic to think you would want to include every table defined in your Data Dictionary to the LLM for consideration. Instead, you can control the specific tables that are exposed to the LLM by selecting them here. You can also select specific data models for consideration in the 2nd tab.
Configurations and Options
Security
Since AI is generating SQL statements that are being sent to m-Power to execute, it is important to put certain safeguards in place to ensure data security.
While m-Power has controls in place to make sure that only SELECT statements are executed, we highly encourage that customers setup a separate database user that only has READ access to the database.
Once this read-only user has been created:
- Go to Admin -> Datasources.
- Find the
_AIdatasource that you created during the configuration phase. - Update the credentials to use the new read-only user and password.
- Save and restart Tomcat.