How to create a customer portal in 11 minutes
Full Transcript of Video
In this video, I’ll show you how to build a secure customer portal from scratch in about 10 minutes.
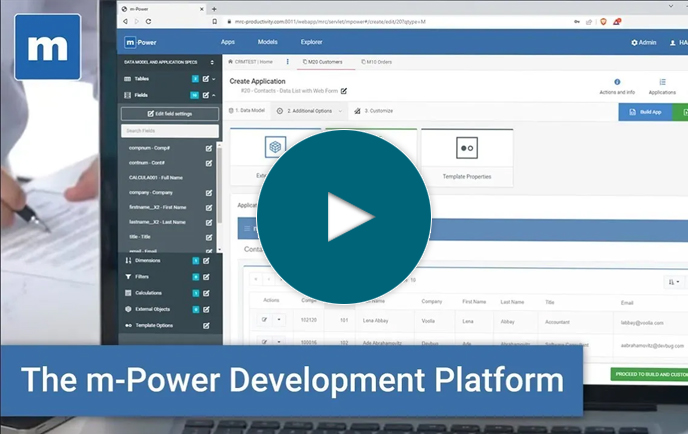
For the sake of this video, let’s suppose I work for a bicycle manufacturer. I have all of my customer order data in a database table. But, I want to give my customers a way to securely access their order history through a portal. To do this, I need to turn my data into a secure web application, add multi-tenant security, and put it all in a secure portal. I’ll be using our low-code development platform, m-Power, as it simplifies the process.
The first thing I want to show you is the users I have in here. After all, if you have a portal...you’re gonna have users that will be logging into this portal, and I just want to point out a couple of things.
They each have a user role and a row-level security value that equals their customer number. And we’re going to be using these a lot, and I’ll touch on more of what they do later.
And one more thing...I have my users right here in m-Power for this demo, but m-Power lets you validate users in many ways if you want: active directory, OAuth, single sign-on, and more. I just have my users in here for the sake of this demo.
Okay, let’s get started. I want to turn my order data into a web application. I’ll create a maintainer, which will let users view and manage their orders. To start the build process, I need to name my application and select a template. m-Power templates provide the layout and features for every application...but they’re also easily customizable, as I’ll show you later.
Now, I need to tell m-Power where my data is. It’s in this orders table, which contains data about all customer orders. I’ll select it and grab these fields here. Now, I also want to grab some fields from my customer table. With m-Power, it’s pretty easy. It handles all of the table joins for me. I just need to select my data--which in this case, I want to just add some basic data about my customers. That way, I can use it in my order application later on.
Now, I just need to tell m-Power how to sort my data, and I’m nearly done.
Before I build, I do need to go into the filters here, and this is where we’ll add our row-level security. I’m securing it on the customer number, which, if you remember from before, each user has a row-level security field attached to their customer number. And that means they can all access this one application, but only be able to see their data, which is way better than having to create separate applications for each customer.
Now I’ve jumped into the build step and just need to wait for m-Power to put everything together for me. And...I went through this build process pretty fast because this is a basic application and it’s not the point of this demo...which is to show you how to create a portal. I just need this app for my portal. Okay, so it’s done building now. Let’s check it out.
As you can see, there’s a lot of data here. And...I haven’t turned security on yet, so I am seeing data for all customers, but we’ll turn on security in a few minutes. So, I have all of my customer orders and my customer information over here. I can add new orders up here and even update or delete orders over here. And this is fine, but we can make it better. Let’s jump into m-Painter to touch this up a bit.
m-Painter is m-Power’s visual editor, and I can really customize this however I want in here. For starters, let’s remove these columns on the right and put this data elsewhere. I want to keep the table from getting too wide, and also, this data is pretty important, so I’d like to emphasize it a bit more. First, I want to change the title up here and also put the customer name up here in the title bar, which is as simple as getting that database field from the left.
Okay, now I want to update the layout here and add a couple of columns above my table. In those columns, I’ll just add a couple of stat widgets, and those are really easy to add with the nice component selector here. I’m adding these because I’d like to put some customer info up here. In this one, we’re going to have their credit limit, so I’ll grab that field over here...and over here in this one, we’ll put the amount they have due, so I’ll just grab that field as well. Then, it’s just a matter of changing the icons in here...I’ll grab this one for this widget...and let’s grab this one for the amount due...
Okay, now, let’s take a look at this button. It lets customers create new orders, so let me change the text. Next, I want to limit who can place orders in here. For instance, there might be a few different people from the same company that will have access to this page, okay. But, I only want those with a “manager” role to be able to add new orders. If someone doesn’t have that role, they shouldn’t see this button. And I’m setting that up now using conditional rendering, and just removing this button if the user role is an employee. And again, you can set any roles that you want. I just set them as manager and employee, but it’s up to you.
Alright, so that’s done. Now, we also have these dropdown buttons over here to edit or delete orders. I want to add a couple of conditions to this, so it will only appear if two things are true. First, they shouldn’t be able to edit or delete an order if it’s been shipped or delivered. So, I’ll make this button only appear if the status is set to processing. Okay...that’s the first thing. Then, I’ll do the same thing as the order button, where it won’t show up for those with a role of an employee. Okay, so I’m done with those buttons. Just a couple of things left.
First, I want to list the current logged-in user, so I’ll add a row up here and then add some text, something like, “Logged in as...” and then grab their username field. I also want this to be on the right side of the page, so I’ll add some quick styling in here to make it align on the right.
And one more thing to do...before the video, I created a similar application that shows the details for each order, and I’d like to let people drill into each order and view or edit the items in that order, so I’m adding a smartlink, which connects two applications and passes key data automatically. In this case, I’m passing the order number.
Okay, so we’re all set with this, so I’ll save it. Alright, so let’s test it out. I’m going to quickly turn on security, and if you remember, I have users with different roles in here, so we can log in as each one and test to make sure everything is working.
When I log in as a manager at Amboy, you see that I only see my company’s data, which means the row-level security is working, and I do have that button to place a new order, which means the conditional logic is working. I also see that the edit buttons are hidden for orders that have been shipped or delivered, which is great, and I can also drill into each of my orders and view more details about each one.
Okay, so that’s all working well. Now, let’s log out of here and then log back in as an employee of Amboy, just to make sure that the conditional logic is working there too. Great! As an employee, I still only see my company’s data, but now I do not have that order button, so that’s working well.
Now that we have an application to put in there, let’s set up the actual portal. And I’m going to create a few more applications for this portal, but I’ll do it in the background and skip ahead as that’s not really the point of this video...I’m mainly showing you how to set up a customer portal and the types of security options you have in there.
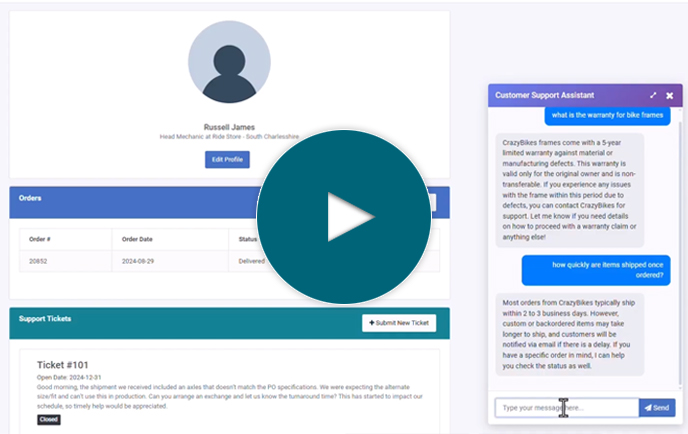
Okay, so I’ve created a few more applications for my portal. I have a support ticket app where customers can submit support tickets if they have questions or problems, and again, there’s row-level security in there so they can only see their tickets. I also have an application that lets each customer edit their information...and finally, I have a report where customers can see data about their orders.
Now, let’s put all of this in a secure portal. And the first thing I want to do is set up some groups for my portal. This will let me organize my applications by type, so I’ll have a group for orders, where I can put that orders app and the report. I’ll have a group for support, where I can put the support ticket application. And finally, I’ll have a group for admin, where I can put that application that lets customers edit their orders. Okay, so now that I have all my groups, I can add menu options to my portal.
And this is just a matter of choosing one of my applications in here. Let’s start with that orders app. Then, I’ll need to give it a short description, and we’ll call it orders. Then I need to give it a long description, and I’ll fill that in now. Then, I’ll add an icon in here, and I have a bunch to choose from, but I’ll grab this one. Then, I’ll put it in the Orders group that I just set up. And finally, I’ll need to select a role, and this option will be available to all users.
Okay, now I’ll do the same thing for the rest of my menu options, but I’ll do it in the background so this doesn’t get too repetitive.
Alright, I have my menu options set up. Just one thing to note...the application that lets customers edit their information is only available to managers...okay, so those with an employee role won’t be able to see it.
Okay, let’s check it out. If I log in as a manager, you’ll see that I have access to everything. It’s broken up into tabs for easy organization, and you can really add as many tabs as you like. If I were to click into one of these, I can get right back to this menu by clicking the home button up here.
Let’s log out and then log in as an employee. Now, I still see the menu options, but I don’t see that application that’s restricted to the manager role.
Of course, there’s a lot more I can do here. I can add more applications, customize the look and feel, and much more. For the sake of time though, I won’t get into all of that in this video. If you’d like to learn more about creating secure portals for your business, visit us at mrc-productivity.com. Thanks for watching!
Learn how m-Power can help you
Sign up for a free trial
More Videos
Sort videos by category using the options below
